How To Fix Notification Delay on iPhone - Late Notifications Fix
Introduction
Facing issues with delayed notifications on your iPhone? Wondering why that important email alert came in late or why your favorite social media app didn't ping you immediately when your friend tagged you? This could be due to several factors including unreliable network connection, certain iPhone settings, or restrictions set on your device. Our comprehensive guide will walk you through various steps to rectify this, ensuring your notifications come in real-time. From enabling 'Background App Refresh' for your apps, checking your VPN settings, verifying your network connection's stability, to adjusting your 'Low Power Mode' and 'Notification' settings. Additionally, we'll dive into iPhone's 'Focus Modes' and 'Screen Time' settings that could potentially impact your notification delivery. Let's get started to ensure your iPhone is always in sync and you never miss an important notification again.
Activating Background App Refresh
The first step to resolving delayed notifications on your iPhone is to check your "Background App Refresh" settings. Navigate to your settings app and then to the "General" section. Here, you'll find "Background App Refresh." Ensure that it's toggled ON for the apps that you want to receive timely notifications from.
Be aware that if this option is turned OFF, your apps will only update when your device is connected to a WiFi network, which could contribute to notification delays.
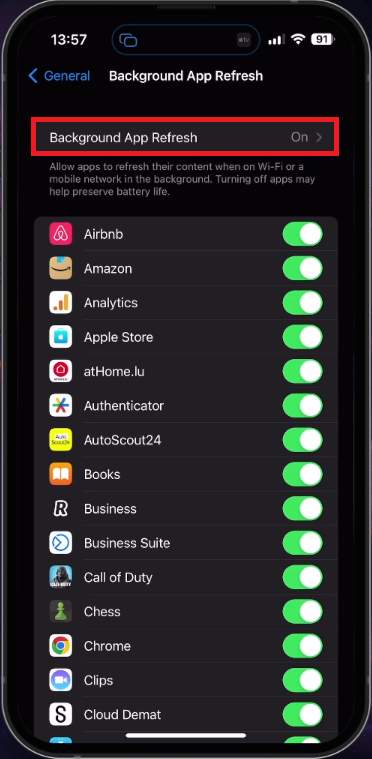
iPhone General Settings > Background App Refresh
Checking VPN Settings
Once you've taken care of the app refresh settings, it's time to examine your VPN connection. Head back to the general settings and scroll down to “VPN & Device Management”. Here, you might need to disable your VPN connection temporarily. This can help identify if your VPN is the culprit behind your notification delay.
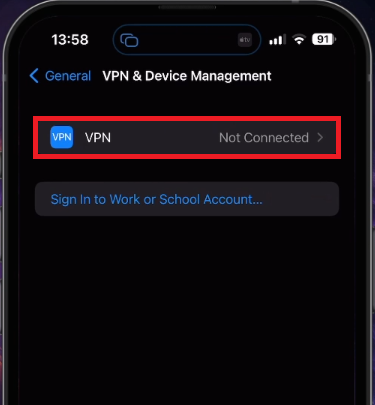
iPhone Settings > General > VPN & Device Management
Evaluating Network Connection
A reliable network connection is crucial for timely notifications. Test the stability of your network connection by browsing the web or using an application such as Speedtest, which provides an estimate of your upload and download speed to the nearest server.
If your connection is less than ideal, you may need to adjust your network settings or even reset them in your iPhone's general settings to solve the issue of delayed notifications.
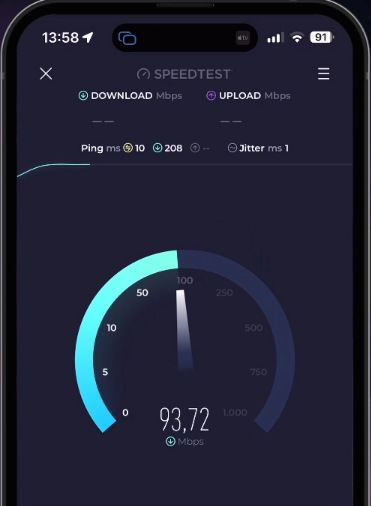
Test iPhone Network Connection Speed
Optimizing Notifications: Turn Off Low Power Mode
In order to ensure a seamless experience on your iOS device, you must use a stable connection. After verifying this, enable the "Background App Refresh" setting. It allows your apps to update content in the background during Wi-Fi or cellular connections, meaning you can always stay up-to-date with your favorite applications.
Then, navigate back to your iOS device settings, specifically the "Battery" section. Here, you'll find the "Low Power Mode" option. Ensure this setting is turned off. Low Power Mode, while efficient for preserving battery life, can interfere with the timely delivery of notifications. For instance, you might experience delayed alerts or automatic downloads, including essential files or emails, might not happen instantly. By disabling this, you'll get to enjoy an uninterrupted flow of notifications, giving you real-time updates about what's happening on your device.
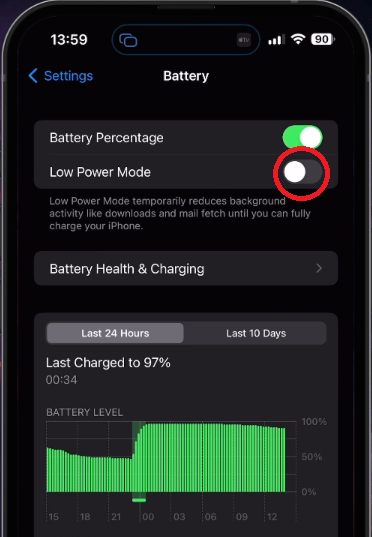
iPhone Settings > Battery > Low Power Mode
Customizing App Notifications
After managing the Low Power Mode, head back to your main settings. From here, scroll upwards to find the "Notifications" option. This feature provides you with the flexibility to modify the general visibility of your notifications, like their display on the lock screen.
Beyond this, you can choose specific apps from which you want to receive notifications. For example, you might want to enable notifications from popular communication apps such as "Discord". Upon selecting an app, simply toggle the "Allow Notifications" option to ON, and select the type of alerts you want to receive.
Remember, you have the liberty to apply these changes individually to each app. That way, you can prioritize alerts based on the apps you use most frequently, creating a more personalized notification experience.
In conclusion, these steps will help optimize your iOS device for an efficient, customized notification experience, allowing you to stay connected and updated at all times.
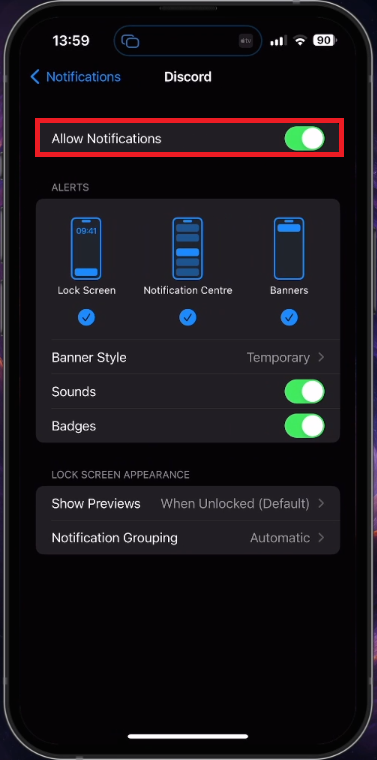
iPhone Settings > Notifications > APP
Managing Focus Modes for Optimized Notifications
Sometimes, your iOS device might not display notifications because of the "Focus Modes" feature. The purpose of Focus Modes is to minimize distractions by silencing certain notifications. However, if you wish to receive all alerts, it's important to check your device's focus modes.
Access your Control Center, then locate and toggle the "Focus" option to OFF. By doing this, you'll deactivate any active focus mode, allowing all notifications to show up on your device.
Alternatively, you might want to keep a Focus Mode enabled, such as "Do Not Disturb", but still allow notifications from certain apps. In this case, navigate to the "Focus" settings, select "Do Not Disturb", or your chosen Focus Mode, and choose the apps you wish to receive notifications from. This way, you can maintain your desired level of focus without missing out on important alerts.
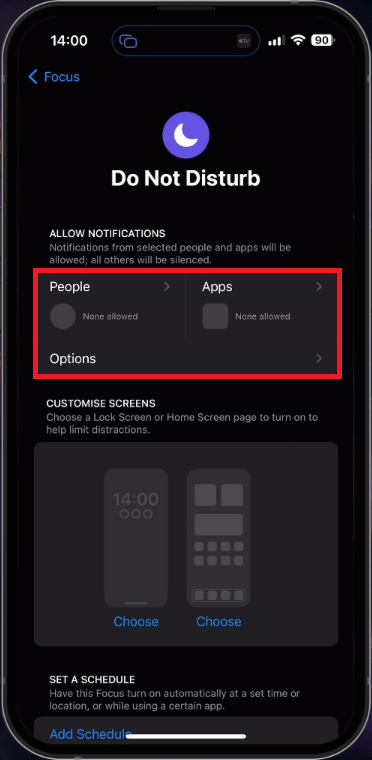
iPhone Settings > Focus > Do Not Disturb
Adjusting Communication Restrictions
Lastly, it's crucial to check for any potential content and communication restrictions that might obstruct your notifications.
To do this, go back to your main settings and proceed to the "Screen Time" section. Under "Communication Limits", ensure that you've enabled communication with everyone. Also, verify that no app limits are in place for the applications from which you want to receive notifications.
By disabling such restrictions, you'll ensure a smooth flow of notifications, keeping you constantly updated with your preferred apps' activities. Remember, managing these settings effectively will contribute to an optimal and customized user experience on your iOS device.
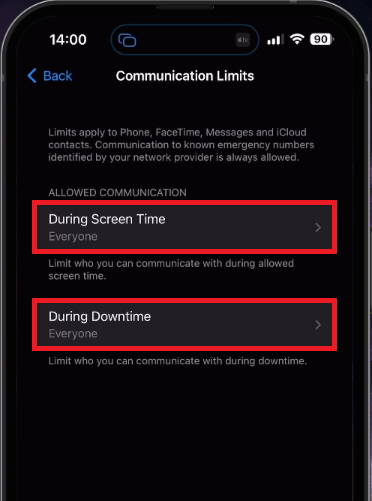
iPhone Settings > Screen Time > Communication Limits
-
A number of factors might cause notification delays, such as an unreliable network connection, certain iPhone settings, or enabled content and communication restrictions.
-
The 'Background App Refresh' setting allows apps to update content in the background. If this is disabled, apps will only update when your device is connected to a Wi-Fi network, which might delay notifications.
-
Yes, a VPN connection could potentially delay notifications. Temporarily disabling your VPN can help identify if this is the issue.
-
When 'Low Power Mode' is enabled, notifications can be delayed, and automatic downloads like emails might not happen instantly.
-
'Focus Modes' on your iPhone allow you to minimize distractions by silencing certain notifications. If you're not receiving notifications, check if a Focus Mode like 'Do Not Disturb' is enabled.