How To Make Your Facebook Account Private - Tutorial
Introduction
In today's digital age, safeguarding your online privacy is more crucial than ever. As a space where your personal and professional lives often intertwine, Facebook stands at the forefront of this privacy quest. Whether to fend off prying eyes or to carve out a personal sanctuary online, customizing your privacy settings is a wise step. In this concise tutorial, we walk you through the seamless process of fortifying your Facebook account, making it a private haven where you share moments only with those you choose. From adjusting profile visibility to managing story settings, we cover it all. Let's delve right in, ensuring that your Facebook experience is both enjoyable and secure.
Enhancing Your Facebook Privacy: A Step-by-Step Guide
In a world where online privacy is paramount, taking control of your Facebook account's visibility is essential. Whether using a mobile device or a desktop, this guide will help you configure your settings adeptly, although note that the layout and setting arrangement might vary slightly.
Step 1: Accessing Your Account
Start by visiting Facebook.com and logging in to your account. Locate your profile icon situated in the upper right corner of your screen and click on it to unveil a comprehensive drop-down menu.
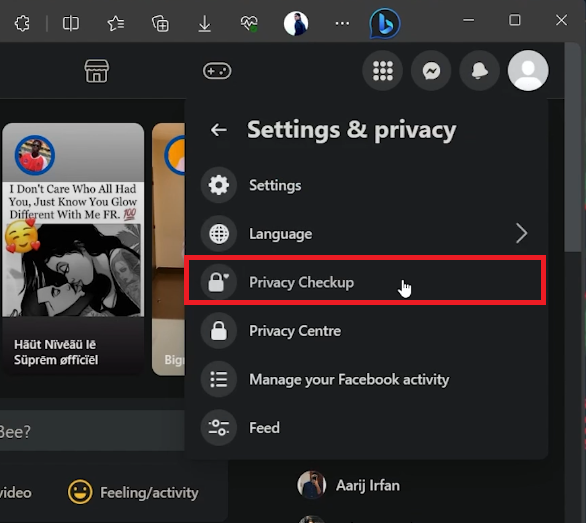
Facebook Settings & Privacy
Step 2: Navigating to Privacy Checkup
Next, opt for the “Privacy and Settings” option followed by selecting “Privacy Checkup”. This will lead you to a critical section where you can extensively manage who has the privilege to view your shared content. Click on the “Who can see what you share” option to proceed.
Step 3: Tailoring Your Profile Visibility
In the subsequent pop-up window, press 'Continue'. You will be redirected to the “Profile Information” window where you are advised to set all available options to “Only Me” to ensure maximum privacy. Once done, click 'Next' to solidify your settings, thus taking a step forward in creating a more private and secure Facebook experience.
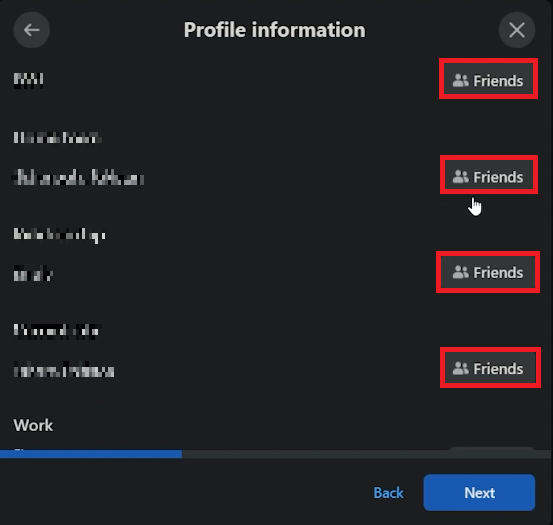
Facebook Privacy Checkup > Profile Information
Step 4: Customizing Your Sharing Preferences
To further bolster your online privacy on Facebook, navigate to the "Posts and Stories" section where you can decisively control the visibility of your content. Here are a few steps to consider:
Future Posts: Set the accessibility of your upcoming posts to “Only Me”, ensuring that your new content remains visible to you alone.
Stories Preferences: Tailor your stories' visibility by either limiting them to a select group of friends or barring specific individuals from viewing them. For instance, you might want to share your vacation stories only with close family members, or prevent your coworkers from viewing your weekend adventures.
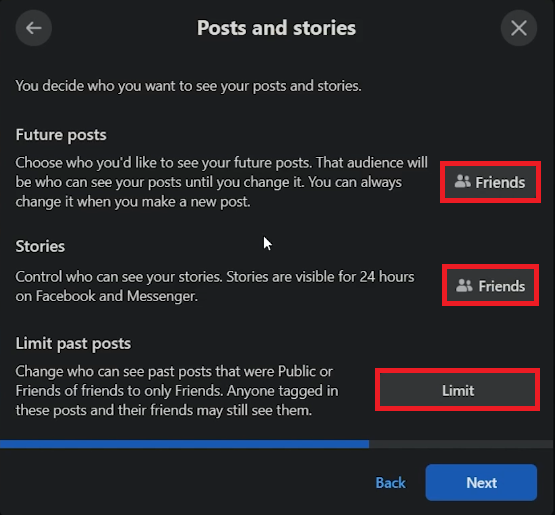
Facebook Privacy Checkup > Posts and Stories
Step 5: Implementing Blocks
Lastly, safeguard your profile by utilizing the options available on the 'Blocking' page. Here, you can restrict access to individuals you'd prefer to keep at bay. For your peace of mind, Facebook maintains your privacy by not notifying the individuals who have been blocked. This feature serves as a robust tool in maintaining a secure and private Facebook experience.
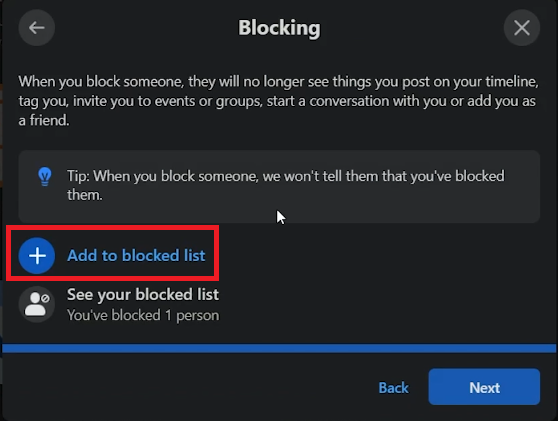
Facebook Privacy Checkup > Blocking
-
Setting your posts to "Only Me" means that any content you publish will only be visible to you. This is an excellent feature if you want to maintain a high level of privacy on your Facebook profile.
-
Absolutely! Facebook allows you to customize your stories' audience. You can either select specific friends who can view your stories or block certain individuals from accessing them, thus personalizing your story sharing experience.
-
No, Facebook does not notify users when they have been blocked. This feature helps in maintaining a peaceful and private user experience by preventing potential confrontations.
-
Within the "Posts and Stories" section, you have the option to restrict the visibility of your past posts, making them accessible only to certain groups or individuals, hence helping in tightening your account's privacy settings.
-
The Privacy Checkup tool can be found by clicking on your profile icon at the upper right corner of the screen, selecting "Privacy and Settings", followed by "Privacy Checkup". This tool guides you in setting up optimal privacy settings for your account.