How To Scan Documents on iPhone (iOS 17) Tutorial
Introduction
Discover the convenience of scanning documents directly on your iPhone with the latest iOS 17 update! This user-friendly guide will walk you through the simple process, eliminating the need for any extra apps. Learn how to use your iPhone's built-in capabilities to quickly scan, adjust, and store important documents, making your digital life more organized and accessible. Perfect for those on the go, this tutorial is a must-read for anyone looking to make the most of their iPhone's document scanning features.
Effortless Document Scanning with iOS 17
Navigating to the Files App
The iOS 17 update brings a more intuitive document scanning feature to your iPhone, integrated directly into the system, removing the need for external apps.
Opening the Files App: Locate and open the 'Files' app on your iPhone. This application serves as the central hub for all your documents and files.
Exploring Your Files: Once in the app, tap the 'Browse' button at the lower right corner. This action opens up the area where you can view and manage your folders and files.
Accessing the Scan Documents Feature
Locating the Scan Option: In the Files app, look for three dots at the upper right corner of your screen. Tapping here reveals a dropdown menu.
Starting the Scanning Process: Within this menu, you'll find the 'Scan Documents' option. Selecting this prepares your iPhone to scan a new document.
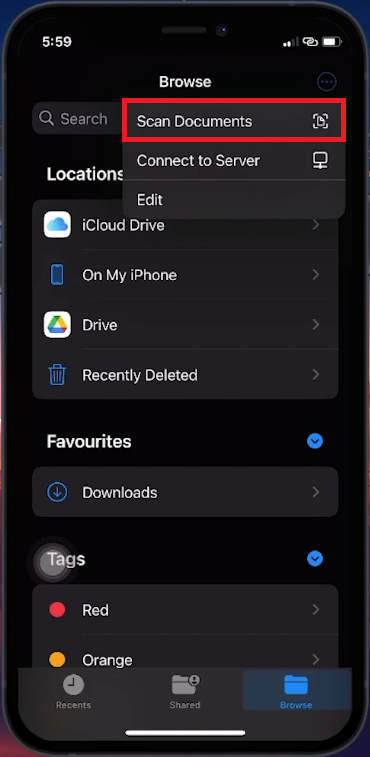
Files App > Scan Documents
How to Scan a Document Using Your iPhone
Activating the Camera for Scanning
After selecting 'Scan Documents' in the Files app, your iPhone's camera becomes a powerful scanning tool.
Steps for a Perfect Scan
Positioning the iPhone: Hold your iPhone above the document you wish to scan. It's crucial to ensure that the entire document is within the camera's frame.
Ensuring Proper Lighting: Make sure the document is well-lit. Good lighting is key to a clear, readable scan. Natural light or a brightly lit room can greatly enhance the quality of your scan.
Automatic Capture: The iPhone's camera is designed to automatically detect and capture the document when it is properly aligned. This feature is perfect for quick scans without the need to adjust settings.
Switching to Manual Mode: If you prefer more control or need to fine-tune the document's positioning, manual mode is available. This option is useful when dealing with larger documents or those that require precise alignment.
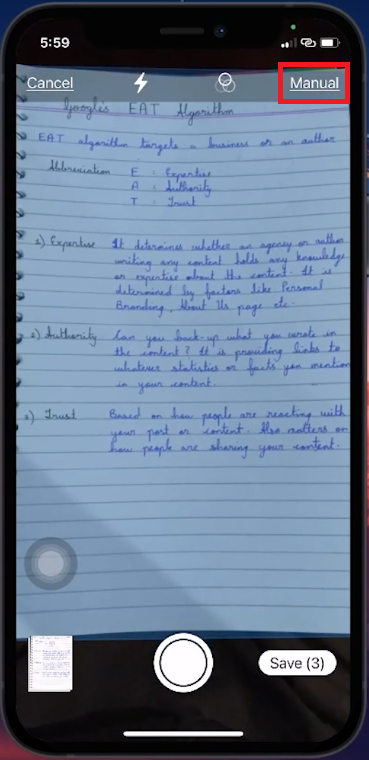
Scan document
Perfecting Your Scanned Document on iPhone
Reviewing and Editing the Scanned Document
After scanning, it's important to ensure the document looks exactly how you want it.
Accessing the Scanned Image: Once the document is scanned, an image icon will pop up in the lower-left corner of your screen. Tap this icon to view your scanned document.
Making Adjustments: If any part of the document isn't captured correctly, use the crop tool. This tool lets you drag the corners of the scan to perfectly align with the edges of your document.
Enhancing Visibility: You have the option to apply filters for better readability or rotate the document as needed. These features help in improving the clarity and orientation of the document.
Saving Your Scan: Once you're satisfied, tap 'Done'. Then, press 'Save', and choose a location in the Files app to store your document. You can also rename the document for easier identification later.
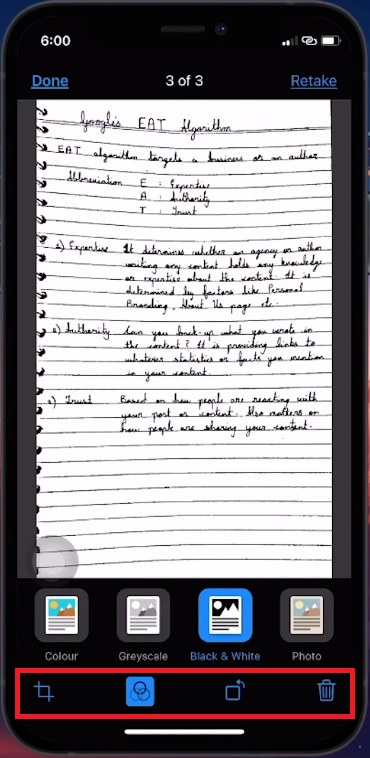
Edit your scan
Locating and Using Your Scanned Document
After saving, your document is easy to find and ready for use.
Finding Your Document: Go to the folder in the Files app where you saved your scan.
Sharing and Editing: From here, you can share the document through email, messaging apps like WhatsApp, or use the iPhone's markup tool to add notes, signatures, or other annotations.
By following these steps, scanning and managing documents on your iPhone becomes a breeze, making digital organization and sharing simpler than ever.
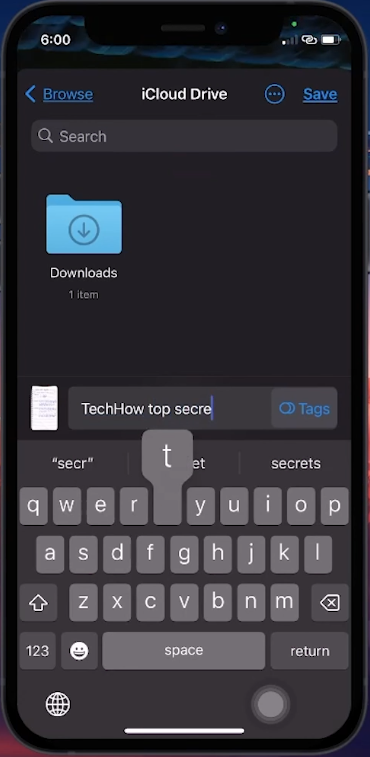
Rename and save your scanned document
-
Yes, with iOS 17, you can continuously scan multiple pages, and the Files app will automatically compile them into a single PDF.
-
No, scanning documents with your iPhone does not require an internet connection. It's an offline feature available anytime.
-
Scanned documents are typically saved as PDFs, but you have the option to save them as images if preferred.
-
While you can't directly edit text within the scanned document, you can use markup tools to annotate or add notes to the scan.
-
Scanned documents are stored securely within the Files app and are protected by the same security measures as other data on your iPhone.