

How To Disable Windows Copilot in Windows 11 - Tutorial
Introduction
Struggling with the intrusive Windows Copilot on your Windows 11 system? Fear not! Our straightforward tutorial guides you through the steps to either remove or completely disable this feature. Perfect for those seeking a more streamlined user experience or simply looking to declutter their taskbar, our guide is designed to provide clarity and simplicity in managing Windows Copilot. Dive into our easy-to-follow instructions and take control of your Windows 11 settings today!
Simplifying Your Taskbar: Removing Windows Copilot
Decluttering Your Workspace
Removing the Windows Copilot from your taskbar is a straightforward process that helps streamline your workspace. This is especially useful for those who prefer a cleaner taskbar or do not actively use the Copilot feature.
Step-by-Step Guide to Remove Windows Copilot
Accessing Settings: Begin by clicking on the Start Menu. Here, type “Settings” and press Enter to launch the Settings window.
Navigating to Personalization: Within the Settings window, select the "Personalization" option, then proceed to "Taskbar".
Disabling Copilot: In the "Taskbar" section, locate “Taskbar items”. You will find a switch to toggle off Windows Copilot. Simply turn this switch off.
Once you've completed these steps, the Windows Copilot icon will vanish from your taskbar. This action is perfect for users who aim to keep their taskbar uncluttered or those who find the Copilot feature unnecessary for their daily tasks.

Windows Settings > Personalization > Taskbar
Fully Disabling Windows Copilot
Achieving a Streamlined Windows 11 Experience
For those who wish to not only remove but completely disable Windows Copilot, the Group Policy Editor offers a permanent solution. This is ideal for users who prefer a more traditional Windows experience without the assistance of Windows Copilot.
Detailed Steps to Disable Windows Copilot
Opening Group Policy Editor: Start by pressing the Start Menu. Type “gpedit.msc” and hit Enter to open the Group Policy Editor.
Navigating the Editor: In the Group Policy Editor, follow this path: Click on "User Configuration", then expand "Administrative Templates", and next, "Windows Components".
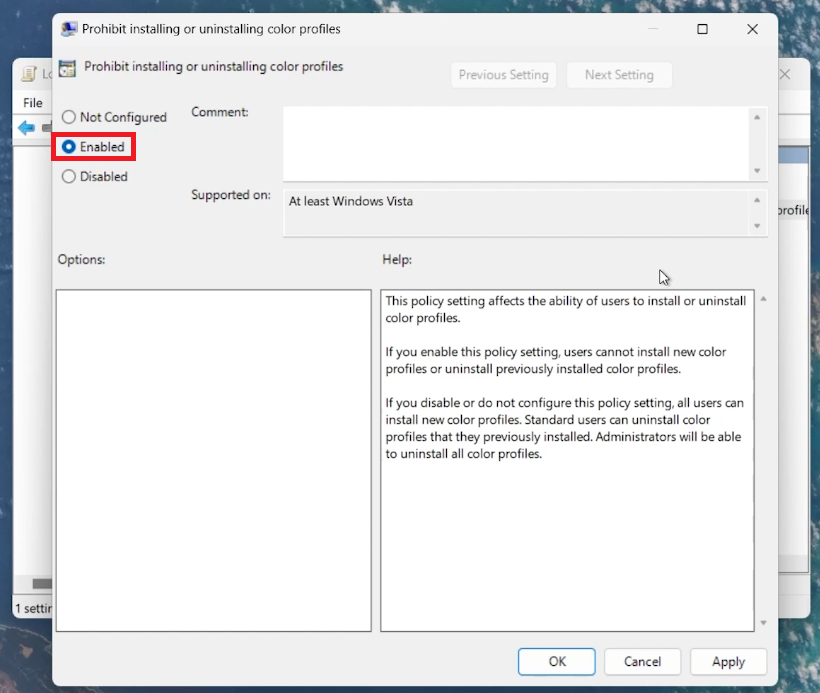
Set the default settings to “Enabled”
Locating Windows Copilot Settings: Scroll down to find “Windows Co-pilot”. Select it, and then double-click on “Window Co-pilot Settings”.
Configuring the Settings: You will see the default setting as “Not Configured”. To disable Windows Copilot, change this setting to “Enabled”. It may seem odd, but selecting “Enabled” actually turns off the Copilot functionality.
Applying the Changes: Click on 'Apply', and then 'OK' to save your changes.
By following these instructions, you can effectively remove Windows Copilot from your system. This process caters to users seeking a more simplified and customized Windows 11 environment, free from automated assistance.

Windows Copilot Policy Setting Change
-
Yes, you can simply remove the Copilot icon from your taskbar for a less cluttered look without permanently disabling the feature.
-
Disabling Copilot will not impact other functionalities of Windows 11. It is designed to be an independent feature that can be turned off as needed.
-
Absolutely. If you change your mind, you can easily re-enable Windows Copilot by reversing the steps used to disable it.
-
Disabling Copilot using the Group Policy Editor may require administrative privileges, as it involves altering system settings.
-
Windows Copilot is an integrated feature in Windows 11 designed to assist users by providing answers and actions for queries within the operating system, like adjusting settings or opening apps.


