Windows 11 - How To Adjust Screen Resolution & Size

Windows 11 is the latest operating system from Microsoft that comes with an array of new features and upgrades. Adjusting the screen resolution and size is one of the most important aspects of using any computer. This can significantly affect how comfortable you are while using your device and enhance your overall experience. In this article, we will discuss how to adjust screen resolution and size on Windows 11, including tips and tricks to optimize your display for maximum clarity and ease of use. So, whether you're a seasoned Windows user or a beginner, keep reading to learn everything you need about adjusting your screen resolution and size on Windows 11.
Windows Display Settings
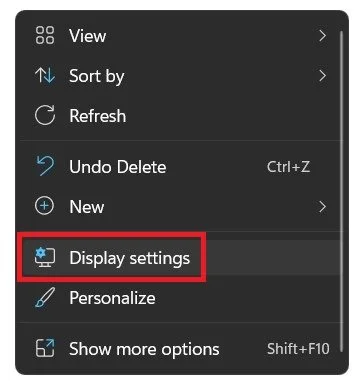
Right-click your desktop and select Display Settings. This will open up your Windows display settings.
Under Scale & layout, you can adjust your scale, changing the size of text, apps, and other items. You can set up a custom scaling value when selecting the Scale option. Below, you can change your text size if you prefer to leave the scale at 100% and only increase the text size.
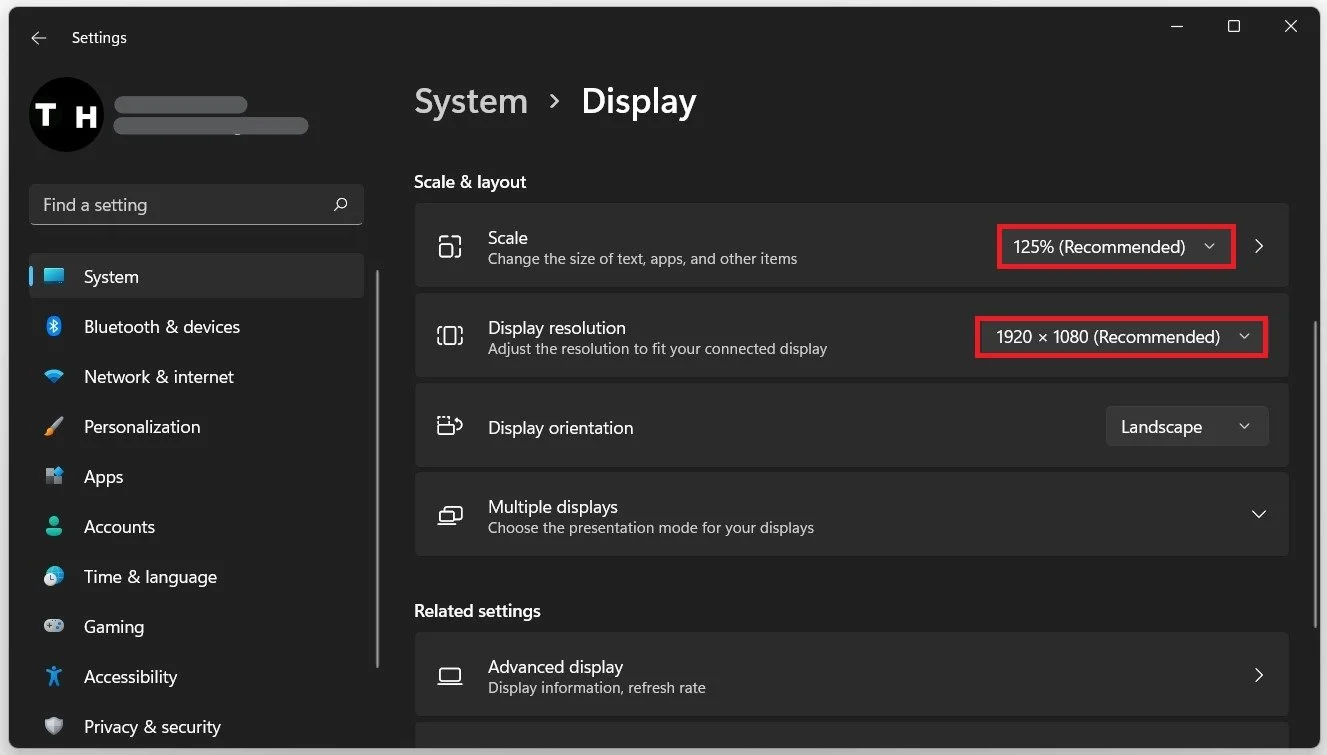
Windows Settings > System > Display
Windows Advanced Display Settings
Under Advanced display, you can also change your refresh rate. If your refresh rate is not displayed here, connect to your PC with the correct cable.
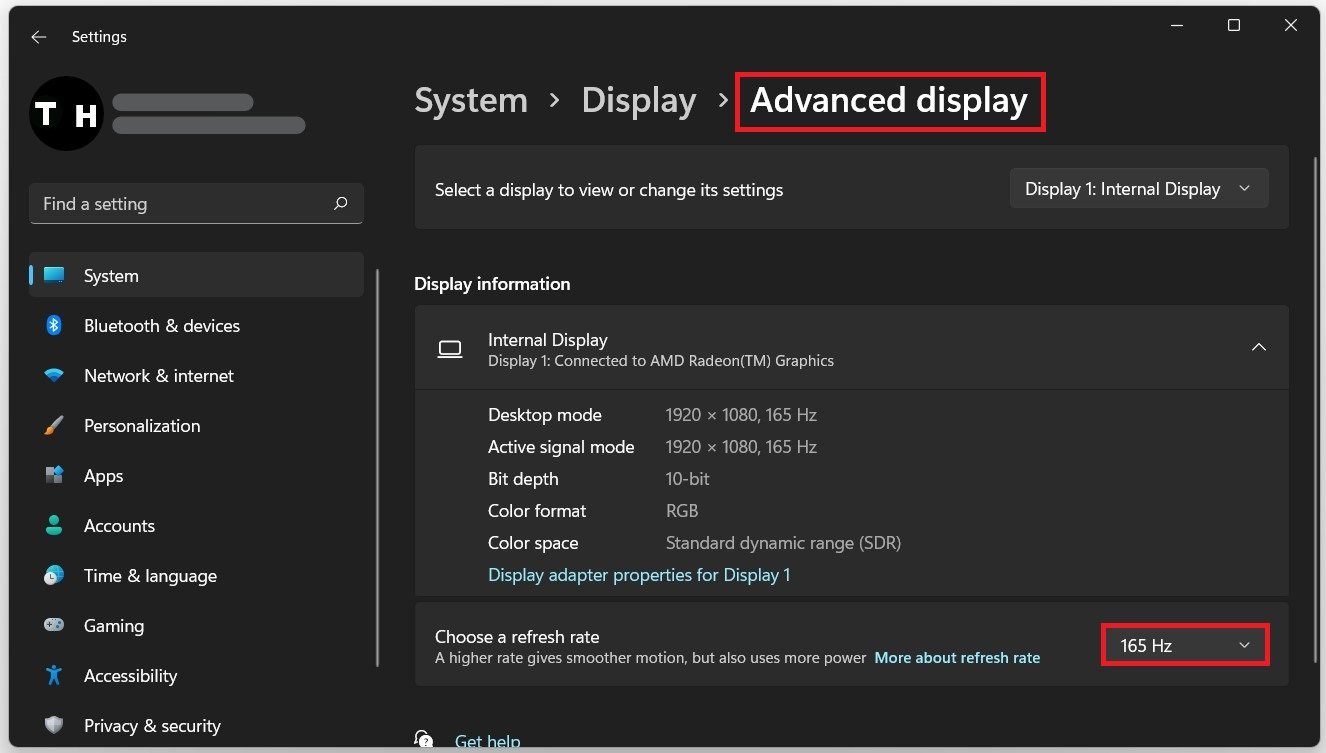
Windows Settings > System > Display > Advanced Display
Adjust your Display Resolution
Navigate back to your Display Settings, and here you can adjust your display resolution. In most cases, you will want to use the recommended display resolution, but sometimes, it makes sense to change it. Below you also have the option to change your Display orientation.
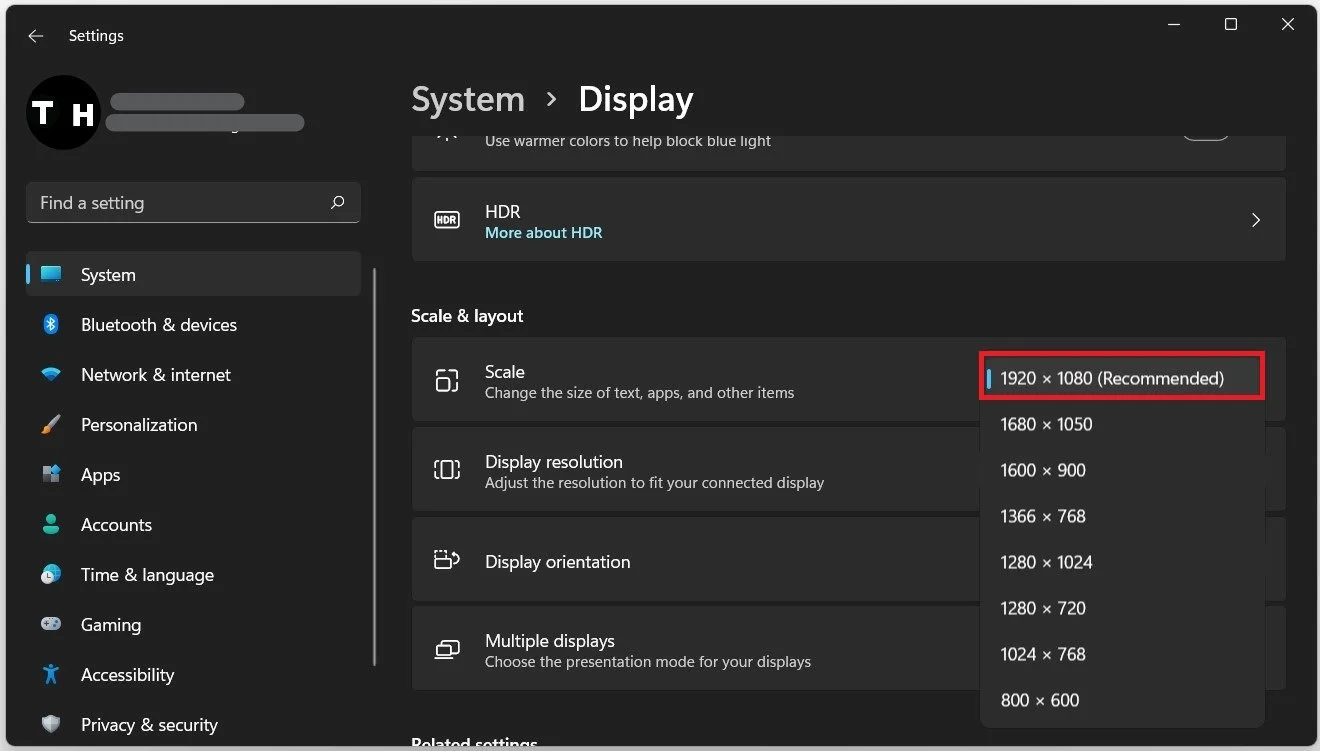
Windows Settings > System > Display > Scale