Windows 11 - How To Fix WIFI Option Not Showing Up In Settings

With the release of Windows 11, many users have reported issues with their WiFi connectivity. One of the most common problems is the WiFi option not showing up in the settings menu, which can be frustrating and prevent you from accessing the internet wirelessly. However, there are several solutions to this problem that you can try without the need for technical expertise. This article will provide step-by-step instructions and effective methods to fix the WiFi option not appearing in Windows 11 settings. Whether you're using a desktop or a laptop, these tips will help you troubleshoot and resolve any WiFi issues.
Adjust your Windows Internet Properties
Type Internet Properties in your taskbar search and hit enter. In your Control Panel Internet Settings, navigate to the Advanced tab and select Restore advanced settings. This will restore your network settings and should enable you to connect to your network connection properly. Don’t forget to apply your changes.
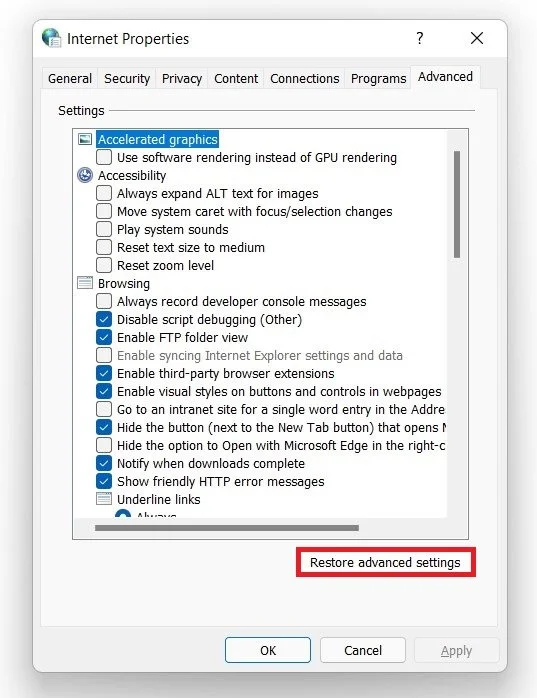
Windows Internet Properties > Restore Advanced Settings
Search for Network status and hit enter. Select Change adapter options. You should make sure that your network adapter is enabled. In case it’s disabled, restart your PC after enabling it.
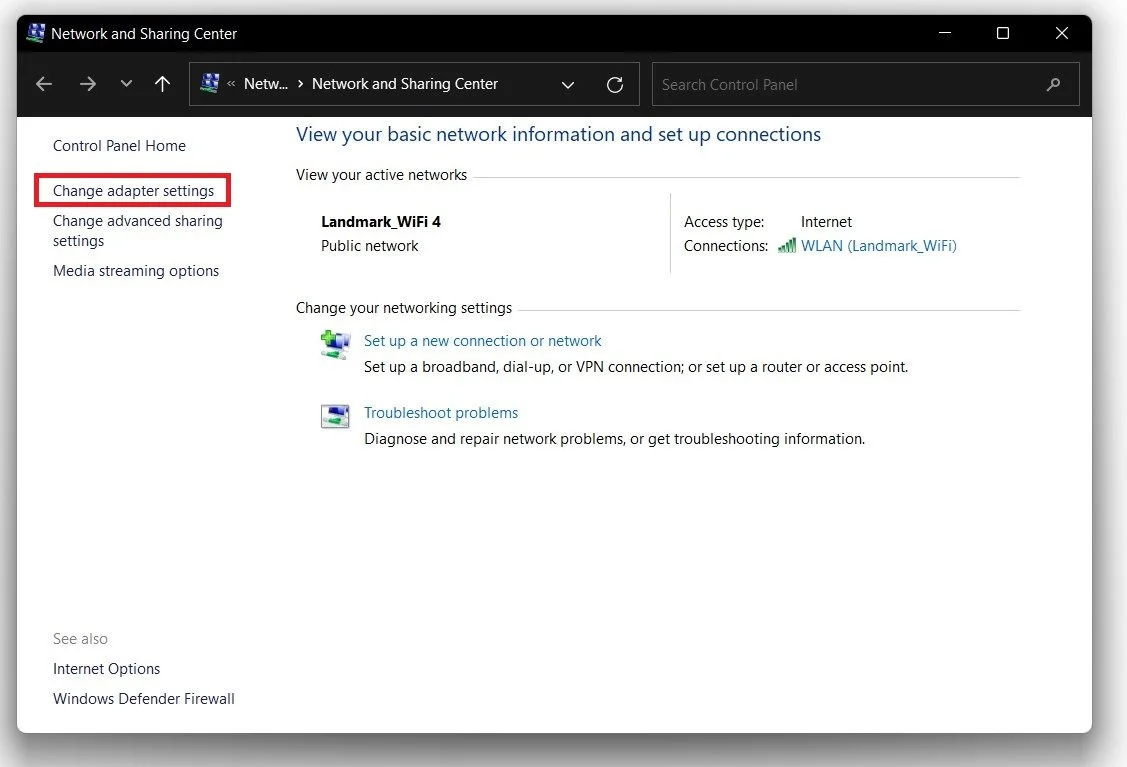
Network and Sharing Center > Change Adapter Settings
Update your Network Adapter Driver
Ensure your network adapter driver is up to date. Search for Device Manager in your taskbar search. On the window, expand Network Adapters, double-click the network adapter you fail to connect to. In the Driver tab, select Update Driver, and then Search automatically for updated driver software.
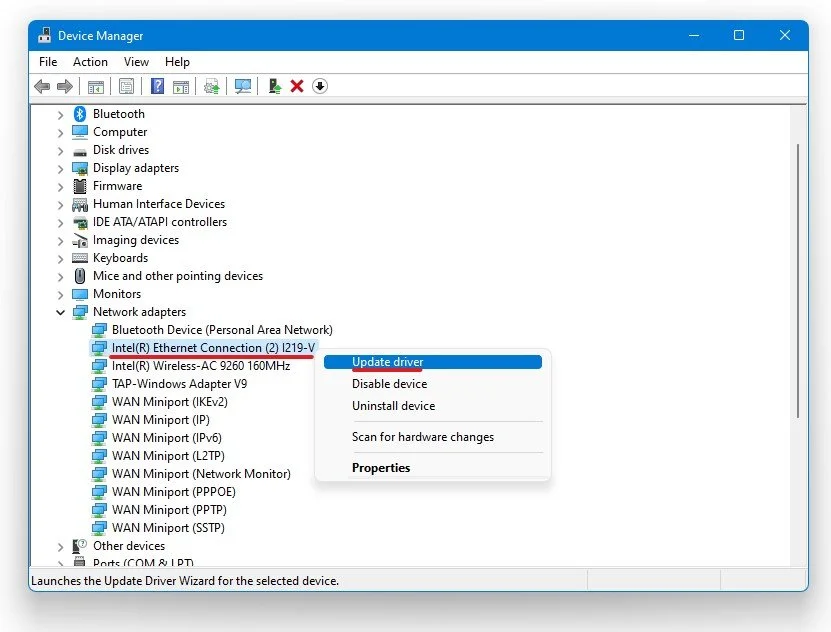
Device Manager > Network Adapters > Update Driver
Windows Command Prompt
If it’s still not working, search for CMD and hit enter to open up your command prompt. Use the following commands:
Netsh winsock reset
This command will reset your network adapter. Next, use the command:
Netsh int ip reset resetlog.txt
You can exit your command prompt, and your network should be visible to your OS.

Command Prompt
Change the WiFi Hardware Properties
Search for Network in your start menu search to open up your Wifi Settings. The WiFi should be enabled. Under Hardware Properties, ensure that the IP Assignment option is set to Automatic and your DNS server assignment option.

Windows Settings > Network & Internet > Wi-Fi > Hardware Properties