

How To Add Clock Widget to Desktop on Windows 11
Introduction
Looking to add a functional and stylish touch to your Windows 11 desktop? This tutorial will guide you through the simple steps of adding a clock widget, a perfect blend of utility and personalization for your computer's workspace. We'll use the lightweight and user-friendly 'Widget Launcher' app from the Microsoft Store, offering various clock styles and customization options to suit your style and needs
Installing Widget Launcher for Clock Widgets on Windows 11
Adding a clock widget to your Windows 11 desktop is made simple with the Widget Launcher app. Here's how to install it:
Step-by-Step Installation Guide
Open the Microsoft Store:
Click on the Start Menu.
Search for 'Microsoft Store' and open it.
Find Widget Launcher:
In the Microsoft Store, use the search bar at the top.
Type in 'Widget Launcher' and press Enter.
Download and Install the App:
From the search results, select 'Widget Launcher'.
Click on 'Get' or 'Install' to download and install the app on your computer.
With Widget Launcher installed, you are all set to customize your desktop with a variety of clock widgets, enhancing both the functionality and aesthetic of your Windows 11 workspace.
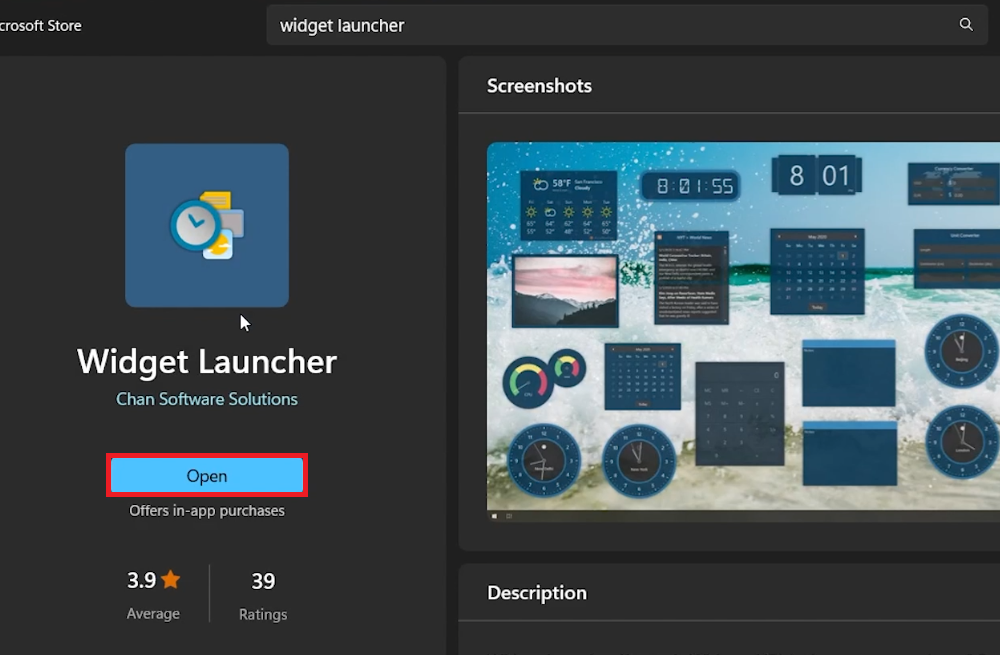
Install Widget Launcher via the Microsoft Store
Selecting and Customizing a Clock Widget in Widget Launcher
After installing Widget Launcher on your Windows 11 PC, it's time to pick and personalize your clock widget. Here’s how you can do it:
Choosing Your Clock Widget Style
Open Widget Launcher:
Find 'Widget Launcher' in your Start Menu and open it.
Select a Clock Style:
Widget Launcher offers three clock styles:
Digital Clock: For a modern, digital display.
Square Clock: A classic, analog-style clock.
World Clock: Ideal for tracking different time zones, perfect for those working internationally or with global teams.

Select the clock style and settings
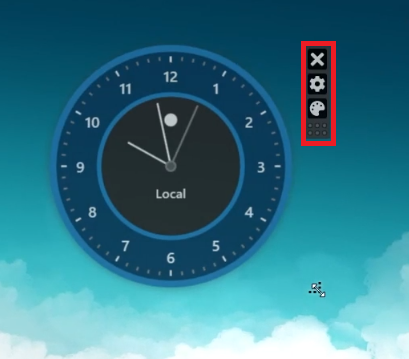
Personalizing Your Clock Widget
Customize Widget Appearance:
In Widget Launcher, you can adjust various aspects to match your desktop's theme or your personal style:
Theme: Choose a general style for your widget.
Background and Accent Colors: Select colors that complement your desktop.
Border and Font Color: Further fine-tune the widget's appearance.
Transparency Value: Adjust how transparent the widget appears on your desktop.
Positioning and Sizing the Widget
Launch and Adjust Your Widget:
Once you’re satisfied with the settings, click 'Launch Widget'.
Your chosen clock widget will appear on your desktop.
Move and Resize: You can drag the widget to your preferred spot and resize it for prominence or subtlety.
By following these steps, you can effortlessly add a functional and aesthetically pleasing clock widget to your Windows 11 desktop, enhancing both its utility and visual appeal.
Adjust clock widget size and position on screen
-
Widget Launcher is a free app available on the Microsoft Store that allows you to add various widgets, including different styles of clock widgets, to your Windows 11 desktop.
-
Yes, Widget Launcher offers customization options like theme, background color, accent, border, font color, and transparency value, allowing you to personalize the clock widget to your liking.
-
There are three styles: Digital Clock, Square Clock, and World Clock, each with its unique design. You can choose one that best suits your desktop's theme or personal preference.
-
Yes, once you've launched the clock widget on your desktop using Widget Launcher, you can easily move it around and resize it to fit your needs.
-
Yes, the World Clock widget is designed to show different time zones, making it a handy tool for those working with international teams or across various regions.


