How To Allow Messenger To Access Photos - Guide
Introduction
Enable seamless sharing on Messenger by granting access to your photos and videos. This guide will help you adjust your mobile device's privacy settings for a smooth sharing experience on Messenger.
How to Adjust Messenger's Access to Photos and Videos
Step 1: Open Device Settings
Navigate to Settings: Launch the 'Settings' app on your smartphone or tablet.
Step 2: Access Privacy Settings
Find Privacy and Security: Scroll to locate the 'Privacy and Security' option.
Step 3: Manage Photo Access
Select 'Photos': Tap on 'Photos' to view and modify app permissions.
Step 4: Adjust Messenger Permissions
Locate Messenger: Find 'Messenger' in the list of applications.
Set Access Level: Change the setting from 'None' to your preferred access level.
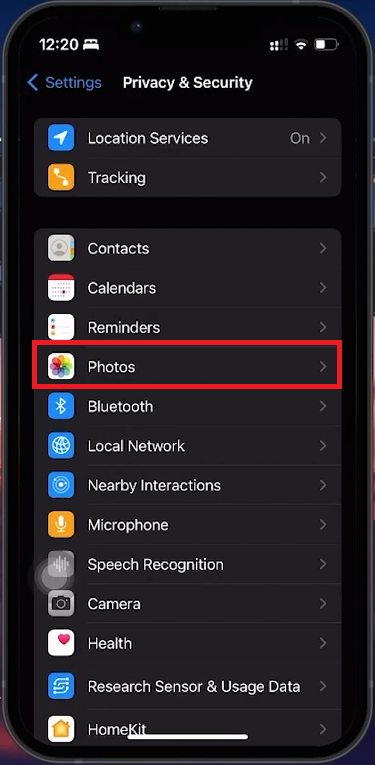
iPhone Settings > Privacy & Security > Photos
Configuring Photo Sharing Permissions in Messenger
Opting for Full or Limited Access
Full Access: Grants Messenger access to your entire camera roll. Ideal for frequent sharing without needing to set permissions each time.
Limited Access: Restricts Messenger to selected photos, offering more privacy control by choosing specific images or videos to share.
Making the Right Choice
Ease of Sharing vs. Privacy: Choose 'Full Access' for convenience or 'Limited Access' for greater privacy control.

Allow Limited or Full Access
By following these steps, you can easily manage photo sharing on Messenger, enhancing your interaction and ensuring a hassle-free sharing experience.
-
Open the 'Settings' app on your device, navigate to 'Privacy and Security' > 'Photos', then find and adjust Messenger's settings to 'Full Access' or 'Limited Access’.
-
'Full Access' allows Messenger to use your entire camera roll, while 'Limited Access' lets you select specific photos for Messenger to access.
-
Yes, you can change photo access settings anytime by revisiting the 'Photos' section under 'Privacy and Security' in your device's settings.
-
Yes, with 'Limited Access', you'll need to manually select which photos Messenger can access, offering more privacy but requiring extra steps to share.
-
Changing permissions does not affect photos already shared. It only applies to future shares and how Messenger accesses your photos moving forward.