Overwatch - How To Fix Network Lag, High Ping & Packet Loss
Are you tired of experiencing network lag, high ping, and packet loss while playing Overwatch? These issues can seriously impact your gameplay experience, causing frustration and even making it difficult to compete effectively. But fear not - there are steps you can take to fix these issues and get back to dominating the battlefield.
This guide will explore some of the most effective strategies for fixing network lag, high ping, and packet loss in Overwatch. From adjusting your network settings to optimizing your gameplay configuration, we'll cover everything you need to know to minimize lag and ensure a smooth, responsive gaming experience.
Whether you're a seasoned Overwatch veteran or just starting out, these tips and tricks will help you optimize your network and achieve the best possible performance. So, let's get started and fix those network issues once and for all!
Adjust the Overwatch In-game Settings
Run Overwatch and navigate to your settings. In the Video tab, enable the Display Performance Stats. You can extend this option, and enable a few indicators to help you determine where your game-related issues are coming from. Enable the Network Latency and Network Interpolation Delay.
Under Gameplay, enable the Network Quality Setting and disable the Limit Client and server send rate.
Overwatch > Settings > Gameplay
Verify the Overwatch Server Status
If you're experiencing high server-side latency while playing Overwatch, the issue may not be with your system, but rather with the server you're connected to. To verify that the servers are working properly, you can visit a site like DownDetector to check the Overwatch server status.
To do this, simply open up your web browser and navigate to https://downdetector.com/status/overwatch/. This page will provide you with real-time updates on the status of Overwatch servers, including any reported outages, connectivity issues, or other problems.
By checking the Overwatch server status before you start playing, you can ensure that you're connecting to a stable, reliable server and minimize the risk of lag or other connectivity issues. So, next time you're experiencing server-side latency in Overwatch, be sure to verify the server status and get back to dominating the battlefield!
Overwatch Server Status and Reported Problems
Verify the Integrity of the Overwatch Game Files
To ensure that your Overwatch game files are complete and up-to-date, it's important to periodically verify their integrity. This can help prevent issues like crashes, freezes, or other performance problems while playing.
To do this, simply open your Blizzard launcher and select "Options" for Overwatch. From there, select "Scan And Repair" to initiate the verification process. This will automatically scan your game files and download any missing or corrupted files, ensuring that your game is in top condition.
While this process may take a few minutes to complete, it's an important step in optimizing your Overwatch performance and ensuring a smooth, seamless gaming experience. By regularly verifying the integrity of your game files, you can catch and fix any issues before they become a major problem. So, make sure to scan and repair your Overwatch game files regularly and stay ahead of the game!
Battle.net > Overwatch > Settings > Scan and Repair
Disable VPN Connection
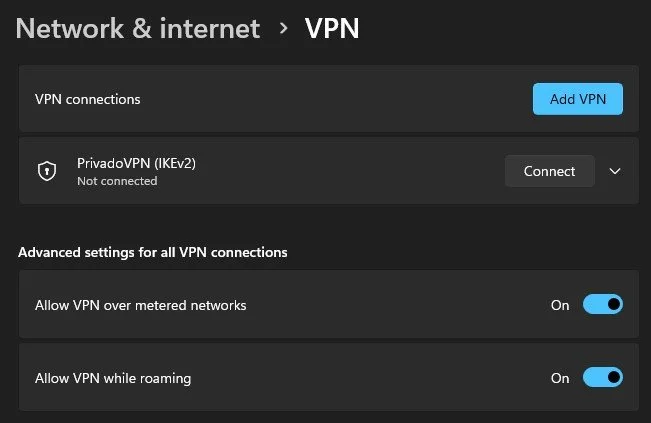
Since the game has many simultaneous players on the same server. You can also fix server problems by trying to change the server region in the game. This will help you depending on where you are trying to connect from. You should also make sure that you are not using a VPN service as this will cause latency and packet loss when you try to play Roblox. If the servers don't seem to be affected, the problem could be on your end.
Windows Settings > Network & Internet > VPN
Test and Improve your Internet Connection
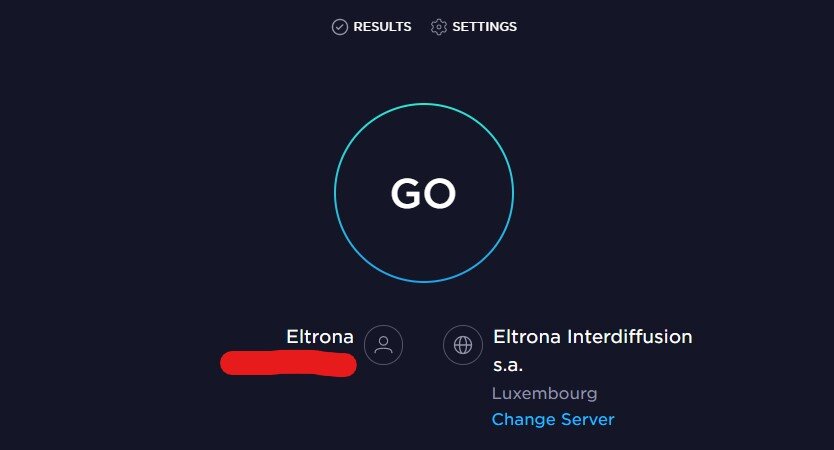
If you're experiencing network-related issues while playing Overwatch, it's important to diagnose whether the issue is with your connection or the server you're trying to connect to. One of the best ways to do this is by using a speed test service, which can help you preview the approximate up- and download speed of your connection, as well as the latency to their server.
To test your connection, you can visit websites like www.speedtest.net and make sure that your latency (ping) is averaging below 100 ms. High latency can induce packet loss to the server, leading to lag and rubber-banding while in-game.
To improve your network connection, consider using an ethernet cable to connect to your PC for the best possible performance. If you're forced to use a wireless connection, make sure to restart your router (or modem) if you haven't done so in a while and reduce the number of devices connected to the same network. By optimizing your network connection, you can ensure a smooth, responsive gameplay experience and take your Overwatch performance to the next level.
Test your network connection to the closest server
End Network-Intensive Processes
If you're experiencing network lag while playing Overwatch, it's possible that some network-intensive processes running in the background may be consuming too much of your available bandwidth. To fix this issue, it's important to identify and end any unnecessary network processes using your system's Resource Monitor.
To access your Resource Monitor, simply right-click your taskbar and select "Task Manager." From there, click on the "Performance" tab and select "Open Resource Monitor." In the new Resource Monitor window, navigate to the "Network" tab and open the "Processes with network activity" section.
After a few seconds, you'll be able to see every process using your network connection on your system. This could include your browser running in the background, a download, or other programs consuming your bandwidth. To minimize lag in Overwatch, consider ending any unnecessary processes, but be sure to only end those you know won't break your operating system. You can also preview your network utilization in percent to better understand which processes are consuming the most bandwidth.
By ending network-intensive processes and optimizing your system's network usage, you can minimize lag and ensure a smooth, responsive gameplay experience in Overwatch. So, next time you're experiencing network issues while playing, be sure to check your Resource Monitor and get back in the game!
Resource Monitor > Network > Processes with Network Activity
Windows Command Prompt
Open up your command prompt by searching for CMD in your taskbar search. The next two commands will help you test and improve your latency and packet loss if your connection is inducing any lag.
ping google.com
This command will simply check your latency and packet loss to Google’s servers. You can also ping another server, but the ping google.com command has become somewhat of a benchmark in the recent years.
ipconfig /flushdns
This command will reset your network connection by flushing its DNS resolver cache. This command will help improve your latency issues.
Change DNS Server Addresses
Network-related issues can be caused by your DNS server address connection. In this step, we will change it, as it should help a lot of users with network problems. Use the shortcut Windows Key + R, and in the dialogue box enter Control and hit enter.
This will open up your control center. From there, navigate to Network & Internet, Network & Sharing Center, and here select your connection.
Navigate to Properties and lastly, double-click the Internet Protocol Version 4 as you can preview on the screenshot below. Select to Use the following DNS server addresses option, and as your preferred DNS server, use : 8.8.8.8 and as you alternate DNS server, use: 8.8.4.4. These are the official public DNS server addresses from Google, which are safe to use.
Remove Malware & Other Applications
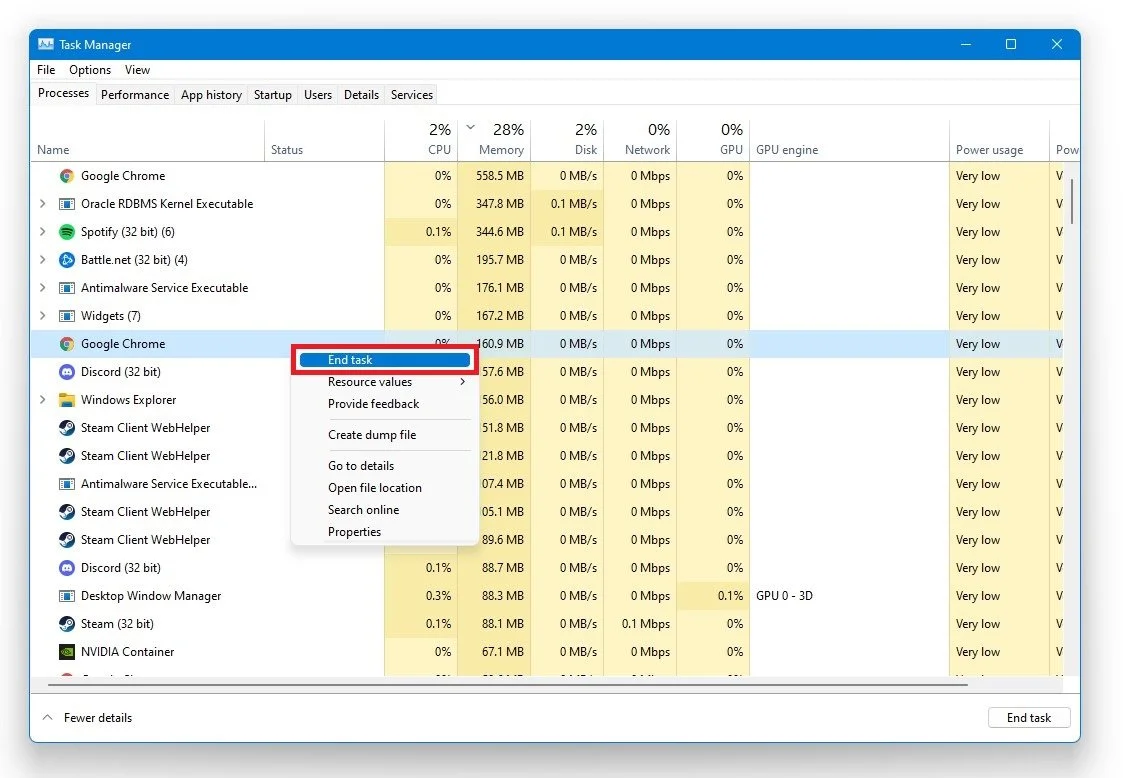
We suggest removing malware and preventing applications from running that could use up your available resources or change your game files.
Task Manager > Processes > End Task
Delete Temporary Files
If you're experiencing issues with loading maps or downloading content in Overwatch, it may be due to cluttered temporary files on your hard drive. To fix this issue, it's important to periodically delete these files and clear up some space on your hard drive.
To do this, simply search for %temp% in your taskbar search to open up your temporary files folder. You can safely delete everything in the folder, but keep in mind that some files may still be in use by other programs, so it's best to leave those alone. By regularly deleting your temporary files, you can reduce clutter on your hard drive and ensure that Overwatch is running at optimal performance.
In addition to improving Overwatch performance, regularly deleting temporary files can also help improve overall system performance and speed. So, don't let cluttered files slow you down - take a few minutes to delete your temporary files and get back to the game!
Search for %temp% in your start menu search to access the temporary files folder


