How To Play Whiteout Survival on your PC & Mac
Introduction
Embark on an adrenaline-pumping adventure as you dive into the world of Whiteout Survival, a thrilling game that keeps you on the edge of your seat. But why limit yourself to playing on mobile devices when you can experience the full potential of the game on your PC or Mac? In this comprehensive guide, we'll walk you through the process of bringing Whiteout Survival to your computer, allowing you to enjoy a more immersive experience with enhanced graphics and controls. Whether you're a seasoned player or a newcomer to the game, our step-by-step instructions will help you optimize your gaming experience, ensuring you're ready to conquer the frozen landscape like never before. So, let's get started on your journey to play Whiteout Survival on your PC or Mac!
Download & Install BlueStacks
To enjoy Whiteout Survival on your computer, you'll need an Android emulator like BlueStacks. Widely recognized for its exceptional performance, BlueStacks is specifically designed to optimize mobile gaming on PCs. The download and installation process is straightforward and quick – simply follow the on-screen instructions provided by the setup wizard. With BlueStacks installed, you'll be all set to experience Whiteout Survival in a whole new way on your PC or Mac.
Download Whiteout Survival
Open your Play Store and log in with your Google account. Search for Whiteout Survival and download the game to your BlueStacks emulator. This might take a few minutes to complete depending on your network connection.
Download Whiteout Survival from the Google Play Store
Optimize BlueStacks Performance Settings
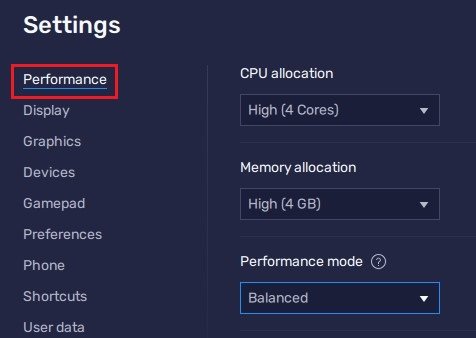
As you download Whiteout Survival, take a moment to adjust the emulator's settings for optimal performance. Click the gear icon to access the settings menu, and then head to the Performance tab. Here, you can allocate CPU cores and memory based on your computer's capabilities. If you aren't running multiple applications simultaneously, feel free to dedicate more CPU cores. For memory allocation, choose a Low setting if your system has 4GB or less RAM. This way, you'll ensure a smooth gaming experience on your PC or Mac.
BlueStacks Performance Settings
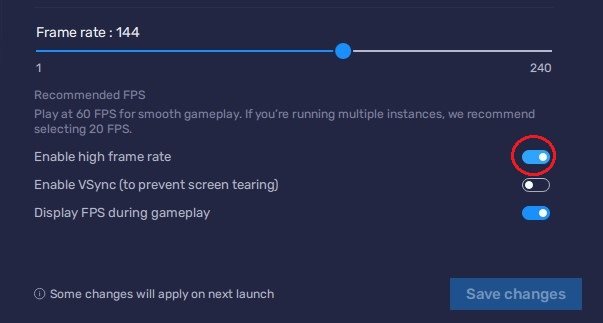
Under Performance Mode, set the option to Balanced. This will reduce the memory and CPU usage if your PC lags or you otherwise encounter low performance. I prefer to enable the high FPS option and set the frame rate of the emulator according to my screen refresh rate.
BlueStacks Display Settings
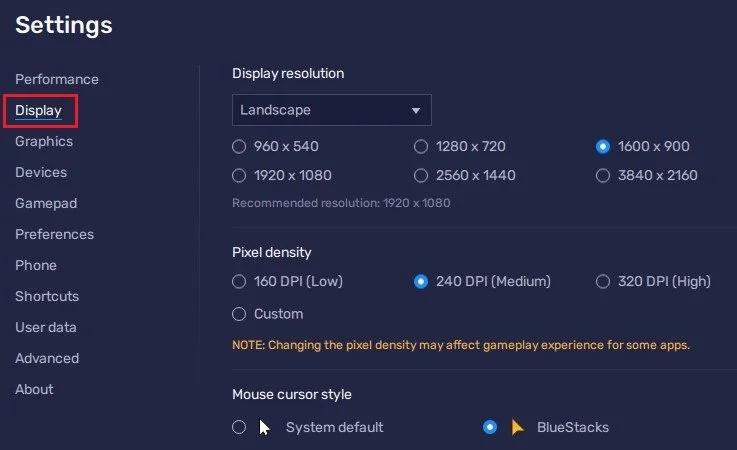
In your Display settings, set the display orientation to landscape, and choose a proper resolution to play Whiteout Survival on your monitor. You can also adjust the size of this window by dragging its corners.
BlueStacks Settings > Display
Whiteout Survival In-Game Settings
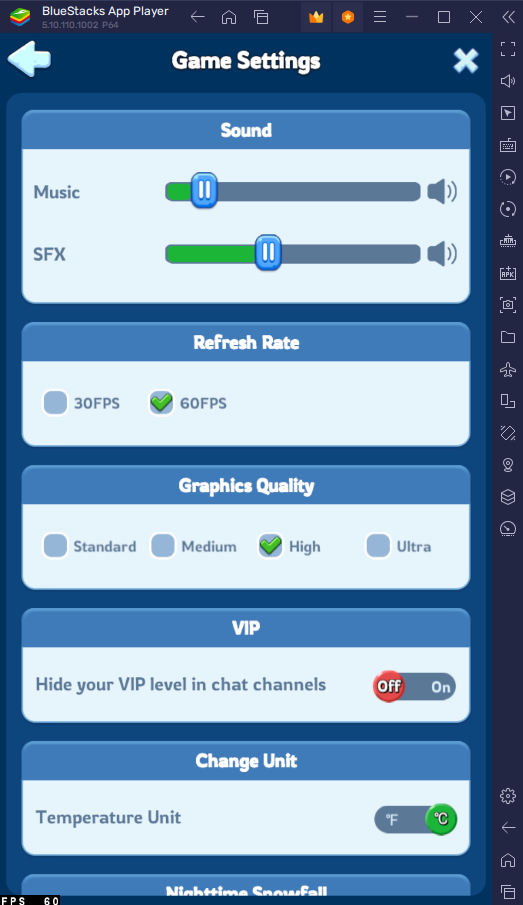
Once you launch Whiteout Survival, navigate to the in-game settings to fine-tune your experience. Within the game settings, you can adjust music and sound effect volumes to your preference. Additionally, consider increasing the refresh rate to 60 FPS if your PC or laptop can support higher frame rates, keeping in mind the performance settings of your BlueStacks emulator.
If you encounter lag or performance issues, try reducing the Graphics Quality setting. Conversely, if you're playing on a larger screen and notice a lower resolution, feel free to increase the graphics quality. To sync your progress with your mobile device, link your Facebook, Google, or Play Games account in the "Account" section of the settings menu.
Whiteout Survival In-Game Settings
-
No, you need an Android emulator like BlueStacks to play Whiteout Survival on your PC or Mac, as it is a mobile game designed for Android devices.
-
Yes, BlueStacks is a reliable and popular Android emulator, widely used for playing mobile games on PCs and Macs.
-
You can optimize the performance of Whiteout Survival by adjusting the CPU cores, memory allocation in BlueStacks settings, and tweaking in-game settings such as refresh rate and graphics quality.
-
Yes, in the "Account" section of the game settings, you can link your Facebook, Google, or Play Games account to continue playing where you left off on your mobile device.


