How To Fix Slow Laptop on Windows 11
Are you frustrated with your slow Windows 11 laptop? If so, you're not alone. Slow laptops are a common issue that can cause a lot of frustration and lost productivity. However, there are several things you can do to fix the problem and get your laptop running like new again.
This article will explore some of the most effective solutions for fixing a slow laptop on Windows 11. From simple tweaks to advanced techniques, we will cover everything you need to know to speed up your laptop and get it running smoothly again.
Update Operating System
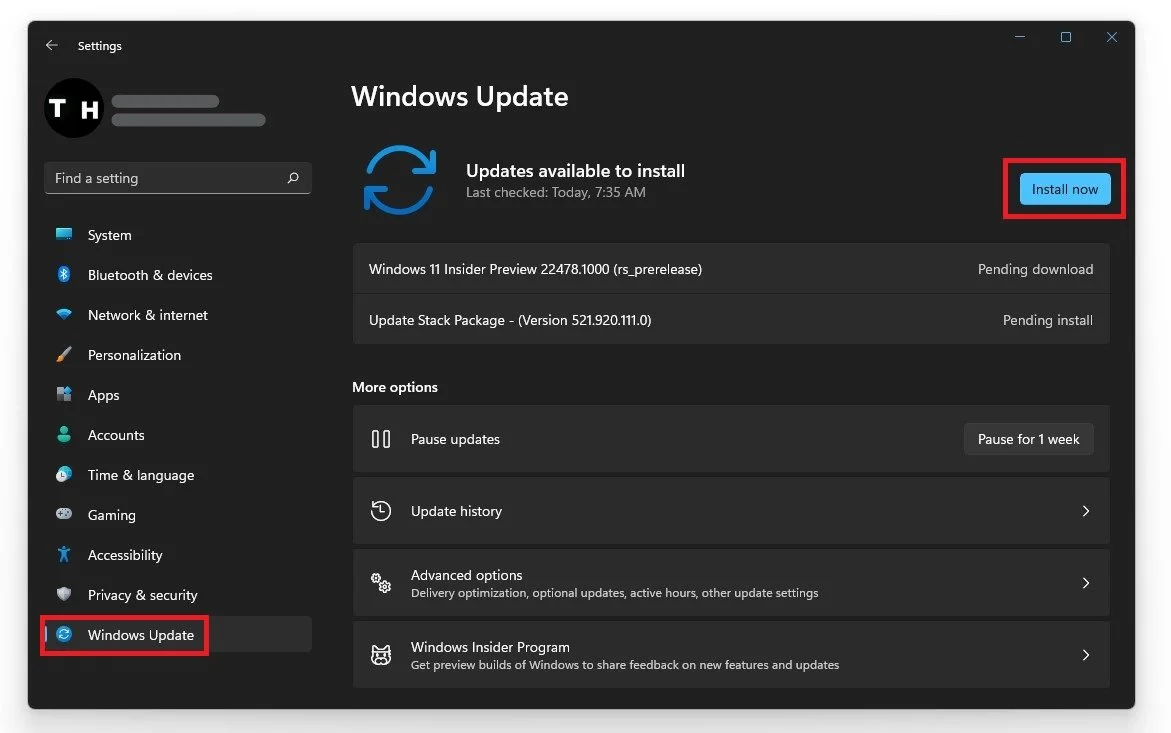
To optimize your system for performance, you should ensure your operating system is up to date. Search for Update in your taskbar search. Download the latest update in your Check for updates system settings window and restart your PC after the download. This will in any case, help you with performance issues.
Windows Settings > Windows Update
Update your Device Drivers
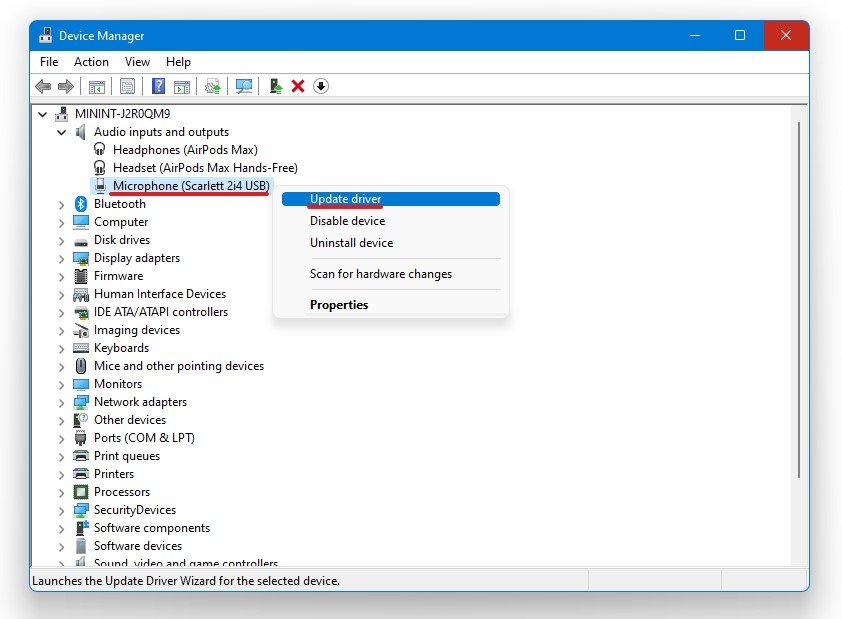
Ensure that some important drivers are also up to date. Search for Device Manager to open it up. In your device manager, you can expand your audio inputs & outputs, network adapters, USB connections, etc. For each category, ensure that your primary device’s driver is current. Double-click the device you are using, in this case, my headphones, and in the Driver tab, select Update Driver and then Search Automatically for drivers. This will make sure that your device’s driver is up to date.
Device Manager > Device > Update Driver
Update Graphics Card Driver
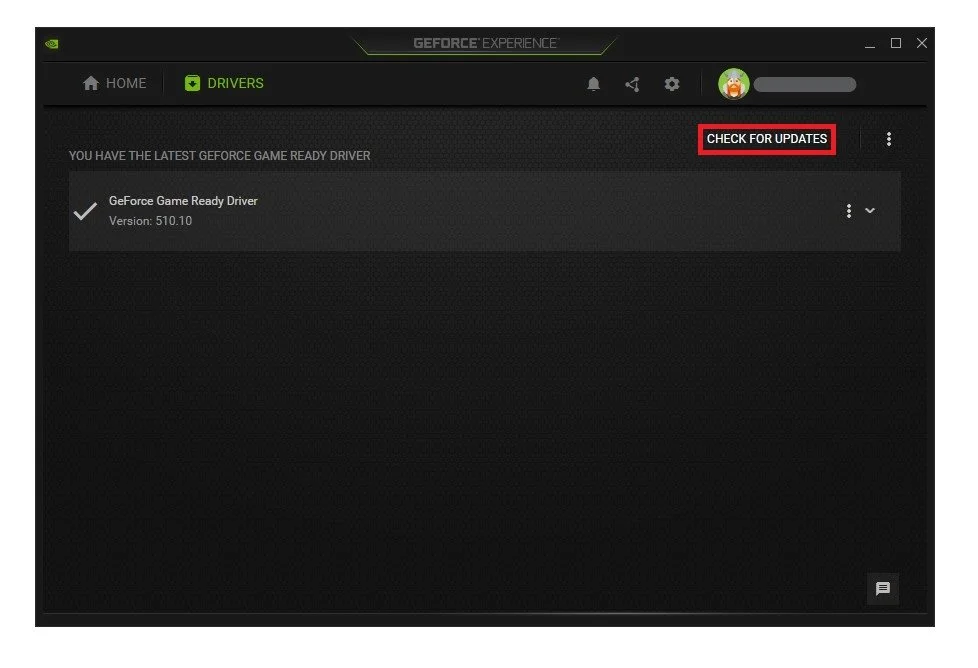
NVIDIA graphics cards can utilize the GeForce Experience application. Click here to download the application to your system. When the download is completed, open up the application, and in the Drivers tab, select Download. This will download and install the latest GPU update and should take a few minutes to complete.
GeForce Experience > Drivers > Download
Adjust the NVIDIA Control Panel Settings
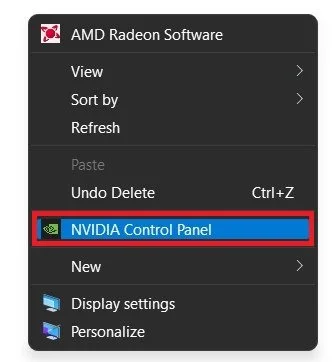
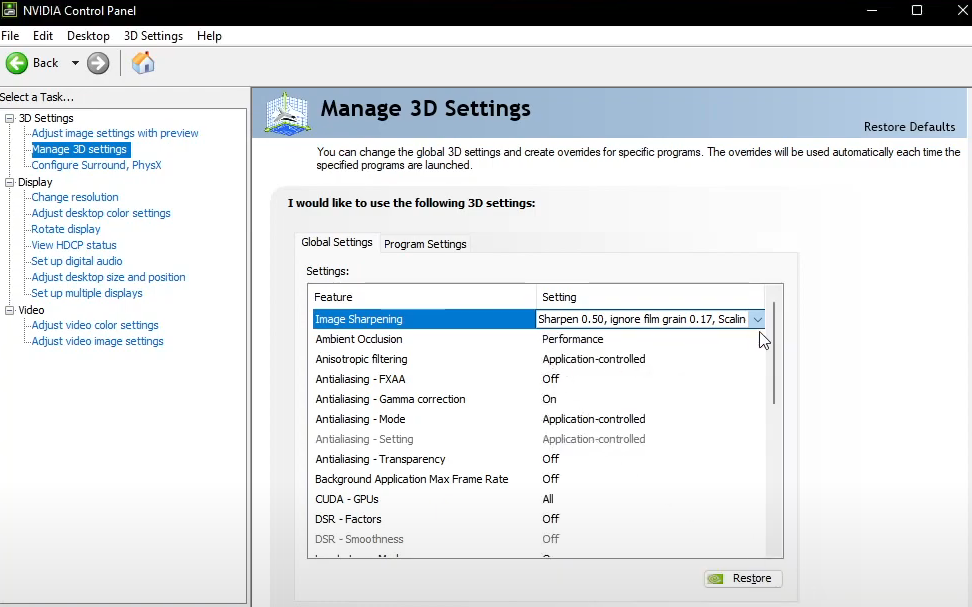
Making changes to your NVIDIA control panel can be essential. Change a few options in your NVIDIA control panel to improve the game’s performance on your system. To open your NVIDIA control panel, right-click your desktop and select NVIDIA Control Panel.
Enable Image Sharpening if you can, set the Sharpen value to 0.5, and ignore film grain to 0.17. You should also enable the GPU scaling option, in case it’s available to you. This will enable you to use custom resolutions, especially lower ones for games that don’t usually support it.
NVIDIA Control Panel > Manage 3D Settings > Global Settings
Set Ambient Occlusion to Performance.
Anisotropic Filtering to Application controlled
Turn Antialiasing FXAA to Off
Enable the Antialiasing - Gamma Correction option
Antialiasing Mode should be set to Application controlled
Antialiasing Transparency should be turned to Off
CUDA GPUs should be set to All
Set the Dynamic Super Resolution option to off unless you prefer to upscale your in-game render resolution.
For Low Latency Mode, set this option to ON for the most performance when playing games on your system. If you’re running a low-end PC and cannot run games at 60FPS, then set this option to Ultra.
Turn the Max Framerate option OFF when using a system which has no issues running games on a normal frame rate, as you can cap your FPS in most in-game settings anyway. If you suffer from low FPS, you can manually cap your max framerate to your monitor’s refresh rate to save resources.
Disable Multi-Frame Sampled AASet the OpenGL Rendering GPU to the GPU you are using; unless you use multiple ones, set this option to Auto-Select.
Set the Power management mode to Prefer Maximum Performance.
Below, set Preferred Refresh Rate to Highest Available,
Enable “Shader Cache” and texture filtering - anisotropic sample optimizations.
Set Texture filtering - negative LOD bias to Allow.
Texture Filtering Quality should be changed to Performance or High Performance.
Switch Trilinear Optimization to ON.
Threaded optimization should be set to Auto, Tripple Buffering should be turned off, turn off the V-sync option, and lastly, set the Virtual reality pre-rendered Frames option to 1 and Variable rate super sampling to Off.
Disable Windows Game Bar Recording
Some native Windows 10 settings can reduce your overall performance while in-game. Disable the Game Bar recording option, as it continuously records your gameplay and audio. In your taskbar search, enter: Game Bar to open the game bar system settings.
Make sure to uncheck the recording option. In the Captures tab, disable the background recording option additionally. These settings will only reduce your performance. If you want to record your gameplay, we suggest using OBS Studio or an external capture card if you lack performance.
Windows Settings > Gaming > Game Mode
End CPU-Intensive Processes
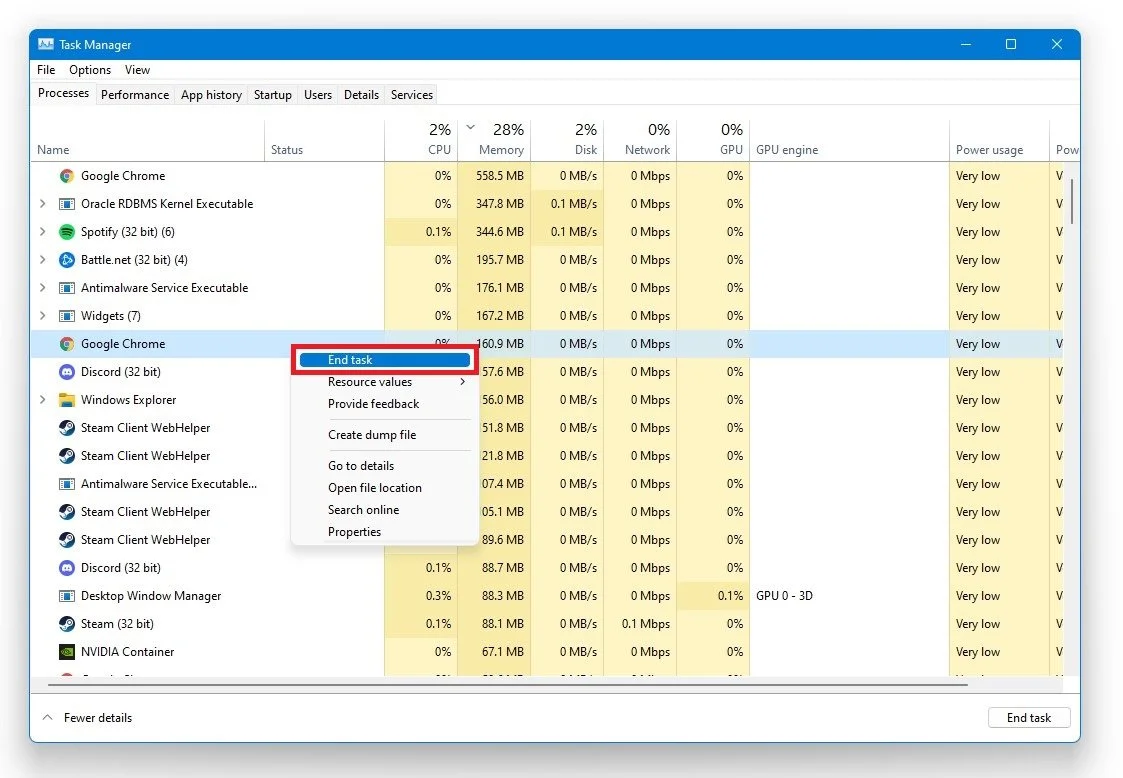
Right-click your taskbar to open up your Task Manager. To reduce the CPU utilization from other programs, we suggest you end some programs from running in the background, which you don't need when playing the game. End programs from running, which you know won't break your operating system. In the Startup tab, you can prevent programs from starting on system boot.
Task Manager > Processes > End Task
Delete the Windows Temporary Files
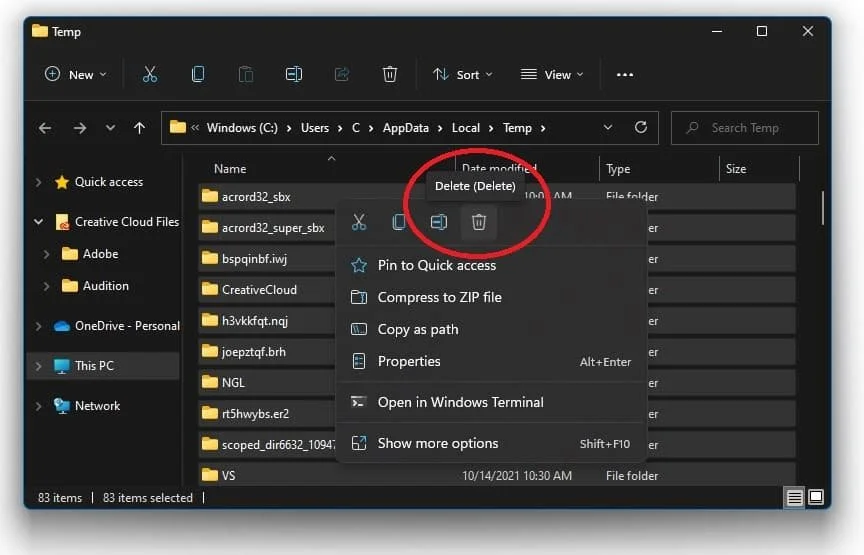
Your hard drive might be cluttered with unwanted files. These files will induce lag if not removed properly. You can delete your temporary files manually or use PC cleanup programs, such as CCleaner. These applications are usually the best choice as they automatically keep your hard drive clean. To manually delete your temporary files, enter %temp% in your taskbar search and hit enter. A new folder will open up. Make sure to delete the content of your temporary files folder.
Sometimes, this can take a few minutes if you haven’t done this before. Some files will most likely stay in your temporary files folder, as these are still in use by your programs. To completely delete these files, you should also make sure to empty your recycle bin.
Delete your temporary files


