

How to Screen Record on Windows & macOS (Step-By-Step)

Screen recording is an essential task for many professionals and hobbyists alike. Whether you are creating a tutorial, recording a gaming session, or demonstrating software functionality, the ability to record your computer screen is crucial. However, finding the right screen recording software that is easy to use, reliable, and produces high-quality recordings can be challenging.
In this article, we will show you how to screen record on Windows and macOS using VideoProc, a powerful and user-friendly screen recording software that allows you to record your screen, webcam, and audio simultaneously. With VideoProc, you can record your screen in high-definition without any lag or glitches, edit and enhance your recordings, and export them in various formats suitable for various platforms. We will provide you with step-by-step instructions on downloading, installing and using VideoProc to record your computer screen, as well as some useful tips and tricks to help you get the most out of this fantastic application.
Download & Install VideoProc
Screen recording is important for creating tutorials or recording gameplay on your PC. To record your screen, you have the option to utilize VideoProc. Make sure to download and install the application when downloading it from here. The program will run on both Mac OS and Windows systems. After installing the application, open up VideoProc. VideoProc not only allows you to record your screen. Use many other features, such as converting video formats and utilizing their complete video toolbox to edit videos. The beginner-friendly application also allows you to record live streams, batch download videos, and much more!

Launch VideoProc on your PC or Mac
Start the Screen Recording
Navigate to Video Recorder. At the top, you got the record screen, and webcam or select to record both simultaneously. For now, click on Screen. The screen capture area will appear in the software. Below, it will show your audio information, and you can always change your audio settings here. Before recording your video, let’s verify your Settings to get the best screen recording on your PC
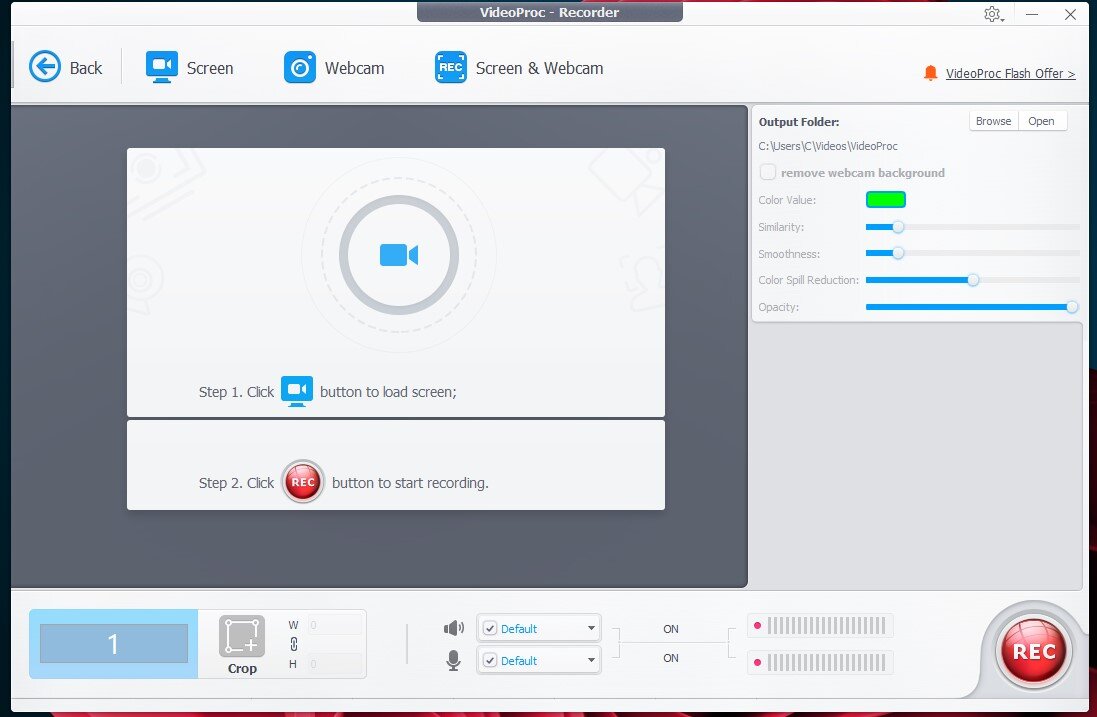
VideoProc interface
Adjust the VideoProc Settings
Click on the gear icon on the top right of your window. In the Recorder tab, set the Recording Quality option to High and the Recording Format to mp4. Below, adjust your Desktop and Mic Audio levels and set up your Stop Recording shortcut below. You also have the option to show your mouse clicks when recording or completely hide your mouse cursor in the recording. Depending on which content you wish to create, this will be very helpful. You can then close your settings window to save your changes.
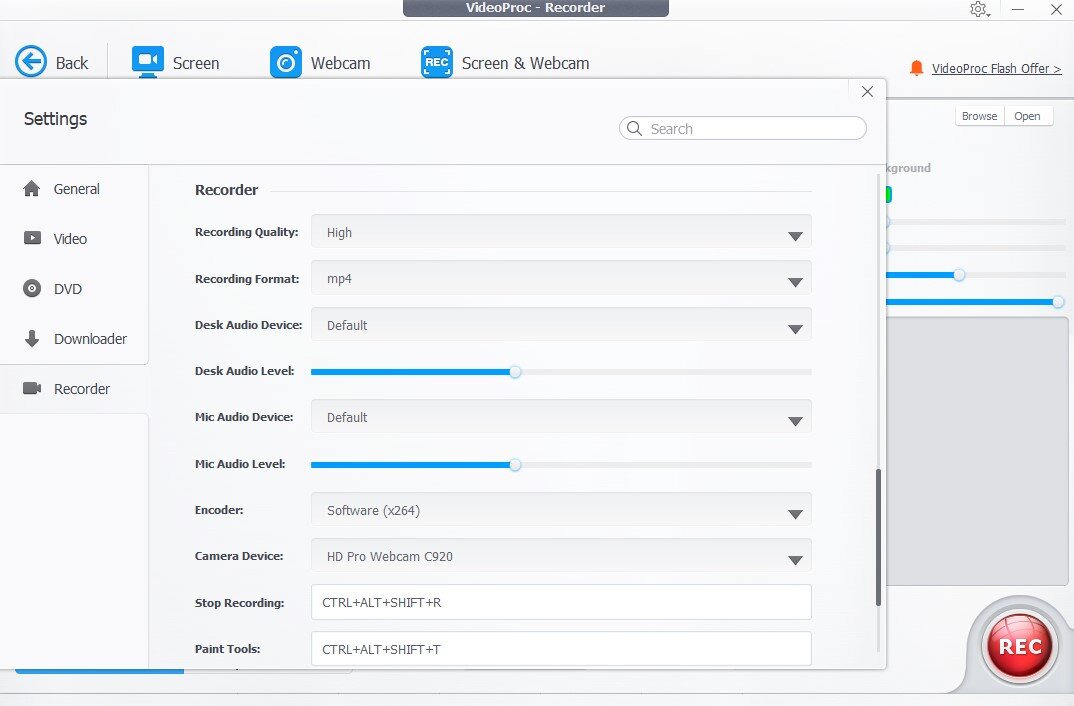
VideoProc Settings > Recorder
On the right side of your window, select the correct output location for your video recordings. To record the entirety of your window, click on Record, and VideoProc will automatically start recording your screen. To stop the recording, use the previously set hotkey or click the Stop button. The recording files will show up in the application on the right-hand side. VideoProc also allows you to select a crop in your desktop window where you wish the recording to be made.
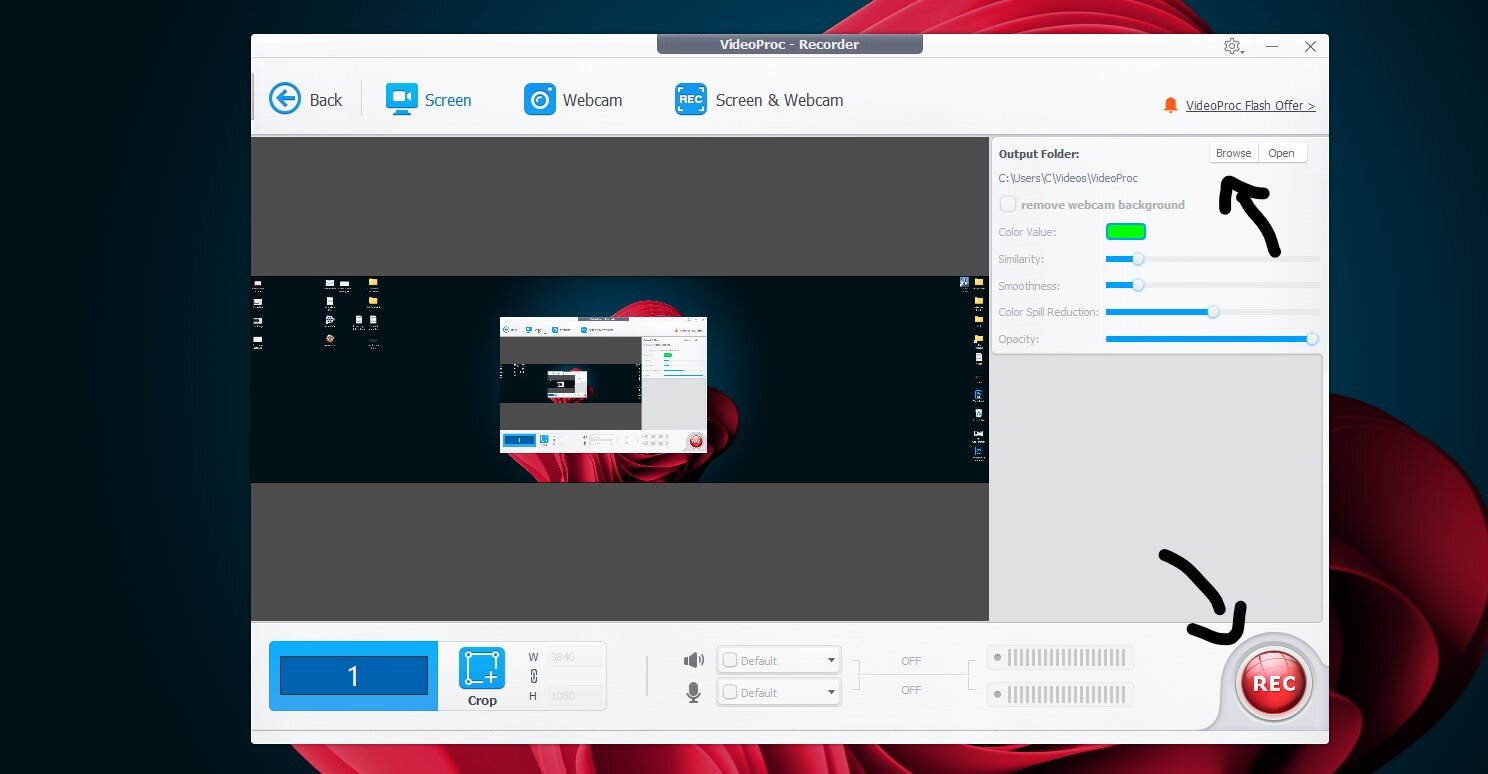
Start and stop the VideoProc recording on your PC
Handy VideoProc Tools
In your VideoProc application, click on the Crop icon. Click and drag your mouse to make a selection of which part of your screen you wish to record. Confirm the area, and click Record to start your recording. You can use the pen tool to make notes while recording. Make use of the hotkey you set in your settings to open up a small menu with icons. Select a tool and color, and you can start adding circles, lines and arrows to your recording. VideoProc allows you to preview your recording inside of the application. Simply click on your most recent recording and the video will play in your video preview window.

This blog post was sponsored by Digiarty Software.


