Windows 11 - How To Decrease Space Between Items in File Explorer

Windows 11 has brought a plethora of new features and enhancements to the table. However, for those who work with files and folders frequently, the spacing between items in the File Explorer can be a bit too much to handle. Fortunately, there's a simple solution to this problem - decreasing the space between items in File Explorer. By doing so, you can not only save space on your screen but also improve your productivity by making it easier to navigate through your files. In this article, we will guide you through the step-by-step process of decreasing the space between items in File Explorer in Windows 11, so you can make the most of your screen real estate.
Enable Compact View in your File Explorer
Open up your file explorer. Click on the Layout and view options menu and select Compact view. As you can see, this will change your spacing between files back to normal.
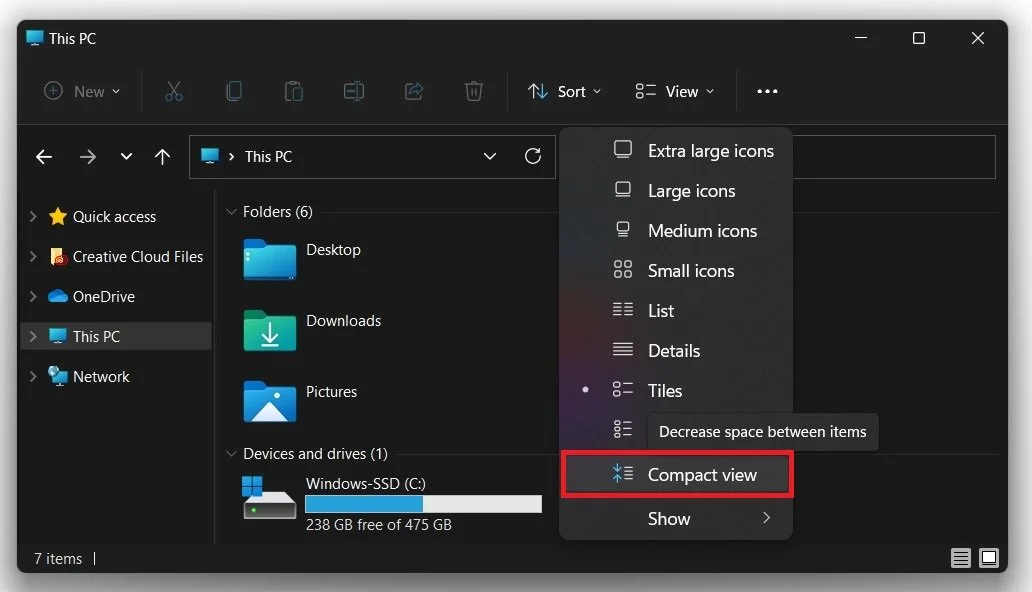
File Explorer > Layout & View Options
Adjust the Folder Options
In case this option reverts back after restarting your PC, you will have to make a change in your file explorer folder options. Click on the three dots, and in the drop-down menu, select Options. On the options window, under View, you have the option to enable the Decrease space between items option. This will in turn, have the same effect as using the integrated folder option.
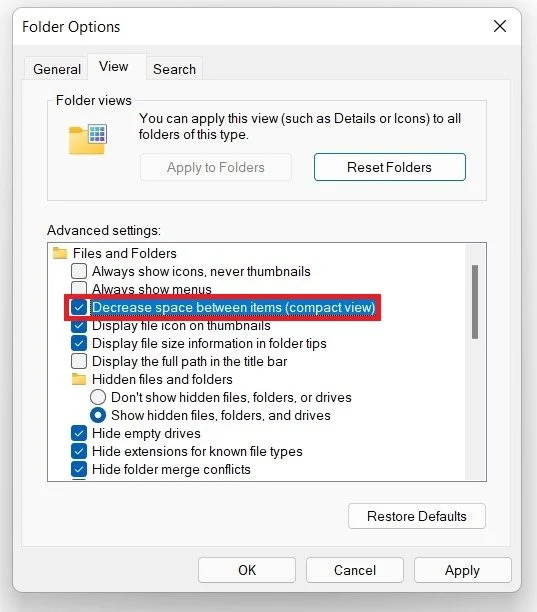
Folder Options > Advanced Settings > Decrease Space Between Items