How To Fix Windows 11 Not Detecting Headphones Problem

Are you struggling with Windows 11 not detecting your headphones? It's frustrating when you can't get audio output from your device, especially when you need it for work or entertainment. But don't worry, you're not alone! This issue can occur for various reasons, such as outdated audio drivers, faulty headphones, or incorrect audio settings. In this article, we'll guide you through some effective solutions to fix the Windows 11 not detecting headphones problem. Whether you're a tech-savvy person or a beginner, our step-by-step instructions will help you troubleshoot the issue and get your headphones working again.
Adjust the Windows Sound Settings
Open up your settings when clicking on this gear icon in your taskbar, or open up your start menu and search for Settings. Select Sound to open up your sound settings window. Ensure your headphones are set to the default output device in case it’s being detected in your settings.

Windows Settings > System > Sound
Change your Headphones Device Properties
In your Device Properties, you can change the overall volume. In case your headphones sound very quiet, increase the volume. This will depend on which device you are using and the software you are using to communicate or listen to audio. In your Advanced Sound settings, select More sound settings. This will open up your sound control panel.

Audio Settings > More Sound Settings
In the Playback tab, ensure that only your headphones are enabled. This will prevent issues with multiple output devices. Double-click your headphones to open up your Headphones Properties panel. Under Advanced, the two Exclusive Mode options should be enabled, and set your Default Format to 2 channel, 44’100 Hz or 2 channel, 48’000 Hz. This will also depend on what is available to you on the list. Apply your changes, and then you can close the sound control panel.

Headphone Properties > Advanced
Update your Headphone Drivers
Testing your device with another source, such as a video on YouTube, will help you determine where the issue is coming from. After tweaking your settings, you can close thewindow, search for Device Manager in your start menu search, and hit enter. Expand Audio inputs and outputs. Right-click the output sound device you prefer to use, select Update Driver, and make sure to Search automatically for drivers. This will take a minute to ensure your device’s driver is up to date.
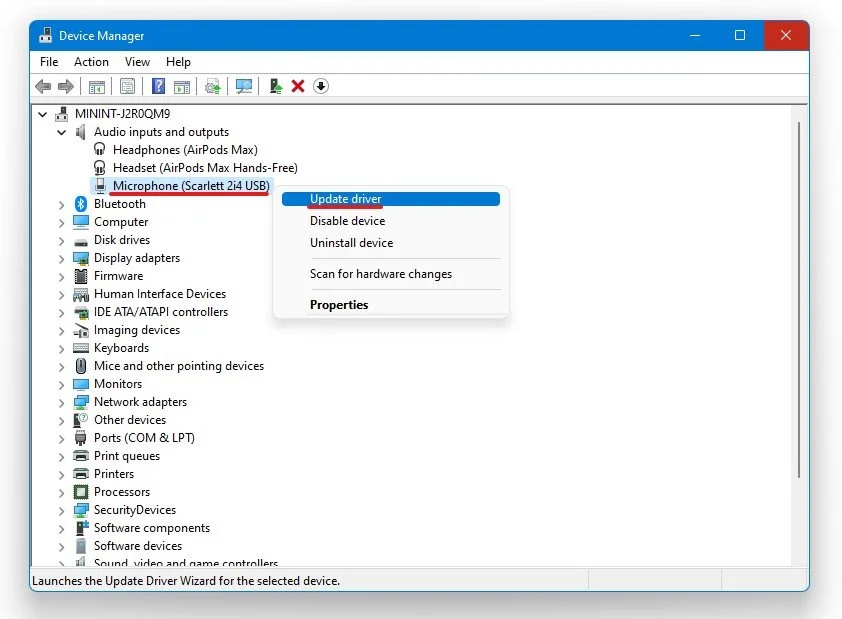
Device Manager > Audio Inputs and Outputs > Update Driver
Adjust the Application’s Audio Settings
Open up your settings for the application you wish to use. For issues while using Discord, for example, open up the application and navigate to your user settings. In your app settings, select Voice & Video. Discord will, like most applications, allow you to change your input and output device. Below, you can test your mic to preview if your low-volume issue is linked to the application or the operating system.

Discord User Settings > Voice Settings
Windows OS Update
If nothing helps you out, then ensure your operating system is up to date. In your start menu search, enter Update to open your Check for Updates system settings window. On the window, click on Check for Updates, Install now or Download now and restart your PC to install the newest Windows update.

Windows Settings > Windows Update