How To Troubleshoot Audio Issues on Windows 11
Are you experiencing audio issues on your Windows 11 device? You're not alone. Audio problems can be frustrating and affect your overall user experience. But don't worry, with a few simple troubleshooting steps, you can get your audio back up and running smoothly.
In this article, we will guide you through troubleshooting audio issues on Windows 11. We'll cover a range of topics, including common audio problems, how to identify the root cause of the issue, and steps you can take to resolve the problem. Whether you're a casual user or a professional, this guide will provide the knowledge you need to tackle any audio issue on your Windows 11 device.
Check for failing hardware
To prevent the most common issues first, we suggest ensuring that your sound problem is not hardware related. Use another PC to test your audio device to ensure the problem is related to Windows 11 or software running on Windows 11.
Troubleshoot Common Sound Problems
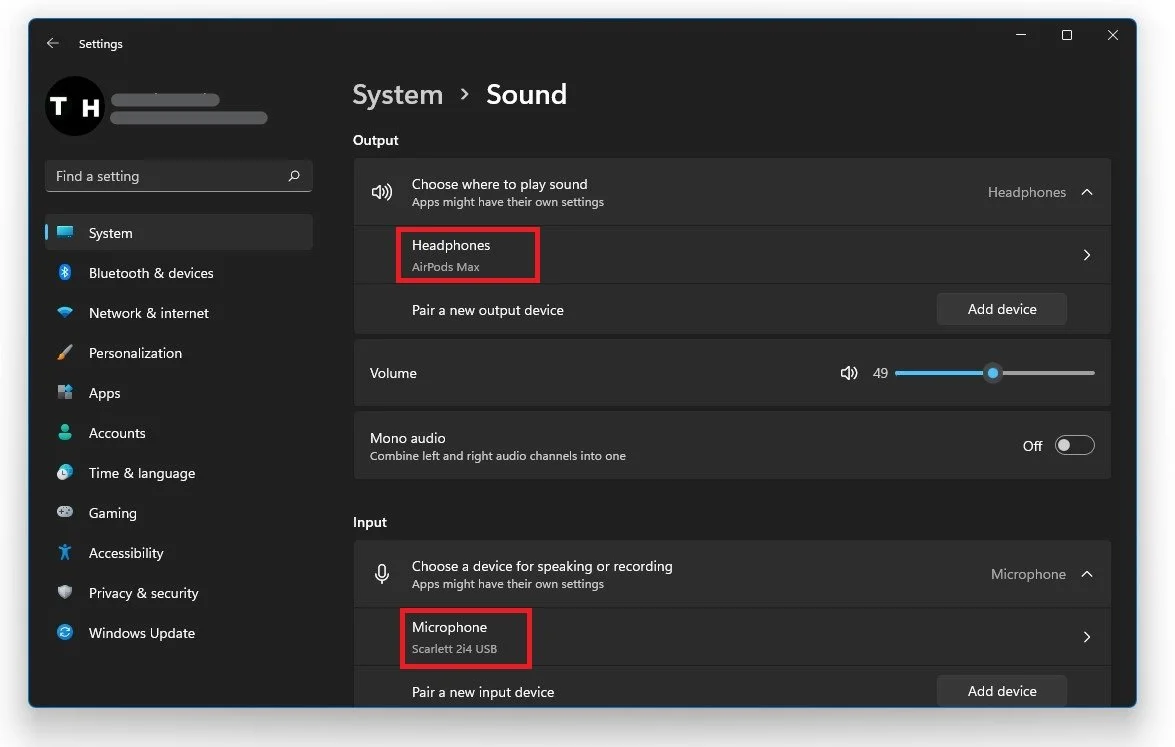
Open up your settings when clicking on the gear icon in your taskbar, or open up your start menu and search for Settings. On the window, under System, select Sound.
Windows Settings > System > Sound
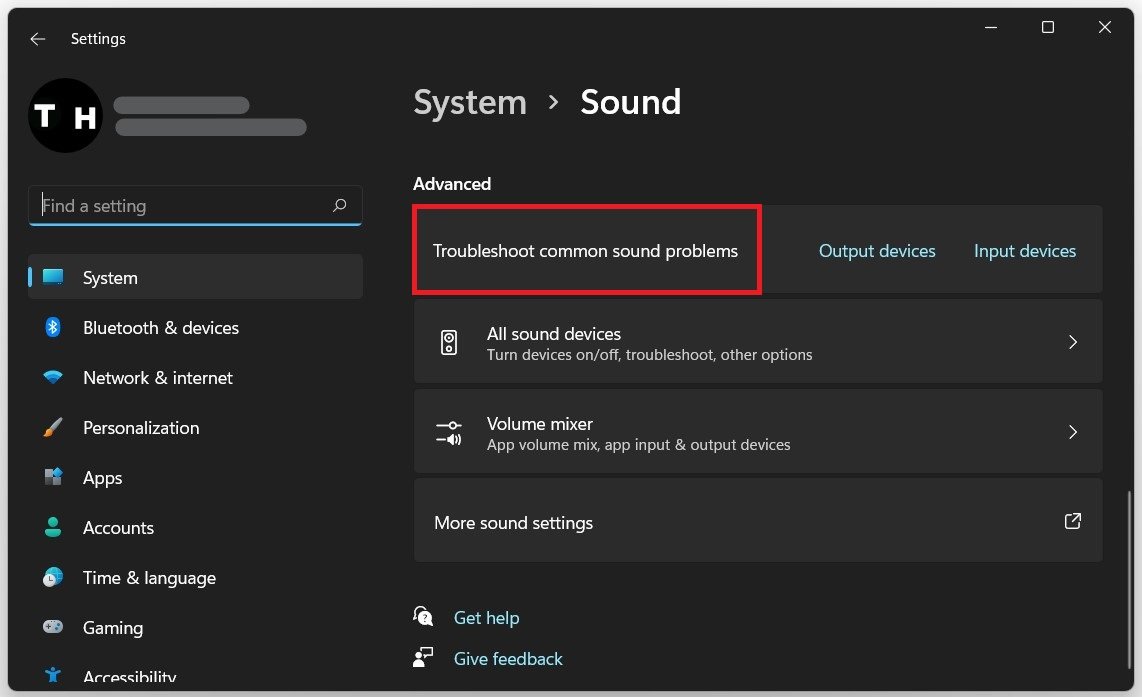
Scroll down and select Troubleshoot common sound problems.
Windows Sound Settings > Troubleshoot Common Sound Problems
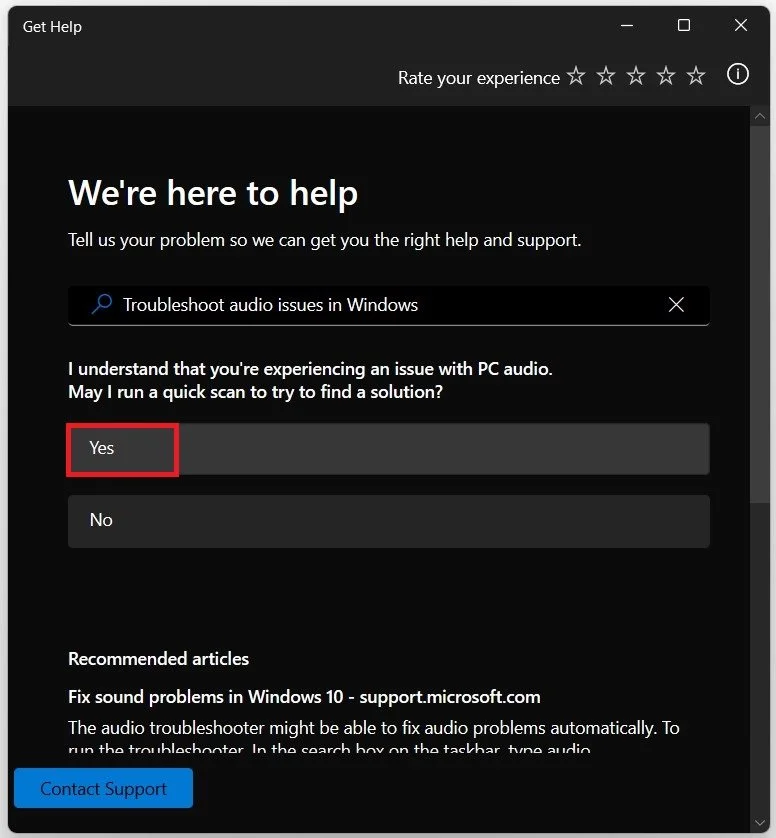
If your sound issues are related to your output devices, such as your speakers or headphones, then select Output Devices, otherwise, click on Input Devices. This will take a minute to detect any issues. You will be asked which device to troubleshoot. Select the device that is giving you the issue and click on Next.
Adjust the Sound Device Properties
Back in your sound settings, under Advanced, click on More sound settings. Your sound control panel will open up. In the Playback tab, right-click your preferred output device and make sure that it’s enabled.
Windows Sound Settings > More Sound Settings
If not, then enable it. Next, right-click the icon and select Properties. On the Properties panel, under Levels, ensure the volume is adjusted to an appropriate level by sliding the slider. Also, make sure the device is not muted by clicking the audio icon.
Audio Device Properties > Levels
Under Enhancements, disable all enhancements by unchecking the box next to it. This will probably fix the issue but if not then on the same Properties menu, switch to the Advanced tab. Under Advanced, you can test your audio device, giving you audible feedback.
If you are not hearing anything, or if the sound is not right, then make sure to change the sample rate to 16-bit, 48’000 Hz, in case this option is available to you. Other applications can also prevent your audio device from working properly. To prevent programs from altering your audio preferences, make sure to uncheck the Allow applications to take exclusive control of this device option and apply your changes.
Audio Device Properties > Advanced
Update the Audio Device Driver
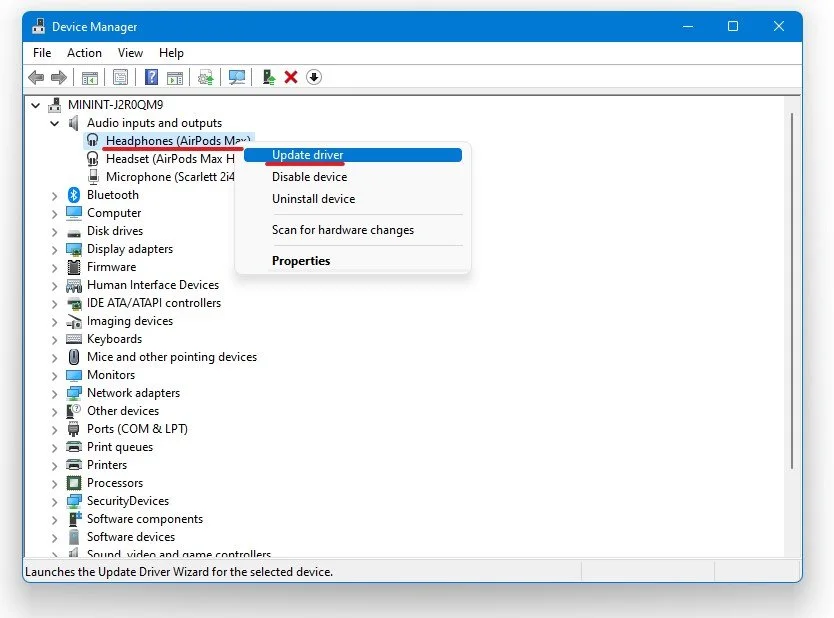
If this does not help you, then ensure that your drivers are up to date. Open up your start menu and search for Device Manager to open it up. On the window, expand Sound, video, and game controllers. From the expanded options, right-click on the device causing the issue and select Update Driver. Once you click Update Driver, you’ll get two options; Search automatically for drivers or Browse my computer for driver software. Select the first option, and it will take a few seconds for Windows to download and install the latest driver, which can help fix sound issues. In case the issue persists, we suggest completely uninstalling the driver. In your device manager, right-click on the device causing you the issue and select Uninstall Device.
Device Manager > Audio Inputs and Outputs > Update Driver
Close 3rd-Party Apps
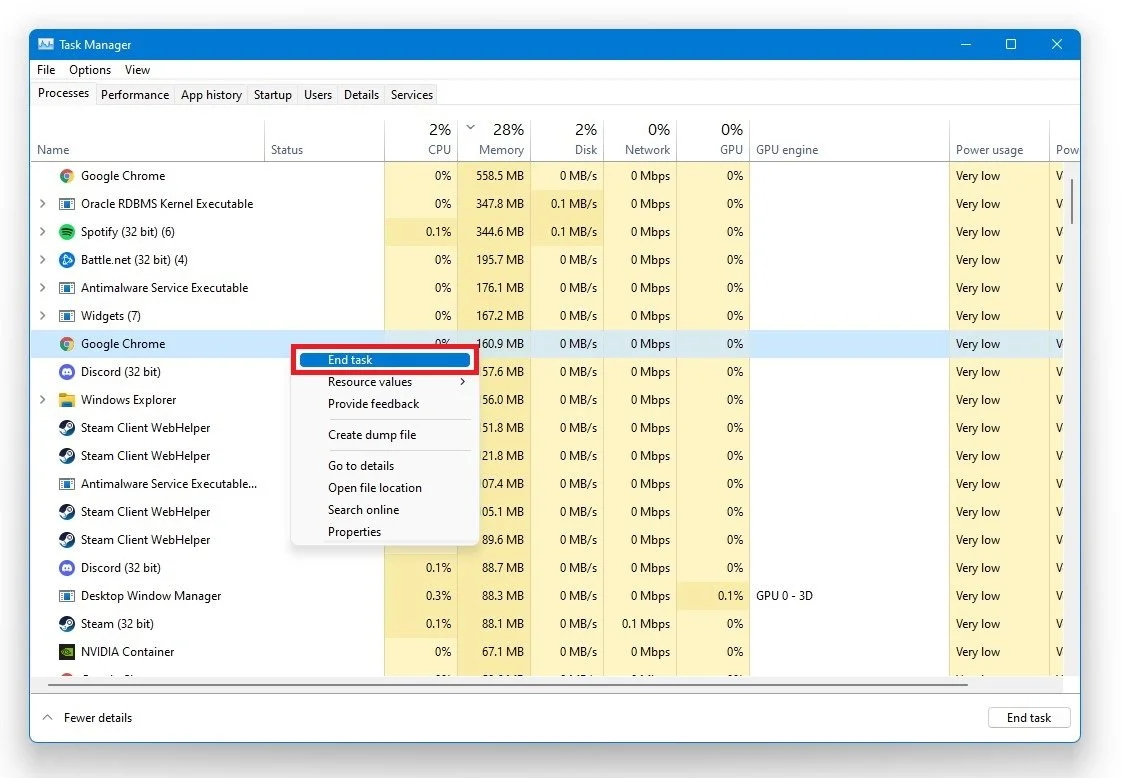
As a last resort, open up your start menu and search for Task Manager to open it up. In the Processes tab, prevent applications from running that could cause audio issues, such as Adobe applications, Discord, Skype, Microsoft Teams and so on. Don’t end processes from running which could break your operating system.
Task Manager > Processes > End Task
In the Startup tab, you should also prevent these applications from starting up on system boot.
Task Manager > Startup


