How To Add Photo on Video in CapCut - Complete Guide
Introduction
Unleash your creativity in video editing with CapCut by learning how to add photos to your videos! This guide breaks down the simple process, from selecting your favorite video to overlaying a chosen image, all within CapCut’s user-friendly interface. Whether you're aiming to enhance your content with personal touches or experiment with various visual effects, our complete guide will walk you through each step. Perfect for both beginners and seasoned editors, discover how to transform your videos with added photos in CapCut, elevating your editing game effortlessly.
Starting a New Project in CapCut
Beginning Your Video Editing Journey
To create a new video project in CapCut:
Launching CapCut: Open the CapCut app on your mobile device.
Accessing the Edit Section: Tap on the 'Edit' tab, located at the lower-left corner of your screen.
Initiating a New Project: Select the “New Project” button. This action will bring up your phone's media library, displaying your videos, photos, and live photos.
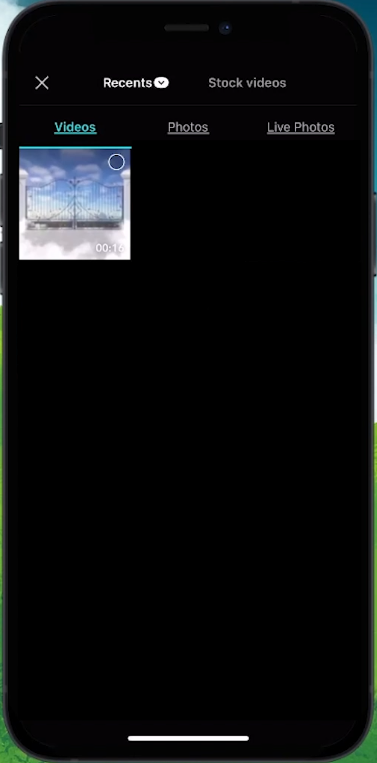
CapCut > New Project
Adding a Photo Overlay to Your Video
Enhancing Your Video with Images
To overlay a photo on your video in CapCut:
Selecting Your Video: Browse through your media items and select a video you want to edit. Tap on the 'Add' button to load it into CapCut's editing window.
Navigating to Overlay Options: In the editing window, you'll find several editing tools at the bottom. Locate and select the “Overlay” option.
Adding the Photo Overlay: After tapping on “Add overlay,” your media library will open again. Go to the “Photos” tab, pick your desired photo, and then tap 'Add'.
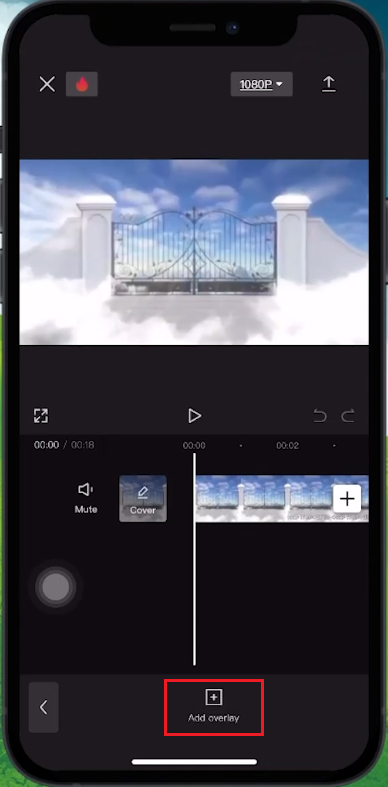
CapCut Project > add Overlay
Customizing the Photo Overlay in CapCut
Fine-Tuning Your Video's Visuals
After adding a photo overlay, you can adjust it to fit your video perfectly:
Resizing and Rotating: Drag the corners of the photo to resize, and rotate it to align with your video's composition.
Applying Effects: Explore options like Split, Blend, and Animation to enhance your photo overlay. For instance, select 'Animation' to browse and apply dynamic effects.
Timing Adjustments: In the CapCut editor, you can set the exact moment for the photo to appear and its duration on the video. Simply drag the overlay along the timeline and adjust its length to fit your needs.
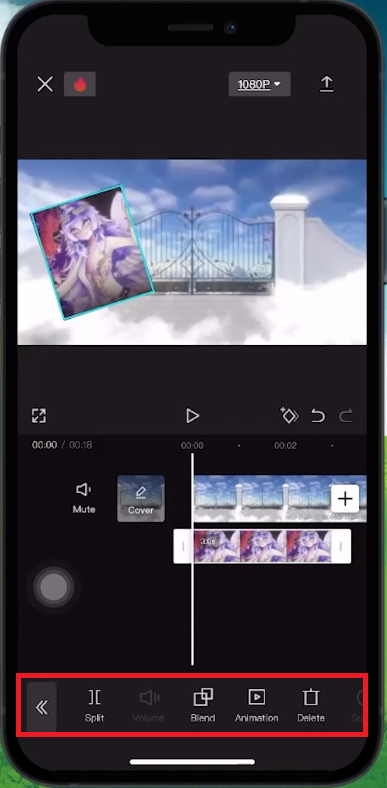
Add Image effect to CapCut video
Exporting Your Edited Video
Sharing Your Creative Work
When your video is complete:
Initiating Export: Tap the arrow icon in the upper right corner of the screen to start exporting your video in CapCut.
Sharing Options: After the export is complete, CapCut will offer options to share your video on social media platforms or save it for later.
This process allows you to produce a polished, visually engaging video ready to be shared with your audience or saved for your personal collection.
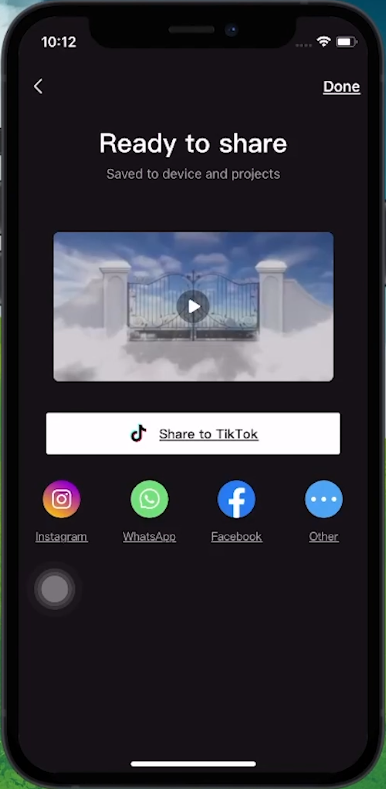
Export Video
-
Yes, CapCut allows you to add multiple photo overlays to your video. Simply repeat the process for each photo you want to add.
-
Absolutely! CapCut offers a variety of animation effects that you can apply to your photo overlays for a dynamic look.
-
You can adjust the timing by dragging the photo overlay along the video's timeline and resizing it to control its duration.
-
Yes, CapCut supports exporting videos in high definition, ensuring your final product is of high quality.
-
Yes, CapCut is a versatile editing app available for download on both iOS and Android devices.