

How To Fix Can’t Connect To This Network Error on Windows 11
Introduction
Encountering the "can't connect to this network" error on your Windows 11 PC can be a frustrating experience, especially when you need immediate access to the internet. Whether it's an urgent work task or a much-needed entertainment break, this error can disrupt your day. Fortunately, there are proven ways to tackle this problem, from simple network resets to updating your network adapter driver. In this comprehensive guide, we'll walk you through step-by-step solutions to get your connection back on track. Whether you're a tech-savvy user or a complete beginner, these methods can help you reconnect with ease and efficiency.
Reset Network Settings on Windows 11
When faced with the "can't connect to this network" error on your Windows 11 PC, one of the primary steps to resolve the issue is resetting your network settings. Follow these easy steps to do so:
Open Windows Settings.
Select the Network and Internet option in the left-side pane.
Choose Advanced network settings.
Click on Network reset.
Select the Reset now button. Confirm by clicking YES if prompted.
Your Windows PC will restart.
In many instances, this simple reset can fix the connection issue, enabling you to get back online quickly.
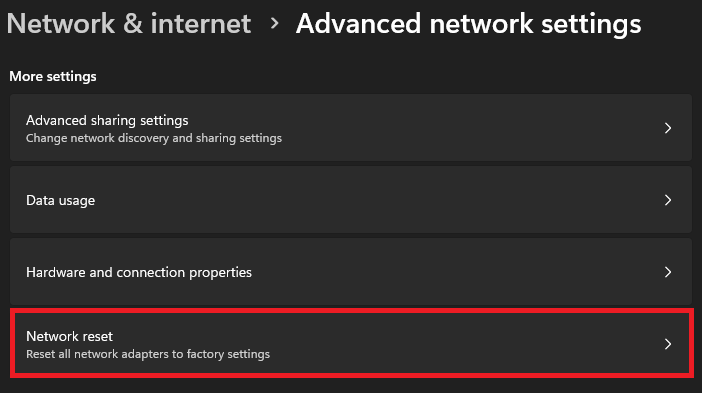
Windows Settings > Network & Internet > Advanced Network Settings
Run the Network Connections Troubleshooter
If the network issue still persists after the reset, Windows 11 offers an in-built troubleshooter designed to diagnose and resolve network-related problems. Here's how to run it:
Open Windows Settings and navigate to the System tab.
Select Troubleshoot.
Choose Other troubleshooters.
Run the Network and Internet troubleshooter.
If prompted, check the WiFi button to select the network adapter to diagnose.
Allow the process to execute to completion, and then close the window.
Utilizing the network connections troubleshooter can target specific issues, guiding you through fixes tailored to your PC's connectivity challenges. Following these methods step by step can often lead you back to a stable and reliable internet connection.

System Settings > Troubleshoot > Other Troubleshooters
Update Network Adapter Driver on Windows 11
Keeping your network adapter driver up to date is essential for maintaining a stable connection. An outdated driver can sometimes be the culprit behind the "can't connect to this network" error. Follow these steps to update your network adapter driver:
Search for Device Manager in your Windows start menu and open it.
Expand the Network adapters option.
Right-click on your WiFi adapter.
Select Update Driver.
Click Search automatically for drivers.
This process may take a moment to complete, but it ensures that you have the latest driver, optimizing your network connection.
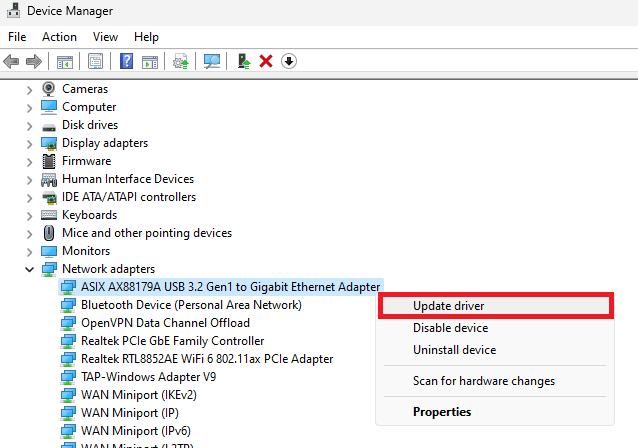
Device Manager > Network Adapters > Update Driver
Verify IPv4 Network Preferences
If none of the above solutions have resolved the problem, you should check your IPv4 network preferences. Sometimes, incorrect settings can hinder your connection to the network. Here's how you can verify and correct these settings:
Search for view network connections in your start menu and click to open the Network Connections window.
Right-click your WiFi adapter and select Properties.
Select the Internet Protocol Version 4 (TCP/IPv4) option and click Properties.
Check both the Obtain an IP address automatically and Obtain DNS server address automatically options.
Click OK and close the Properties window.
By ensuring that your network adapter driver is up to date and your IPv4 network preferences are set correctly, you can often fix the "can't connect to this network" error on your Windows 11 PC, leading to a seamless internet experience.

WLAN Properties > Internetprotokoll V4 > Obtain DNS server address automatically
-
This error can be caused by various issues including outdated network adapter drivers, incorrect IPv4 settings, or other network configuration problems.
-
You can update your network adapter driver by accessing the Device Manager, expanding the "Network adapters" option, right-clicking your WiFi adapter, selecting "Update Driver," and clicking "Search automatically for drivers.”
-
Open the "Network Connections" window, right-click your WiFi adapter, select "Properties," click on "Internet Protocol Version 4 (TCP/IPv4)," and ensure the options for obtaining IP and DNS server addresses automatically are selected.
-
Yes, resetting network settings by going to "Advanced network settings" and clicking on "Network reset" can often fix this error. Make sure to restart your PC after resetting.
-
Running the "Network and Internet" troubleshooter through the "Other troubleshooters" section in your System settings is another effective way to diagnose and solve network-related problems on Windows 11.


