

How To Convert Image to PDF on Windows PC - Easy Tutorial
Introduction
In a digital world where image documentation is as crucial as text, having the ability to seamlessly transition between the two can be a game-changer. Our straightforward tutorial guides you on how to convert images to a PDF file on your Windows PC, a task simpler than it sounds, yet invaluable. Whether it's a single image or a collection, this process is a neat way to organize and share your visual data effortlessly. Through a few clicks, transform your images into a tidy, easily shareable PDF document, bringing together the visual and textual realms in a format appreciated universally.
Locate and Select Images
Open the folder where your images are stored.
Select the images for conversion by clicking on them. To select multiple images, hold down the
Ctrlkey while clicking.
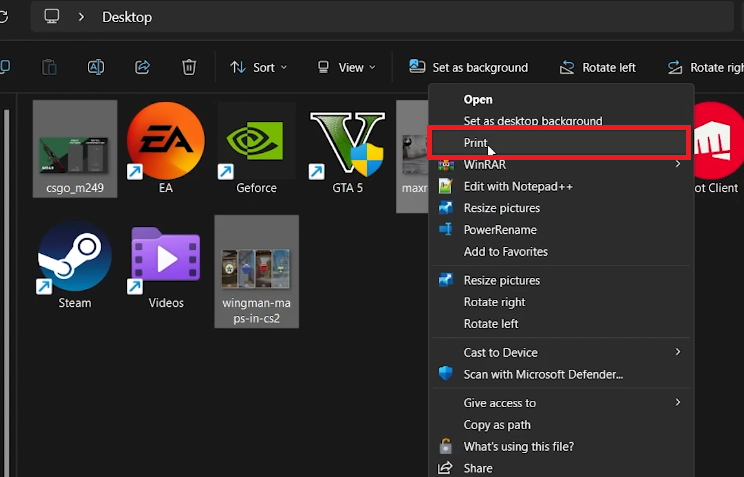
Initiate Print Command
Right-click on any one of the selected images, and from the context menu, choose the “Print” option. This action will open the Print Pictures window.
Configure Print Settings
In the Print Pictures window, check if the selected printer is “Microsoft Print to PDF”. If not, click on the drop-down menu to change the printer selection.
Now, you're all set to move on to arranging your images and converting them into a PDF file.
“Print” selected images
Choose Your Layout
Now it's time to decide on the layout for your PDF. You have options - either place each image on a separate page or have multiple images on one page, depending on the available layouts.
Preview the document to see if it's coming out as you desire. You can flip through the pages using the arrow keys.
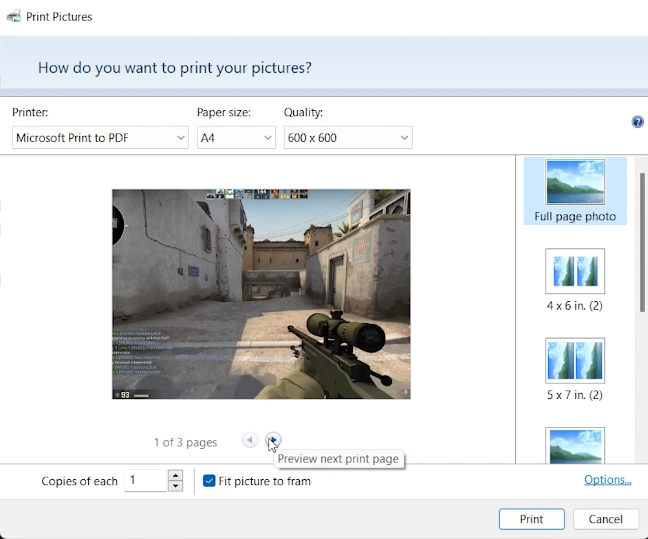
Select a layout for your PDF file images
Hit Print
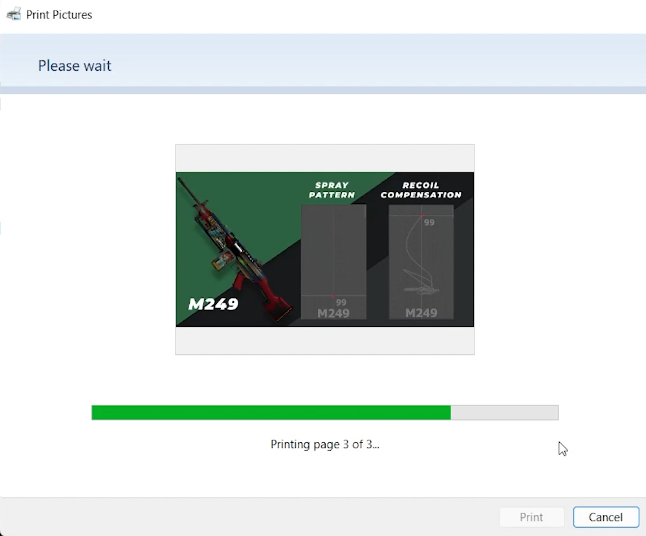
Once you're happy with the layout, click on the “Print” button to proceed.
Name and Save Your PDF
A window will pop up prompting you to name your PDF file and select a save location.
After naming your PDF and choosing the save location, click “Save”.
Head over to the location where you saved the PDF to access it. Voila! Your images are now bundled into a single PDF file, ready for sharing or printing.
Print Pictures to PDF
-
Navigate to the folder with the images, select the images, right-click on any of the selected images, choose “Print”, and in the Print Pictures window, select “Microsoft Print to PDF” as the printer. Set your preferred layout and click “Print”. Name and save your PDF file.
-
Yes, in the Print Pictures window, you can choose a layout that allows multiple images on one page before proceeding to print to PDF.
-
Ensure that the “Microsoft Print to PDF” feature is enabled on your PC. If it’s not, you can enable it through “Turn Windows features on or off” in the Control Panel.
-
Absolutely! A window will pop up asking you to name your PDF file and choose a save location before it gets saved.
-
Yes, there are various software and online tools available for converting images to PDF such as Adobe Acrobat or online converters like Smallpdf.


