

How To Create A Google Form - Complete Guide
Introduction
Ready to dive into the world of Google Forms? Our complete guide is here to effortlessly walk you through the process of creating your own Google Form, step-by-step. Learn how to choose templates, customize questions, and easily share your form with others, all within your browser. Whether you're organizing an event, conducting a survey, or gathering feedback, Google Forms is an incredibly versatile and user-friendly tool for all your needs. Let's get started on crafting your perfect form today!
How to Create a Google Form
Starting Your Google Form
Creating a Google Form is a straightforward process, perfect for surveys, RSVPs, or feedback collection. Here's how to begin:
Open Google Forms: Launch your web browser and visit docs.google.com/forms.
Log Into Your Google Account: Ensure you're signed in to the Google account you want to use for the form creation.
Choose a Template: Google Forms offers various templates for different needs. Select one that best fits your purpose, like a survey, event registration, or feedback form.
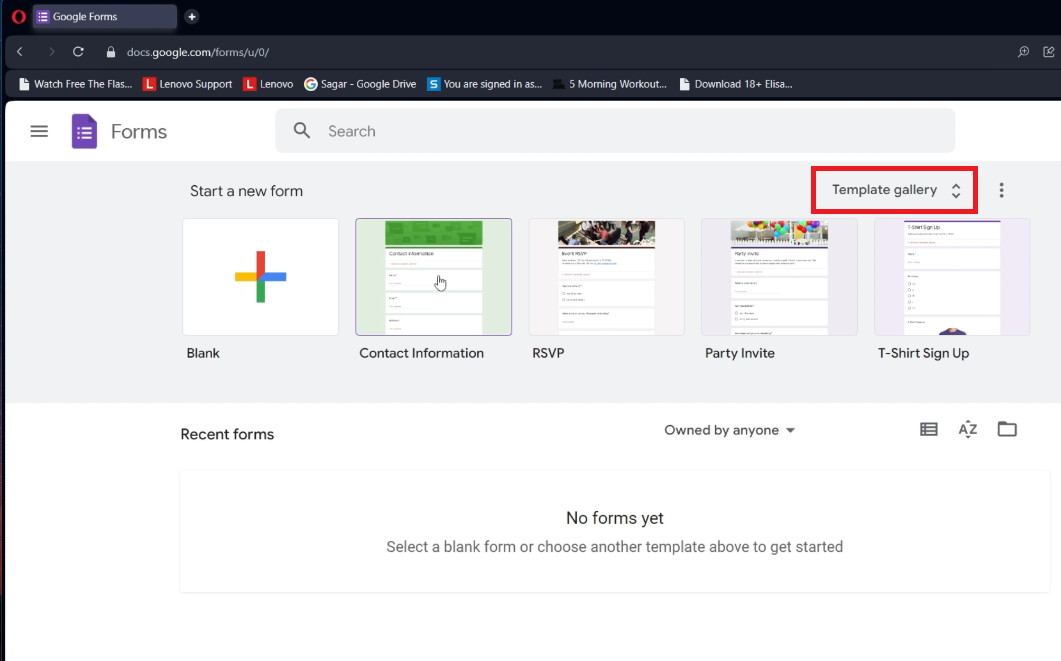
Select Google Forms template
Editing and Adding Questions
Customizing your Google Form is easy:
Modify Questions: To change a question, click on it and edit the text directly.
Delete Unwanted Questions: Click on a question and press the delete button (trash can icon) to remove it.
Add New Questions: Click the plus icon ('+') to add a new question. Choose the type of question from the dropdown menu – options include multiple choice, checkboxes, or short answer.
Customize Content: After selecting the question type, enter your question and answer options. For example, in a multiple-choice question (MCQ), you can provide several choices for respondents to select from.
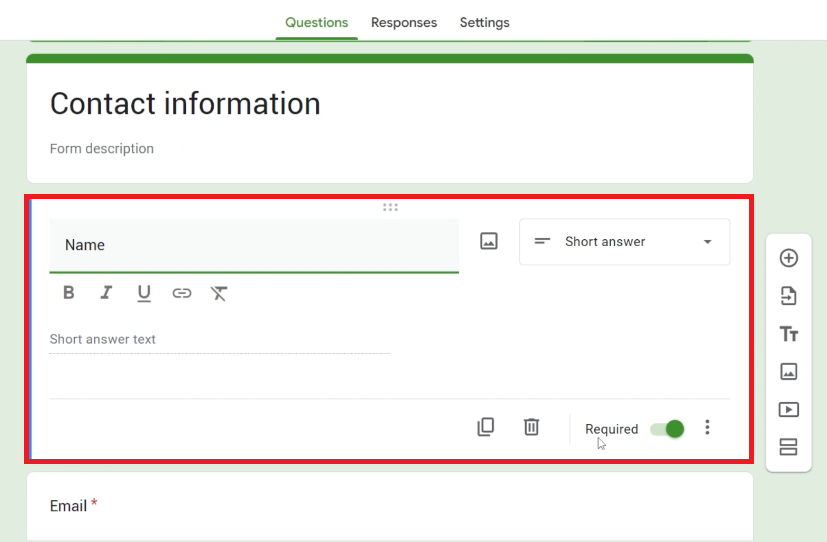
Edit Google Forms question
Sharing Your Google Form
Customizing and Sharing Made Simple
After creating your Google Form, sharing it with others is a seamless process. Here's how to do it:
Access Form Settings: Before sharing, you might want to explore additional settings. Click on the pencil icon to open the editor and adjust settings like who can respond, whether to collect email addresses, or if responses are limited.
Ready to Share: Once you're happy with your form and its settings, click on the "Send" button at the top right of the page.
Choose Sharing Method: In the pop-up window, select the "Link" tab. This generates a unique URL for your form.
Copy and Distribute the Link: Click the 'Copy' button to copy the form link. You can now paste and send this link through email, messaging apps, or even embed it in a website.
With these steps, your Google Form is ready to reach your audience, whether it's for feedback collection, event RSVPs, or surveys. Google Forms offers an easy, free way to gather information and engage with your audience directly from your browser.
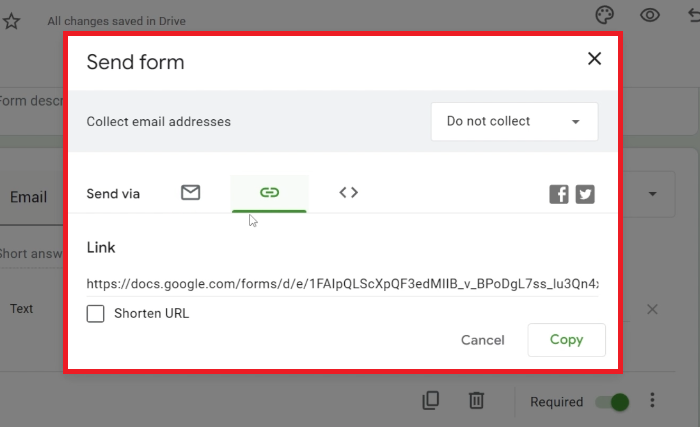
Send Google Forms via Link
-
Start by going to docs.google.com/forms in your browser. Make sure you're logged into your Google account, choose a template that fits your needs, and begin customizing your form with questions and options.
-
Absolutely! Click on any question to edit its text or type. You can add various types of questions like multiple-choice, checkboxes, or short answer. Use the plus icon ('+') to add new questions.
-
Yes, you can share your Google Form with anyone, regardless of whether they have a Google account. Just copy the link generated by the 'Send' option and share it via email or social media.
-
No, Google Forms is a free tool available to anyone with a Google account. It's an excellent resource for creating and distributing forms without any expense.
-
Responses are collected in Google Forms itself. You can view them by opening your form and clicking on the 'Responses' tab. There's also an option to link the responses to a Google Sheets spreadsheet for more detailed analysis.


