

How To Delete A User Account in Windows 11 - Guide
Introduction
Embarking on a digital spring cleaning or making way for new user accounts on your Windows 11 PC? One key step could be removing old or unused user accounts. Our guide walks you through the straightforward process of deleting a user account in Windows 11, ensuring you have a clutter-free login screen and optimized system access. Whether you're doing this for personal or administrative purposes, knowing how to manage user accounts efficiently is a valuable skill in maintaining a tidy and secure computer environment. So, let's dive into the steps and clear the decks for a streamlined user experience!
Removing a User Account
Before diving into the deletion process, confirm you're logged in as an administrator. You'll need these rights to alter user account details. Now, let’s jump into the steps:
Step 1: Access Settings
Click the 'Start' menu, type 'Settings', and open it up.
Step 2: Navigate to Accounts
In the Settings window, find and click on the 'Accounts' section.
Step 3: Locate User Account
Within 'Accounts', click on 'Other users'.
You’ll now see a list of all user accounts on your PC.
Find and click on the account you wish to delete.
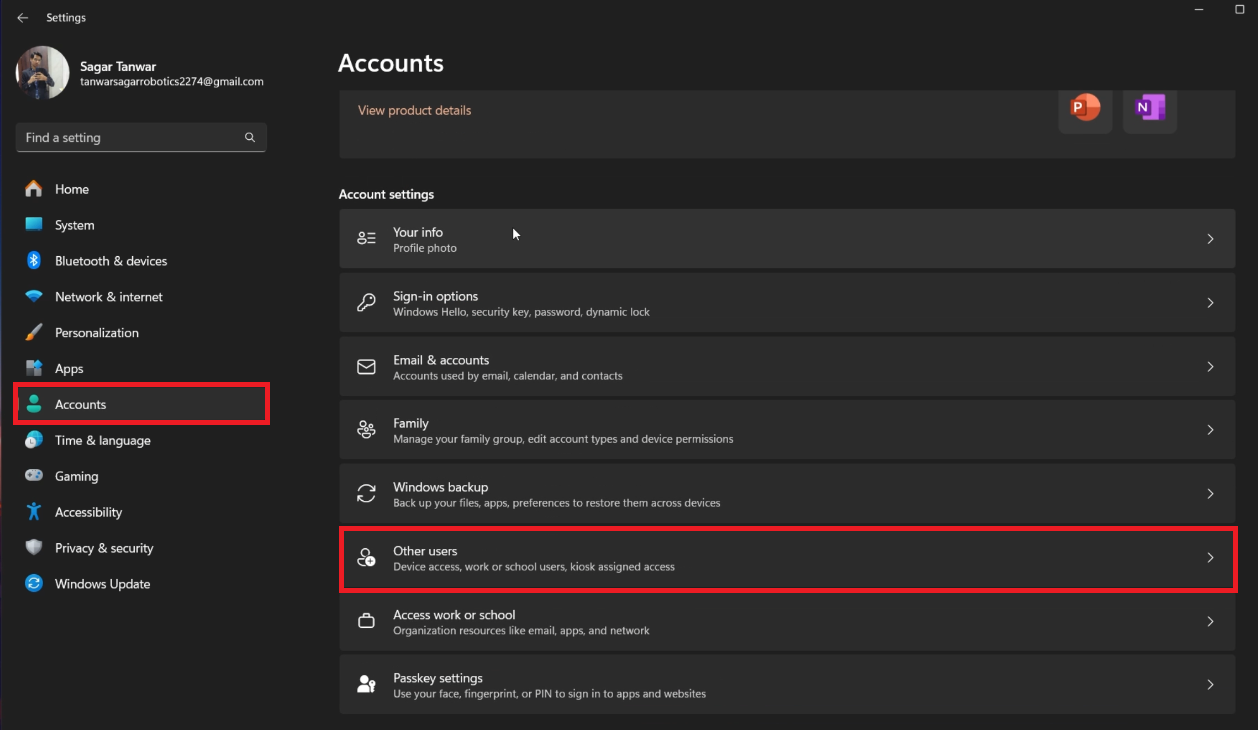
Windows Settings > Accounts > Other users
Step 4: Initiate Deletion
A 'Remove' button will appear. Click on it.
A warning prompt will pop up, reminding you that this action will erase all data tied to this account, including files and settings.
Step 5: Confirm Deletion
If you've backed up any crucial data from this account, go ahead and click on 'Delete account and data'.
Step 6: Completion
The deletion may take a few moments.
Once completed, the user account will be entirely removed from your system, leading to a tidier login screen and a more streamlined user management experience.
This brief guide helps you swiftly navigate through the user account deletion process in Windows 11, ensuring a smooth and straightforward experience.

Remove Users Account > Delete account and data
-
You need to have administrative privileges on your PC to delete a user account. Ensure you are logged in as an administrator before attempting to remove a user account.
-
Before deletion, copy any important files from the user account to another location such as an external hard drive, another user account, or a cloud storage service like OneDrive or Google Drive.
-
Deleting a user account will erase all data associated with it, including files, settings, and configurations. It's vital to back up any crucial data before proceeding with deletion.
-
Once deleted, a user account cannot be recovered. Ensure to have a backup of all essential data before deleting the account.
-
Following the steps outlined in the guide carefully ensures a smooth process. It's crucial to have administrative rights and back up any important data to prevent loss of information.


