

How To Fix Ethernet Doesn’t Have a Valid IP Configuration - Windows 11
Introduction
In the digital age, a seamless internet connection is essential for accomplishing everyday tasks, from work to entertainment. When you encounter an issue like "Ethernet Doesn't Have a Valid IP Configuration" on Windows 11, it can bring your productivity to a screeching halt. But don't worry, we've got you covered. In this comprehensive guide, we'll walk you through the steps to troubleshoot and fix this common network error, ensuring your Ethernet connection gets back on track. We'll cover a variety of solutions, including tweaking network settings, updating drivers, and more. So, let's dive into Windows 11 and make your Ethernet connection reliable once again.
Command Prompt Solutions
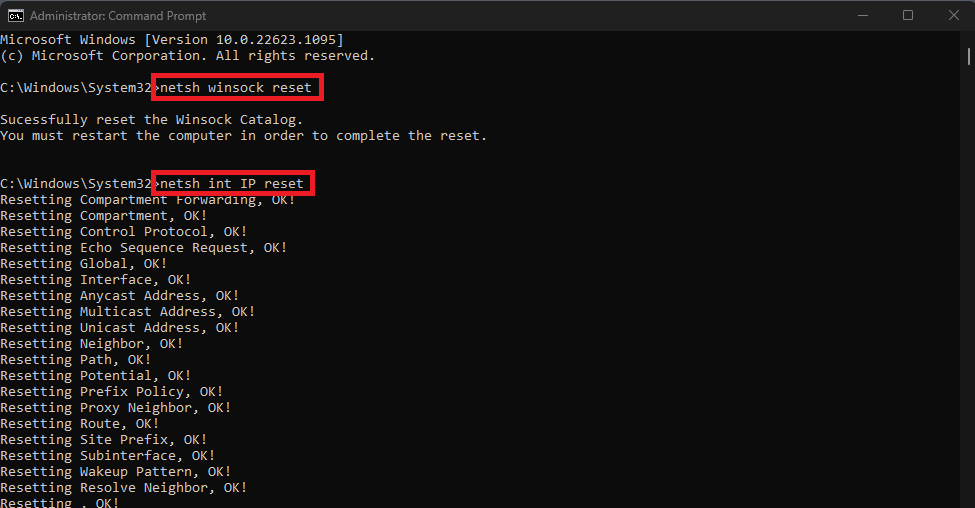
First, click on the Start menu and search for "Command Prompt." Ensure you open the Command Prompt as an administrator.
Enter the following command: “netsh winsock reset”. This command takes a few seconds to reset the Winsock Catalog configurations within Windows.
Next, input the second command: “netsh int IP reset”. This command will uninstall and reinstall your Windows computer's TCP/IP stack. After executing both commands, the "invalid IP configuration" error should be resolved upon restarting your PC. Close the Command Prompt and restart your computer to apply the changes.
Commands
netsh winsock reset
netsh int IP reset
Administrator: Command Prompt
Reinstall Network Adapter Driver
If the previous solution didn't resolve the IP configuration issue, access your Device Manager. Within the list of devices, locate and expand the Network Adapters category. Right-click on the network adapter you're using and choose the Uninstall device option.
Upon restarting your Windows computer, the network adapter driver will be reinstalled automatically, potentially fixing the IP configuration error.
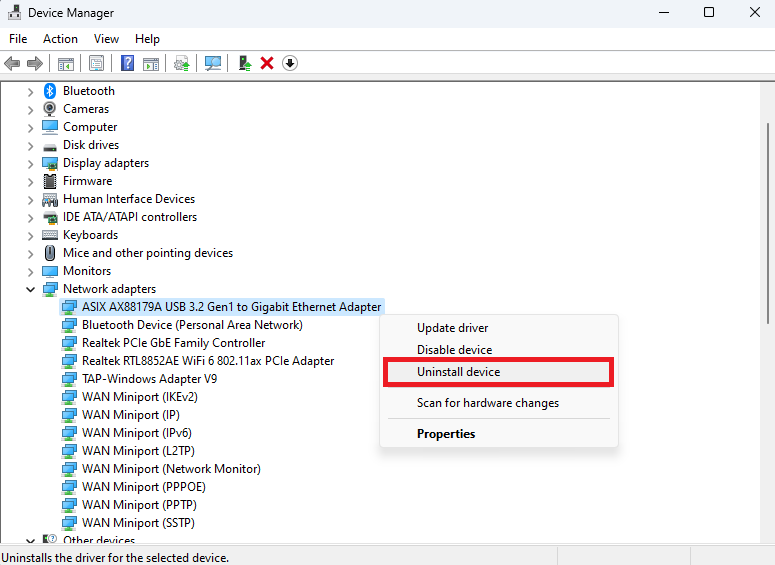
Device Manager > Network Adapters > Uninstall Device
Restore Network Settings to Default
Before rebooting your computer, navigate to your Windows settings. Within the Network & Internet section, find and click on Advanced Network Settings. Choose "Network reset" to revert specific settings back to their default state. Performing a network reset and restarting your PC can help resolve the invalid IP configuration issue.
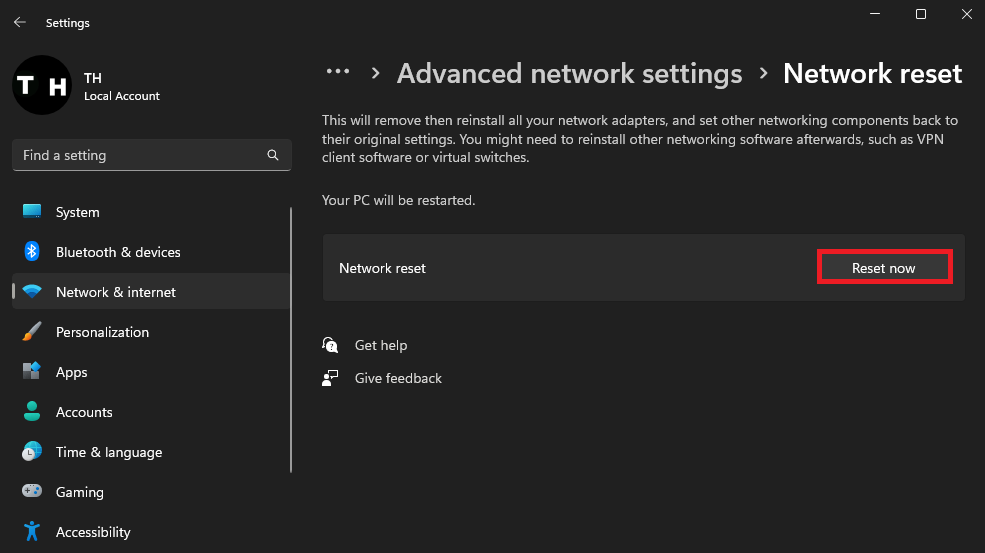
Windows Settings > Network & Internet > Advanced Network Settings
-
This error occurs when your computer is unable to obtain a valid IP address from the DHCP server, resulting in a lack of internet connectivity.
-
Open Command Prompt as an administrator and execute the following commands: "netsh winsock reset" and "netsh int IP reset." Restart your computer to apply the changes and fix the error.
-
Uninstalling the network adapter driver removes its current configuration, and reinstalling it after a restart allows Windows to detect and configure the driver with default settings, potentially fixing the error.
-
In the Device Manager, right-click on your monitor and select "Update Driver." In the subsequent window, choose "Search automatically for drivers" to ensure you're using the most up-to-date d”
-
If the problem persists, consider checking your Ethernet cable, router, or modem for any physical damage or configuration issues. Additionally, you may contact your ISP for further assistance.


