Easily Improve Microphone Quality on Windows 11
Welcome to a world where technology and voice communication go hand in hand. With the rise of remote work and online classes, having a clear and high-quality microphone is essential. Unfortunately, sometimes our microphones may not perform as well as we'd like, leading to muffled or unclear audio. If you're using Windows 11 and experiencing this issue, don't worry! In this article, we'll be sharing with you a step-by-step guide on "How to Fix Easily Improve Microphone Quality on Windows 11". Whether you're a content creator, gamer, or just someone who needs a reliable microphone, we've got you covered. So sit back, grab a cup of coffee, and let's dive in to learn how to easily improve your microphone quality!
Windows Sound Input Settings
Open up your Windows settings. In the System section, click on Sound. Ensure that the correct audio input device is selected and its volume is set to 100. Users with a professional microphone using a mic preamp will have to reduce their input volume to around 70 or 80.
Windows Settings > System > Sound
Microphone Format & Test
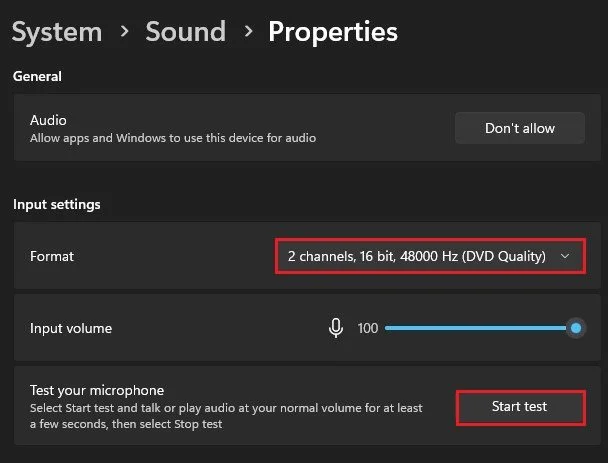
Click on your microphone and make sure that the Format option is set to 2 channels, 16bit, 44'100 Hz, or 48'000 Hz, whichever is available to you. You can test your microphone below to see how loud or quiet it is.
System Settings > Sound > Input Properties
Run Sound Troubleshooter for Input Devices
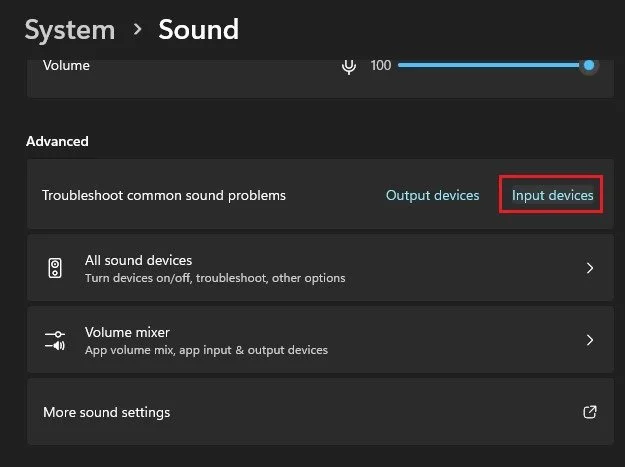
After looking at your mic settings, head back to the Sound section and run the troubleshooter for Input devices. It will take a moment to detect your devices, find potential issues and apply changes in your settings to fix these issues.
Windows Settings > System > Sound
Sound Control Panel
You can close this window and open up your Sound Control Panel by clicking on More sound settings when this is done. On this window, head to the Recording section, right-click all devices that are not your primary microphone and disable them. This will ensure that applications on your PC use the correct audio input device.
Sound Control Panel > Recording
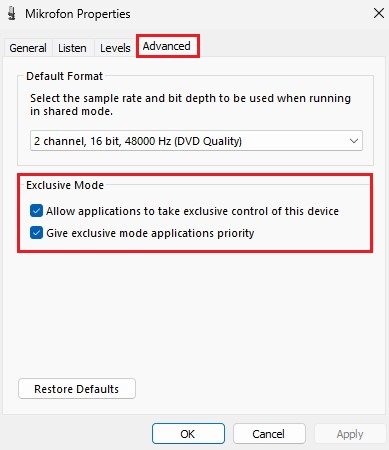
In the Advanced section of your microphone properties, ensure that both of these Exclusive mode options are enabled.
Advanced Microphone Properties
Update Microphone Driver
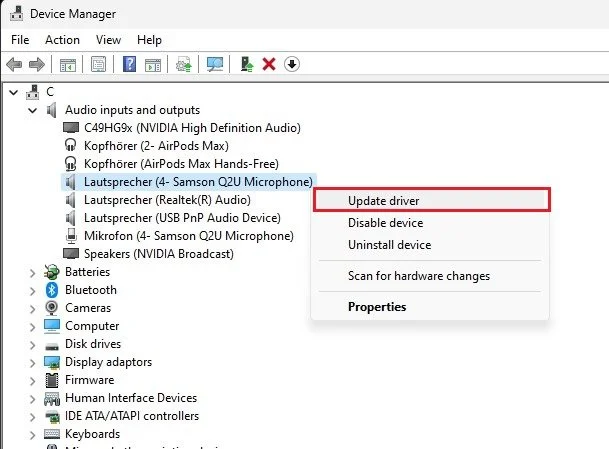
Close your Sound control panel and open your Windows Device Manager. On this window, expand your Audio inputs and outputs. Next, right-click your preferred microphone and select Update Driver. On this window, select Search automatically for drivers, which will take a second to download and install the latest microphone driver in case one is available.
Device Manager > Audio inputs and output > Update driver
Close Apps Using your Microphone
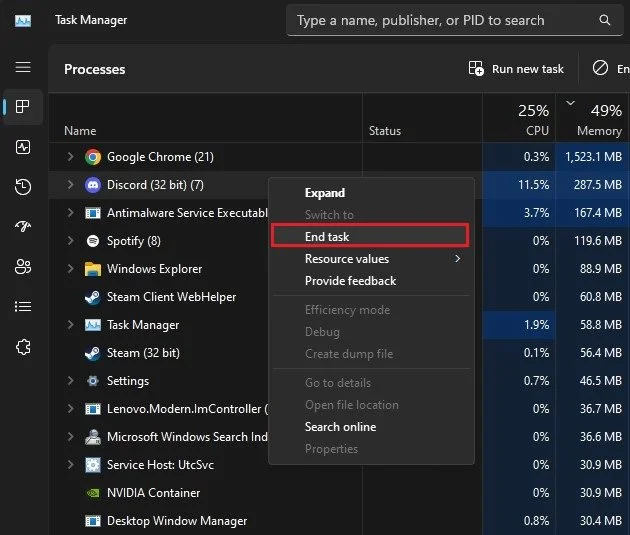
When this is done, close all apps that could use your microphone. In my case, that would be Adobe Audition, Discord, Chrome, or OBS Studio. You can also use your Task Manager to help find and end tasks from running on your PC.
Task Manager > Processes
Allow Apps Access to your Microphone
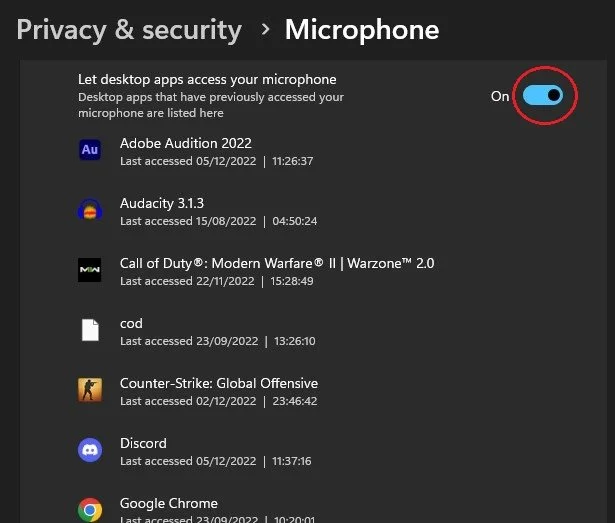
Head back to your Windows settings. Here, navigate to the Privacy & security section and click on Microphone. These settings will help you allow or prevent apps from using your microphone. Scroll down and make sure that the Let desktop apps access your microphone option is enabled.
Windows Settings > Privacy & security > Microphone
Update Windows OS
You should also ensure you're running the latest Windows version, as new updates often fix software-related issues with your peripherals. In the Windows Update section, click on Check for Updates, and download the latest update before restarting your PC.
Windows Settings > Windows Update
3rd Party App Sound Settings
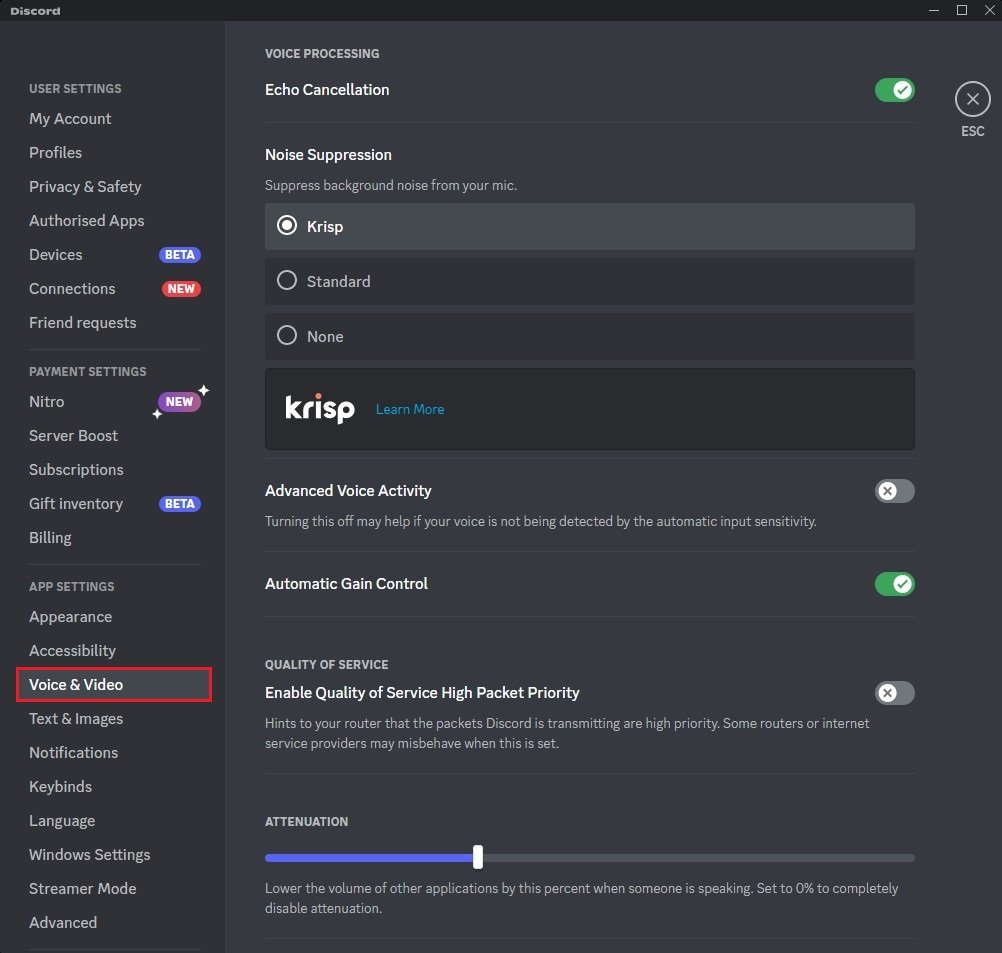
Lastly, use your 3rd party apps to improve your microphone quality. For example, when talking to people on a Discord server, you should use the Discord Voice & Video settings to improve your overall voice. Enable the Echo Cancellation, Noise Suppression, Automatic Gain Control, and so on. Apply your microphone's best settings and test your microphone before joining a call again.
Improve Microphone Quality
To improve your overall input sound, you should reduce the background noise to a minimum. Close windows and prevent devices from running near your microphone. You can also use a microphone arm to prevent it from standing on your desk.
Discord User Settings > Voice & Video


