

Fix Lenovo WiFi Not Working in Windows 11

FOLLOW THE INSTRUCTIONS BELOW
Restart the Lenovo PC
The most common way to fix WiFi connection problems is to restart your Windows 11 Lenovo device and your router or modem.
Verify your WiFi Settings
When this is done and the issue persists, search for WiFi in your start menu to open up your WiFi system settings window. Ensure WiFi is enabled and click on Manage known networks to select the one you wish to connect to.
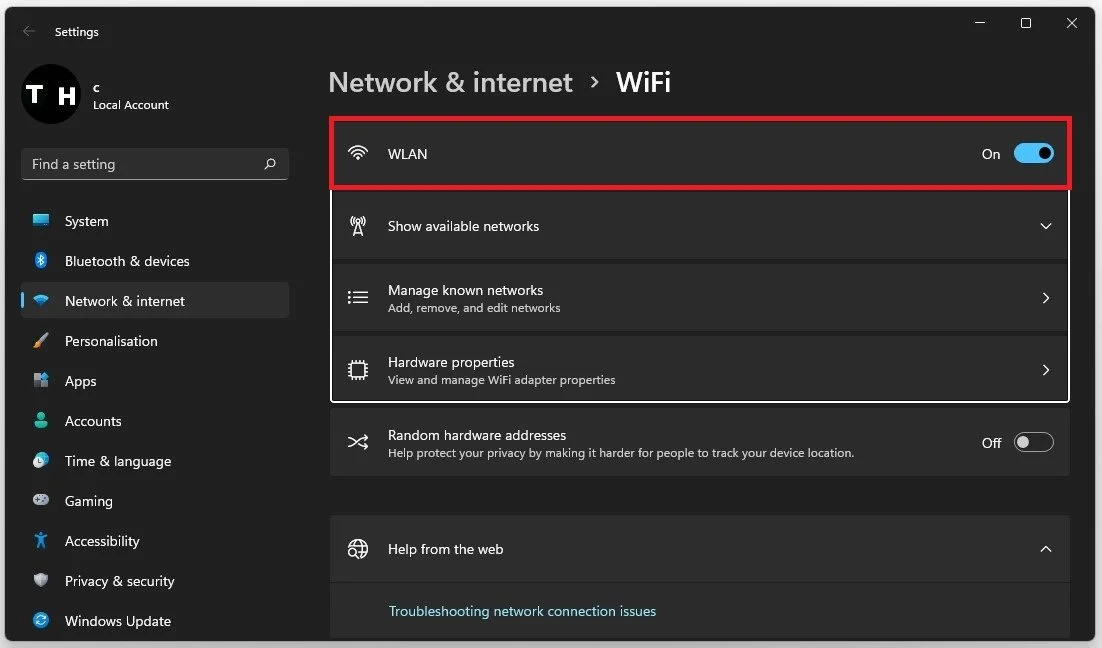
Windows Settings > Network & Internet > WiFi
Ensure that the Connect automatically when in range option is enabled.

Windows Settings > Network & Internet > WiFi > Manage Known Networks
Update Network Adapter Driver
Ensure that your network adapter’s driver is up to date. Search for Device Manager in your start menu search and hit enter. Expand your Network Adapters, right-click the one you are using, and select Update Driver. Lastly, select Search automatically for drivers. In case you’re unsure about which one you are using, then simply update them all.
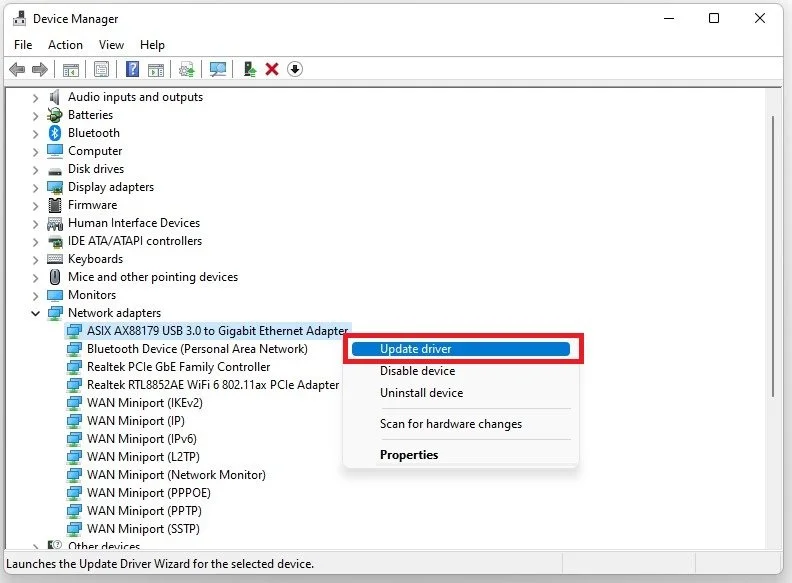
Device Manager > Network Adapters > Update Driver
Adjust the Lenovo Vantage Network Settings
Now, you should try to reconnect your WiFi connection. If the problem persists, use of your Lenovo Vantage application if you have that at your disposal. Search for Vantage in your start menu search to open up the application. You have various options available to you, such as changing the Thermal Mode, enabling Rapid Charge, and previewing your SSD and CPU usage.
Make sure that the Network Boost option is enabled, and in case WiFi security is enabled, then disable it to see if this option is the culprit to your lousy connection. In case it’s disabled, then enable it, as it may also help with an unsecured WiFi connection.
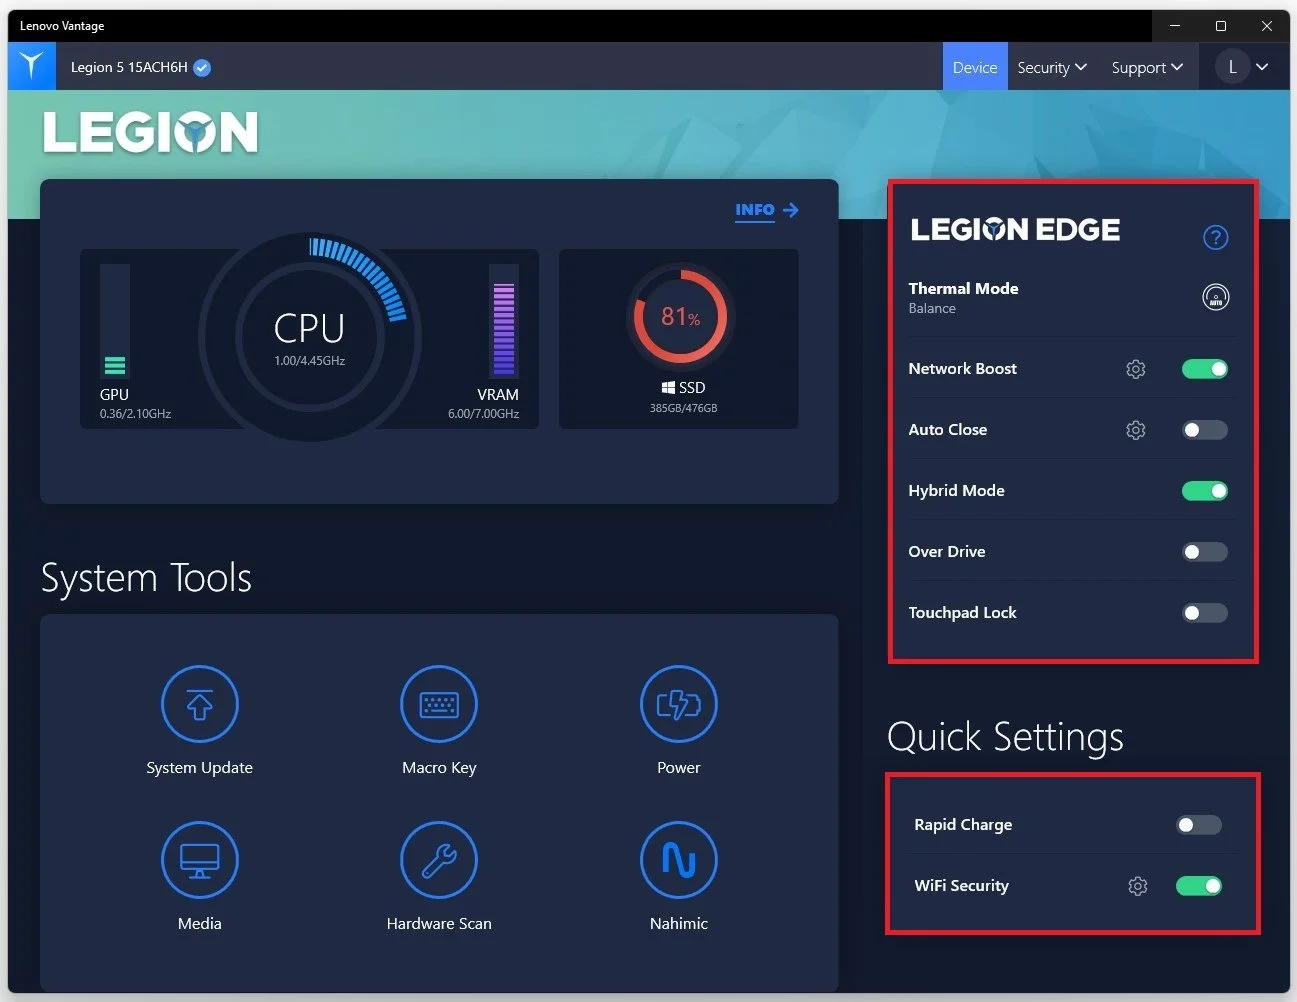
Lenovo Vantage > Network Boost & WiFi Security
Run the Windows Internet Troubleshooter
If you’re still unable to connect to your WiFi, search for Control Panel in your start menu to open it up. View by: Category and select Network and Internet.

Control Panel > Network and Internet
Click on Network and Sharing Centre and then click on Troubleshoot problems. On Windows 11, your settings window will open up. Under Other trouble-shooters, select to run the Internet connections trouble-shooter.
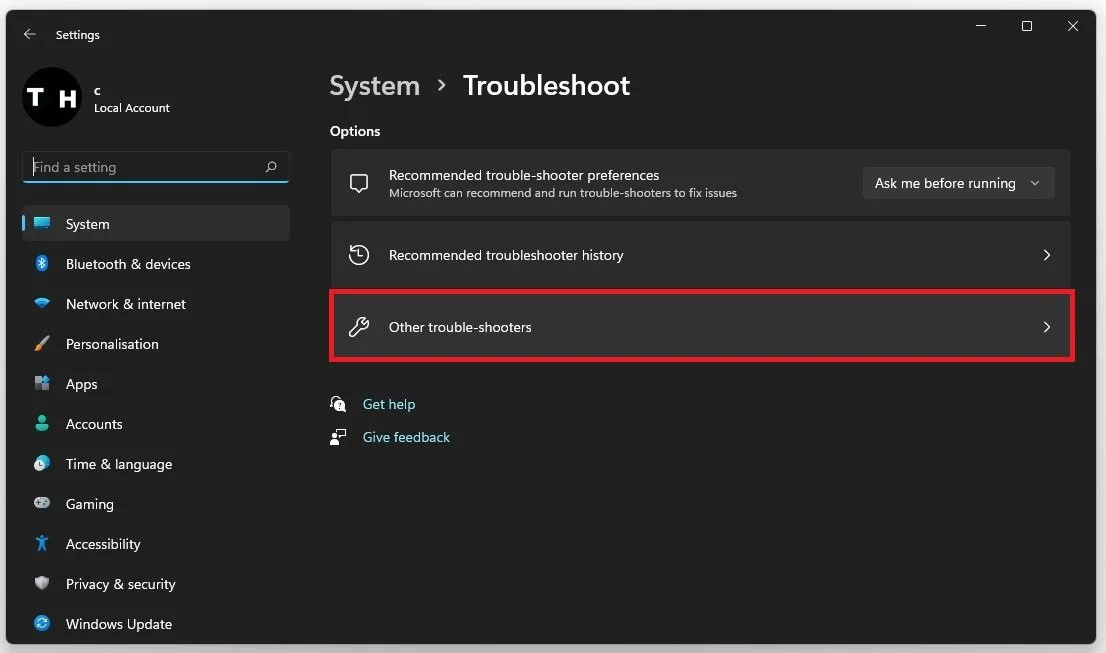
Windows Settings > System > Troubleshoot > Other Trouble-Shooters > Internet connections trouble-shooter
Update Windows 11 Operating System
Ensure that your operating system is up to date. Search for Update in your Start Menu search and select Check for Updates. In your system settings, click on Check for updates, Download, or Install now. When the download is completed, restart your system to install the latest Windows update.

Windows Settings > Windows Update


