How To Play Last Day on Earth on PC & Mac (LDOE)

Last Day on Earth is an action-packed survival game in a post-apocalyptic world. Players are tasked with surviving against the harsh environment and zombie-infested lands to keep their avatars alive. The game is available on mobile devices but can also be played on PC and Mac using an emulator. This article will show you how to play Last Day on Earth on PC & Mac with BlueStacks.
Download & Install BlueStacks
To play Last Day on Earth on your PC, you must use an Android emulator, such as Bluestacks. Bluestacks is a popular choice to play mobile games on your PC, as it’s optimized for playing mobile games. This should take a second to complete, and you can follow the install wizard to install the application to your system.

Download BlueStacks Installer
Download Last Day on Earth
Open your Play Store and log in with your Google account. Search for Last Day on Earth, and download the game to your BlueStacks emulator. This might take a few minutes to complete depending on your network connection.

Google Play Store > Last Day on Earth: Survival
BlueStacks Performance Settings
While downloading the game, you should look at your emulator settings. Click on this gear icon to access these settings. In the Performance tab, you should set these according to your PC’s performance. Allocate a High amount of CPU cores if you don’t have a lot of other applications running in the background. The same goes for your Memory allocation. For users with 4GB or less RAM, set this option to Low.

BlueStacks Performance Settings
Under Performance Mode, make sure to set this option to Balanced. This will reduce the memory and CPU usage if your PC lags or you otherwise encounter low performance. I prefer to enable the high FPS option and set the frame rate of the emulator according to my screen refresh rate.

BlueStacks Settings > Frame rate
BlueStacks Display Settings
In your Display settings, I like to use a resolution of 1920 x 1080, but you can set this to anything you want. You can leave the other settings to their default option and play Last Day on Earth to see how well it runs on your PC.
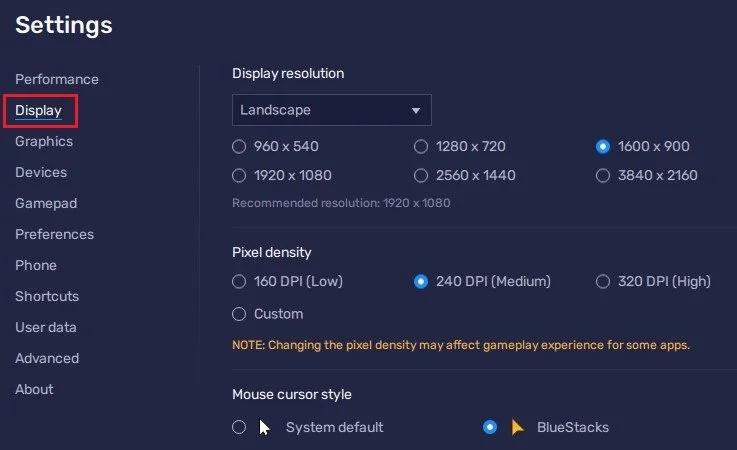
BlueStacks Settings > Display
Play Last Day on Earth
After downloading Last Day on Earth and opening the game for the first time, you will be required to sign in with your Google account, select a server and continue playing where you left off if you logged into the same account.
Click on the keyboard icon in your BlueStacks menu bar on the right-hand side. This will allow you to enable and disable the On-Screen Controls option. This will help you figure out which keyboard keys to play Last Day on Earth on your PC.
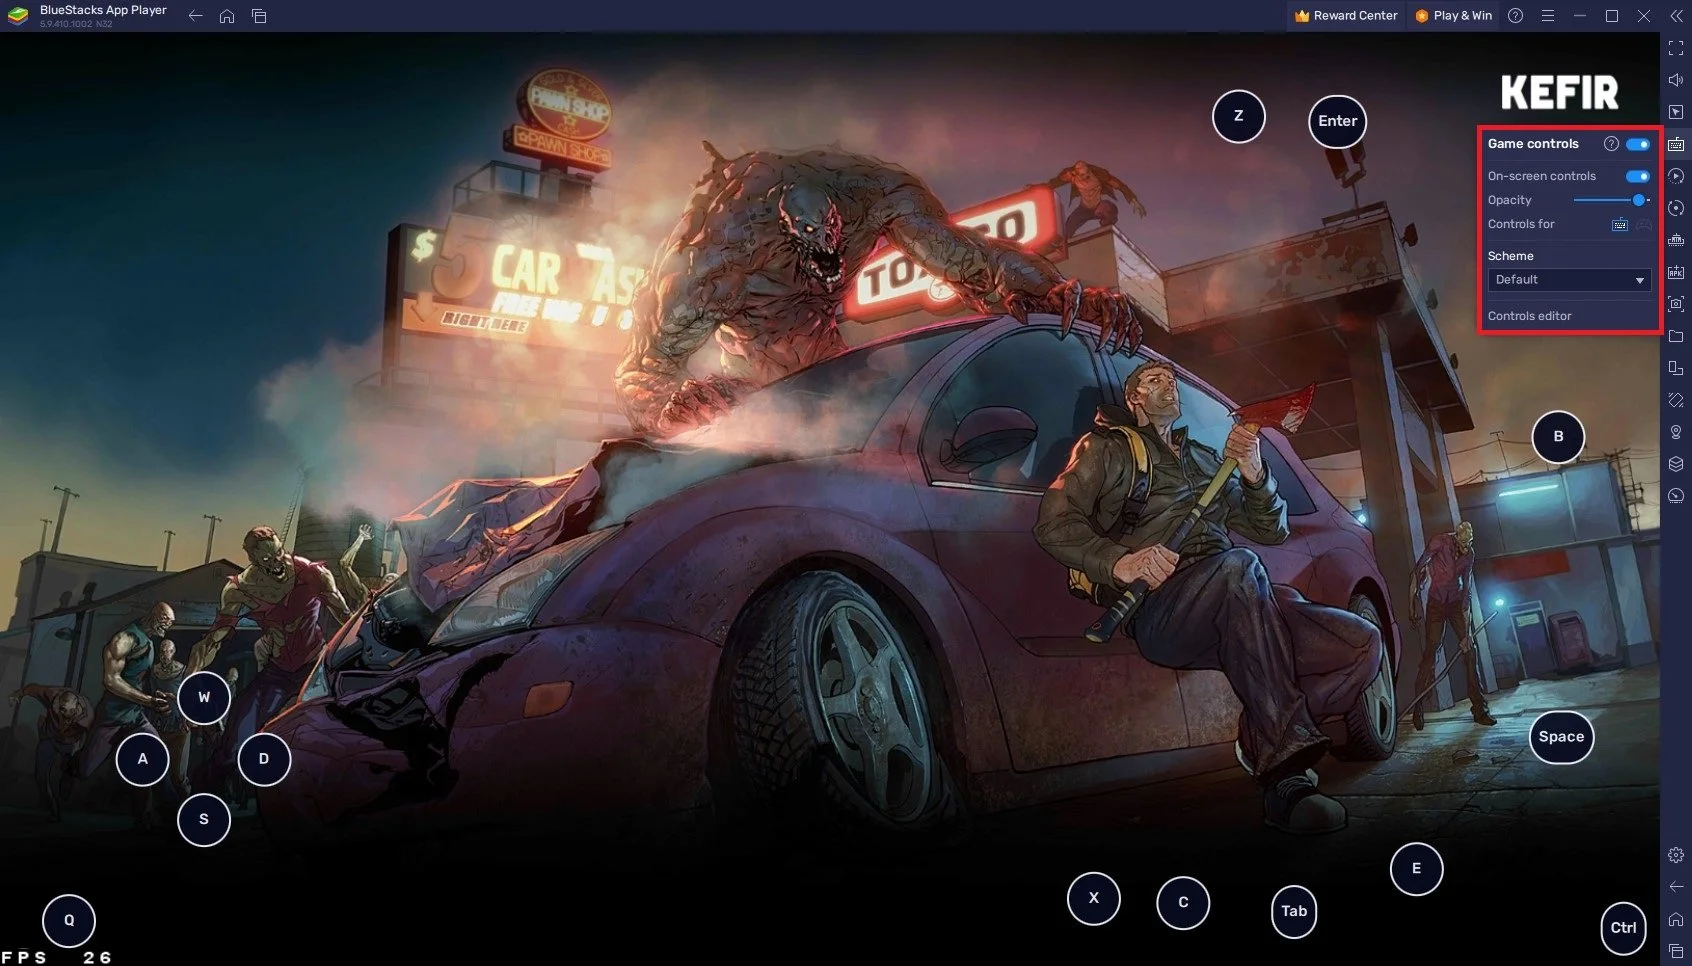
Last Day on Earth Game Controls
Tips and Tricks for Playing Last Day on Earth on PC & Mac with BlueStacks
Here are some tips and tricks for playing Last Day on Earth on your PC or Mac:
Use the mouse and keyboard for better control and accuracy.
Adjust the graphics and performance settings in BlueStacks for a smoother experience.
Use the multi-instance feature in BlueStacks to play multiple instances of Last Day on Earth.
-
Yes, it is safe to play Last Day on Earth on PC & Mac with BlueStacks. BlueStacks is a reputable and widely used Android emulator.
-
Yes, you can use your mobile progress on Last Day on Earth on PC & Mac with BlueStacks. Simply sign in to your Google account in BlueStacks to access your progress.
-
No, you do not need a powerful computer to play Last Day on Earth on PC & Mac with BlueStacks. BlueStacks is designed to run smoothly on most computers, even those with low specifications.
-
The gameplay is essentially the same between playing Last Day on Earth on mobile and PC & Mac with BlueStacks. However, playing on a larger screen and with a mouse and keyboard may provide a more immersive experience.
-
Yes, you can use a controller to play Last Day on Earth on PC & Mac with BlueStacks. Simply connect your controller to your computer and configure it in BlueStacks to play the game with a controller.