How To Play Pixel Gun 3D on PC & Mac
Pixel Gun 3D is a fast-paced, action-packed game designed for mobile devices. It features a wide range of weapons, maps, and game modes that will keep you engaged and entertained for hours. The game is free to download and play, but it also offers in-app purchases that allow you to unlock new weapons and upgrades.
While the game is designed for mobile devices, you can now play it on your PC or Mac using an Android emulator. BlueStacks is one of the most popular and user-friendly options, allowing you to run Android apps on your computer.
Download & Install BlueStacks
To play Pixel Gun 3D on your PC, you must use an Android emulator, such as Bluestacks. Bluestacks is a popular choice to play mobile games on your PC, as it’s optimized for playing mobile games. This should take a second to complete, and you can follow the install wizard to install the application to your system.
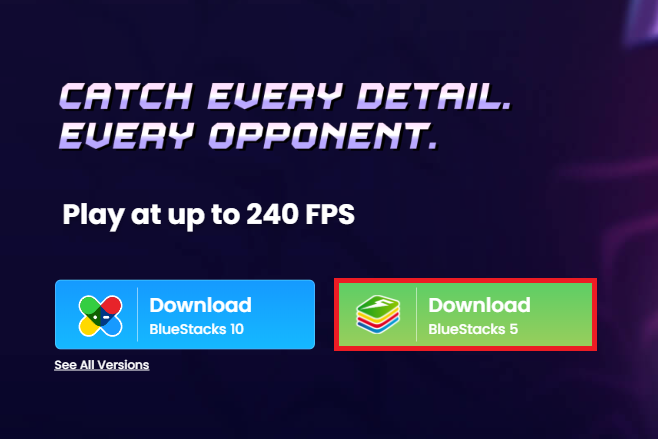
Download BlueStacks Installer
Download Pixel Gun 3D
Open your Play Store and log in with your Google account. Search for Pixel Gun 3D, and download the game to your BlueStacks emulator. This might take a few minutes to complete depending on your network connection.
Play Pixel Gun 3D on PC
BlueStacks Performance Settings
While downloading the game, you should look at your emulator settings. Click on this gear icon to access these settings. In the Performance tab, you should set these according to your PC’s performance. Allocate a High amount of CPU cores if you don’t have a lot of other applications running in the background. The same goes for your Memory allocation. For users with 4GB or less RAM, set this option to Low.

BlueStacks Performance Settings
Under Performance Mode, make sure to set this option to Balanced. This will reduce the memory and CPU usage if your PC lags or you otherwise encounter low performance. I prefer to enable the high FPS option and set the frame rate of the emulator according to my screen refresh rate.

BlueStacks Settings > Frame rate
Windows Display Settings
If unsure about your refresh rate, right-click your desktop and select Display Settings. From here, make sure that the correct display is selected, scroll down, and click on Advanced Display. This will allow you to preview your refresh rate and change it if you want. Also, if you want to troubleshoot performance issues, then make sure to enable the FPS counter option.
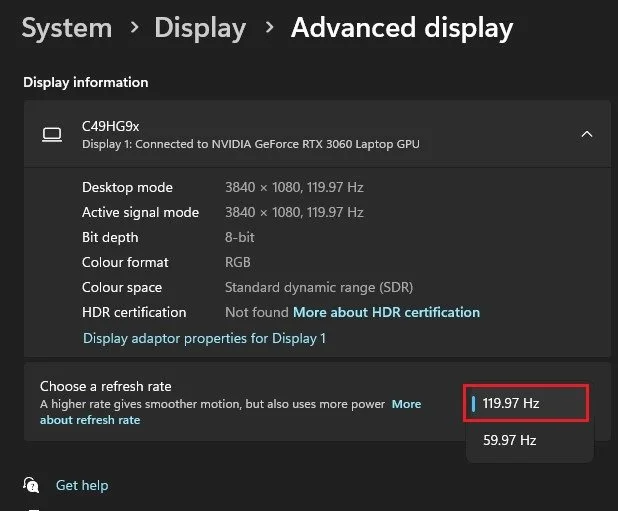
Windows Settings > Display > Advanced Display
BlueStacks Display Settings
In your Display settings, set the display orientation to landscape, and choose a proper resolution to play Pixel Gun 3D on your monitor. You can also adjust the size of this window by dragging its corners.
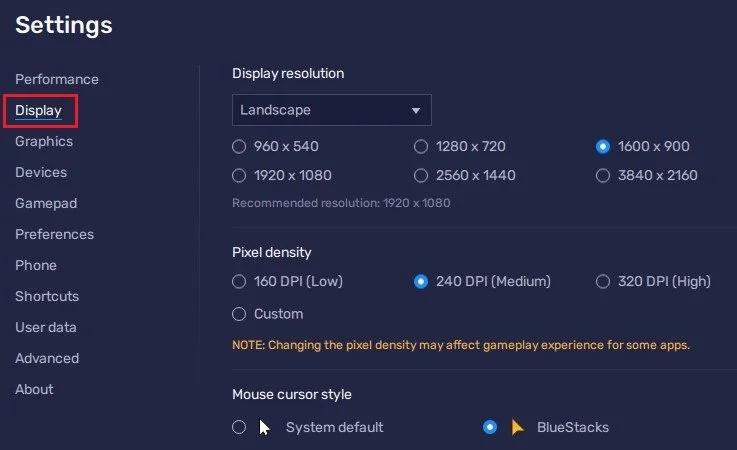
BlueStacks Settings > Display
Play Pixel Gun 3D
While in-game, click on the keyboard icon in your BlueStacks menu bar on the right-hand side. This will allow you to enable and disable the On-Screen Controls option. This will help you figure out which keyboard keys to play Pixel Gun 3D on your PC.
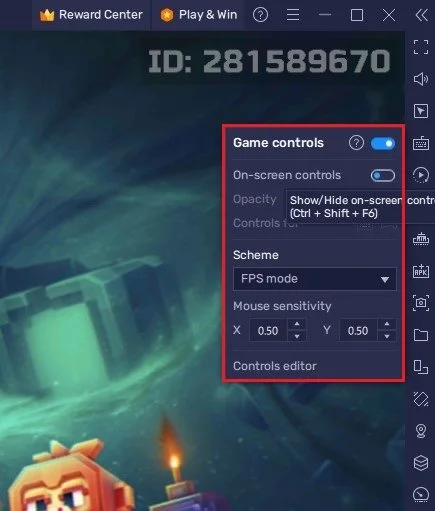
Pixel Gun 3D Game Controls
Pixel Gun 3D In-Game Settings
After loading into the game, head over to your in-game settings. Change your camera sensitivity and acceleration settings. You can also change the Game frame rate option from 60, the default value, to 30 if you experience in-game lag.
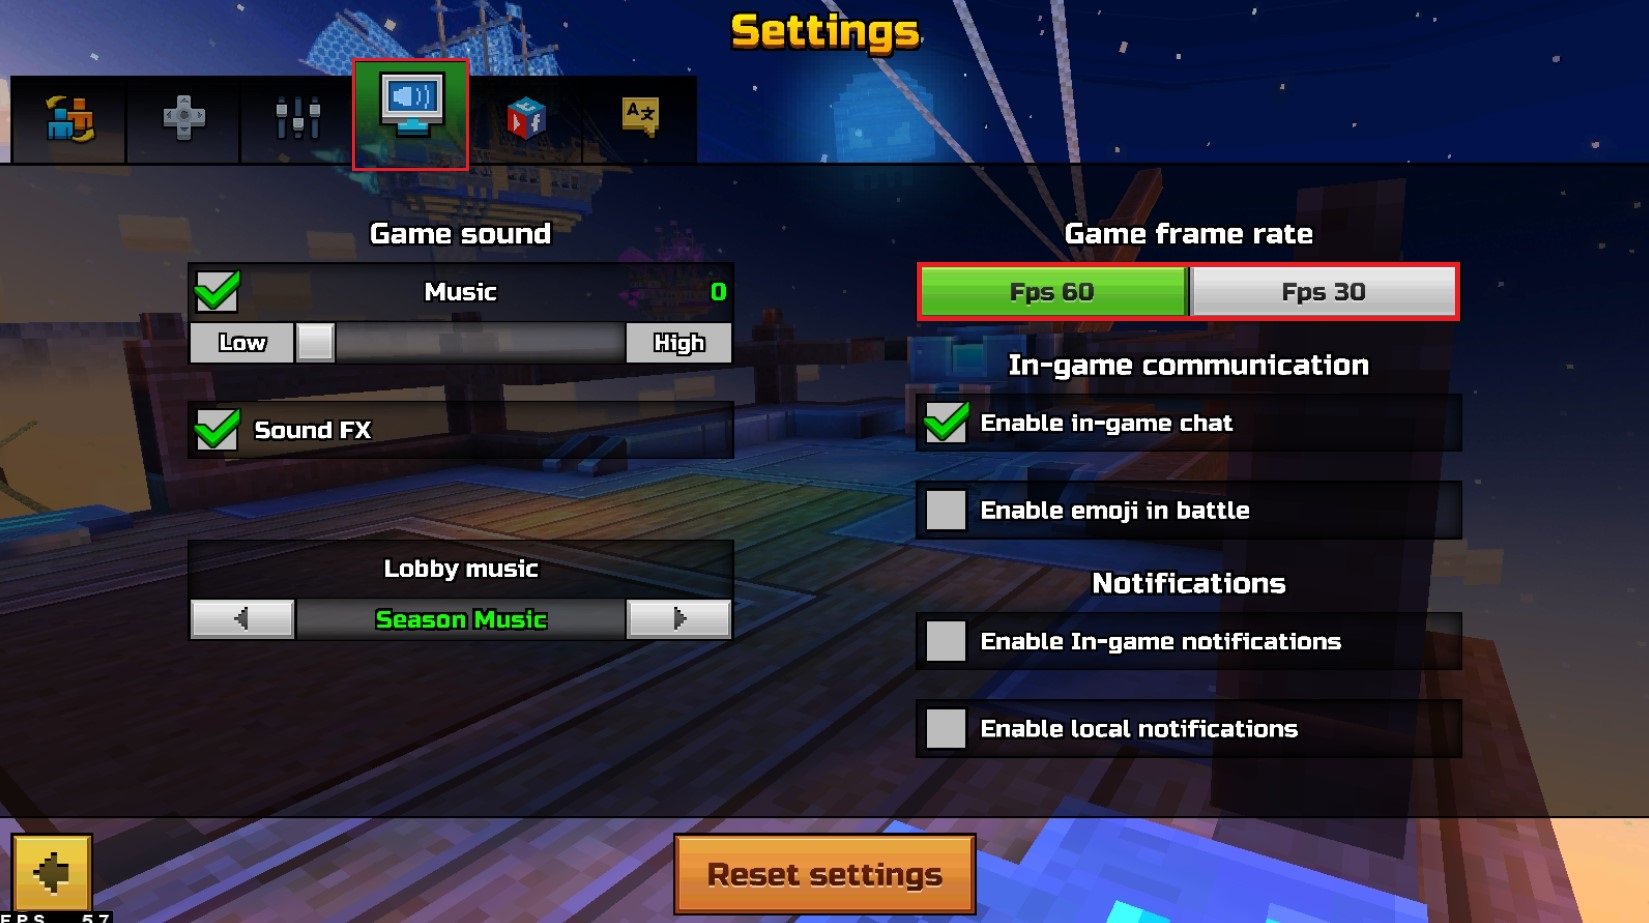
Pixel Gun 3D Graphics Settings
Playing Pixel Gun 3D on BlueStacks
Playing Pixel Gun 3D on BlueStacks is like playing it on a mobile device. You'll have access to all the same weapons, maps, and game modes, and you'll be able to play with other players worldwide.
One of the key benefits of playing Pixel Gun 3D on BlueStacks is the larger screen size. You'll be able to see more of the action, and you'll have a clearer view of your enemies. This can give you a significant advantage in combat and make the game more enjoyable overall.
Another benefit of playing Pixel Gun 3D on BlueStacks is the improved controls. You'll be able to use your mouse and keyboard, giving you greater precision and accuracy. This can be especially useful when trying to take down enemy players.
Tips and Tricks
Adjust the controls: You can adjust the controls in Pixel Gun 3D to suit your playstyle better. Go to the settings menu and experiment with different control options until you find the best one.
Use the right weapon: There are a variety of weapons to choose from in Pixel Gun 3D, and each one is best suited to different situations. Experiment with different weapons to find the ones that work best for you.
Stay mobile: Moving around the map can be a great way to avoid enemy fire and stay one step ahead of your opponents. Make use of cover and keep moving to stay alive.
Work with your team: Pixel Gun 3D is a multiplayer game, and working with your team is crucial to success. Make sure to communicate with your teammates and coordinate your tactics to take down the enemy.
Practice, practice, practice: The more you play Pixel Gun 3D on BlueStacks, the better you will get. Take the time to practice your aim and improve your skills, and you'll be a force to be reckoned with in no time.
-
Yes, BlueStacks is a safe and secure platform. It's been around for many years and has been used by millions of people around the world.
-
Yes, you can play Pixel Gun 3D on BlueStacks for free. The game itself is also free to download and play, but it does offer in-app purchases that allow you to unlock new weapons and upgrades.
-
Yes, playing Pixel Gun 3D on BlueStacks is essentially the same as playing it on a mobile device. You'll have access to all the same weapons, maps, and game modes, and you'll be able to play with other players from around the world.
Playing Pixel Gun 3D on PC & Mac with BlueStacks is a great way to enjoy this popular multiplayer shooter game on a larger screen and with improved controls. By following the steps outlined in this article, you'll be able to set up BlueStacks and start playing Pixel Gun 3D in no time. So grab your mouse and keyboard, and get ready for some fast-paced action!