How To Change your Mouse Pointer Speed on Windows 11
Are you tired of your mouse pointer moving too fast or too slow on your Windows 11 PC? Do you want to customize your mouse pointer speed to fit your preferences and needs? Look no further, because in this article, we'll show you exactly how to change your mouse pointer speed on Windows 11.
Whether you're a gamer who wants to adjust the mouse pointer speed for quick reflexes, or you prefer a slower, more precise pointer for office work, Windows 11 allows you to adjust your mouse speed settings easily. We'll walk you through the step-by-step process and provide helpful tips.
Adjust the Windows Pointer Settings
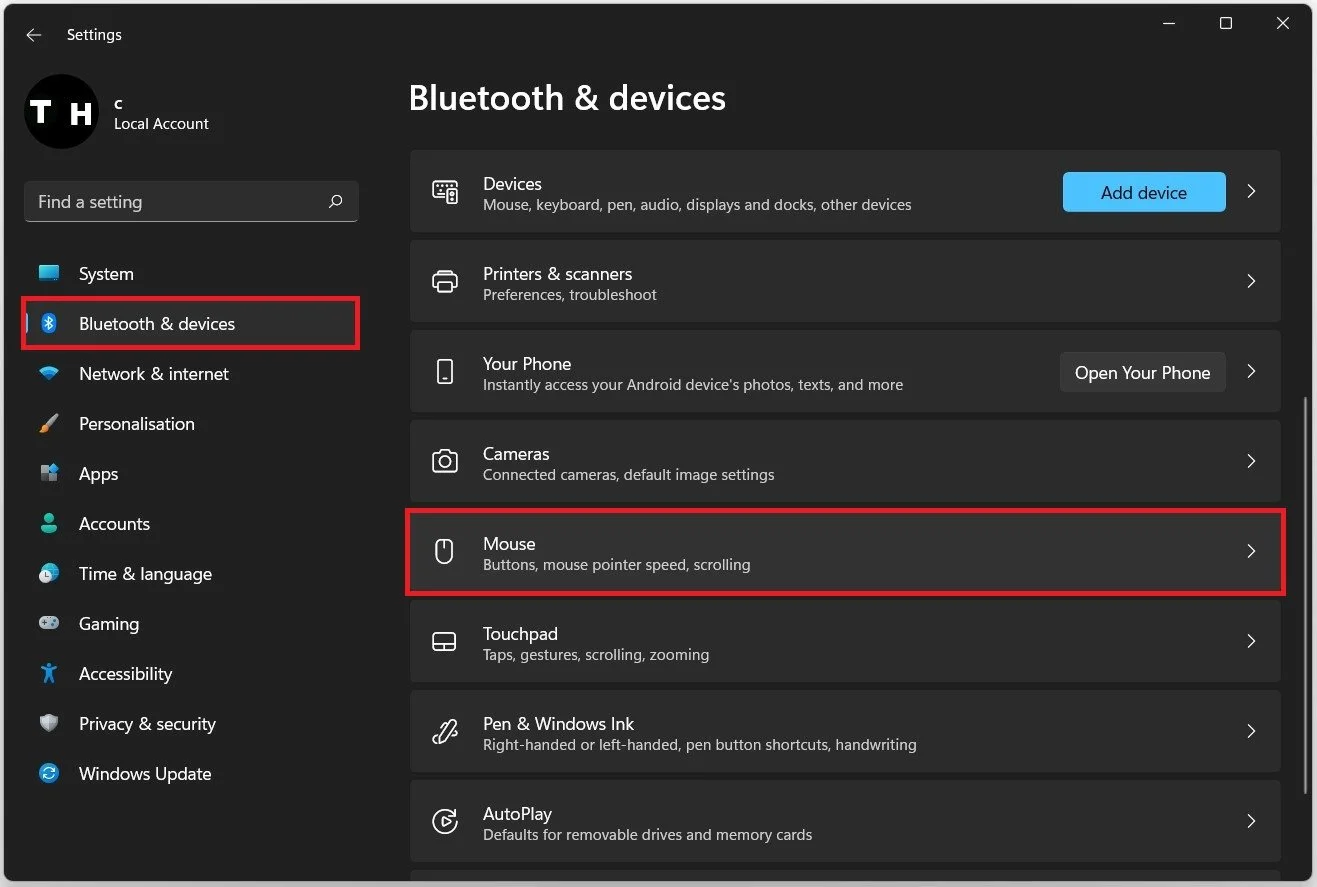
Your mouse pointer speed will determine how slow or fast your Windows 11 cursor is moving in relation to your mouse movement. To change it, open up your system settings window. In the Bluetooth & Devices section, navigate to Mouse.
Windows Settings > Bluetooth & Devices > Mouse
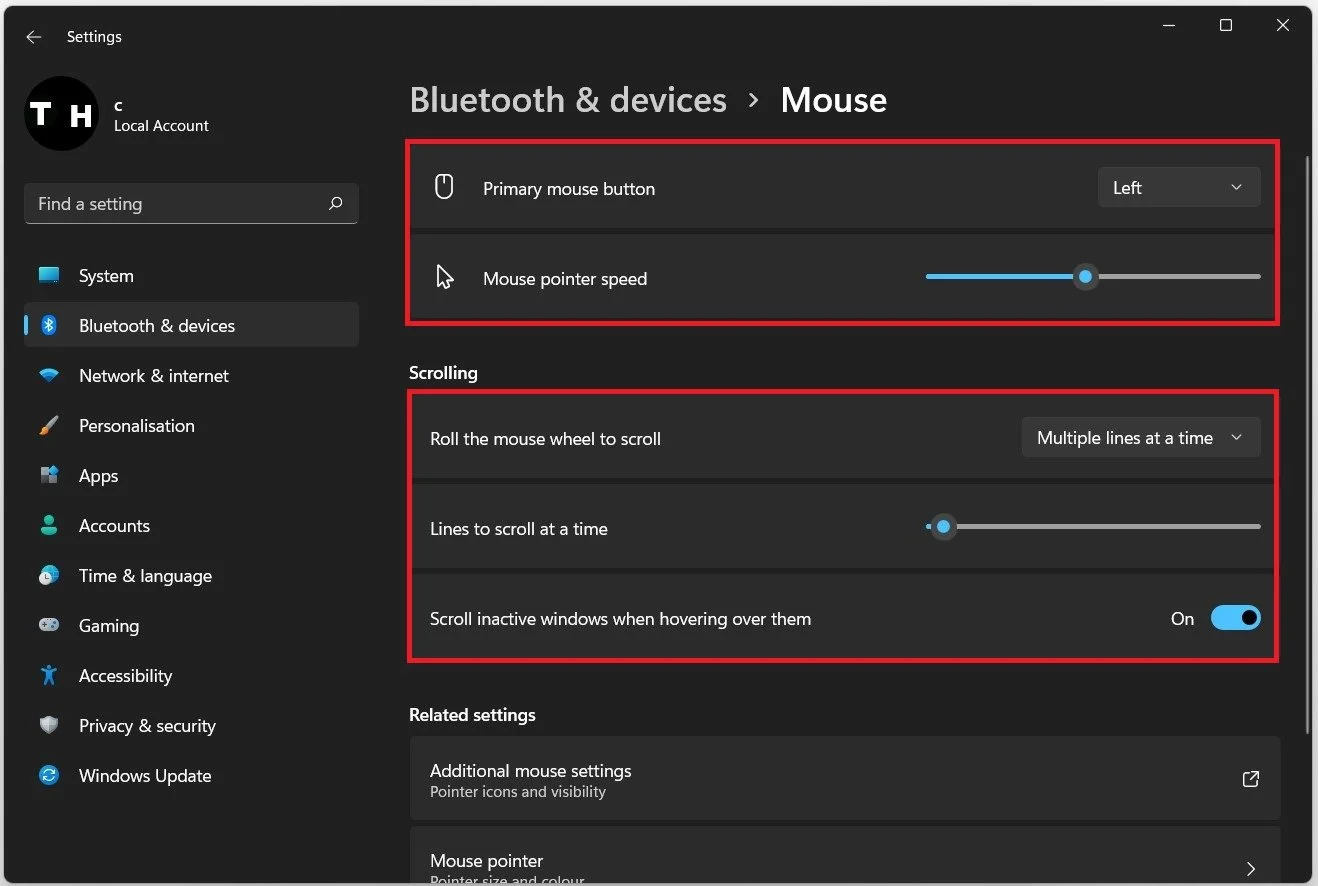
In the Mouse section of your settings, you can change your Primary mouse button, your Mouse pointer speed, and below how fast your Mouse Scroll is.
Mouse Settings > Mouse Pointer Speed
Additional Mouse Settings
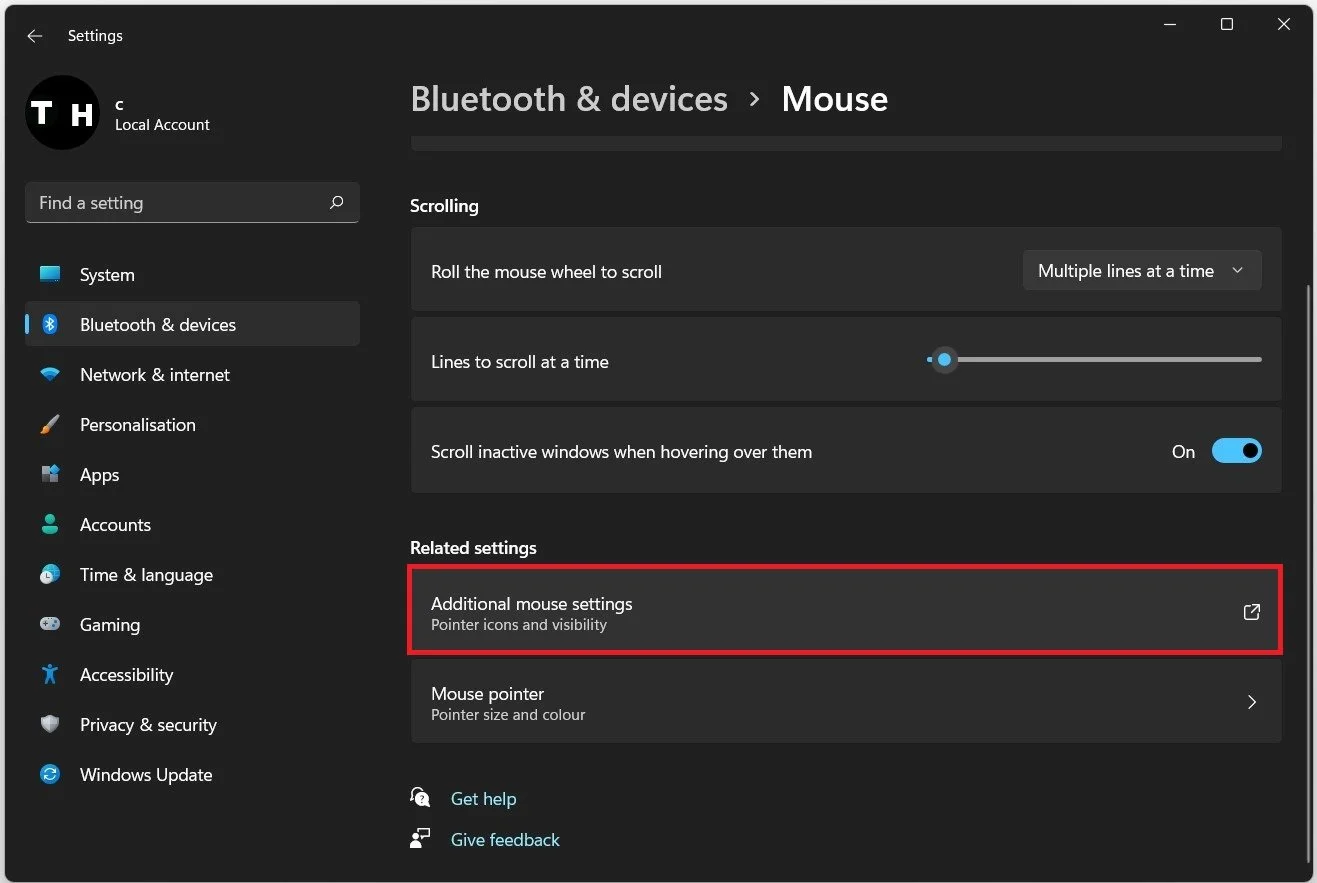
For additional mouse settings, click on Additional mouse settings. A new window will open up.
Mouse Settings > Additional mouse settings
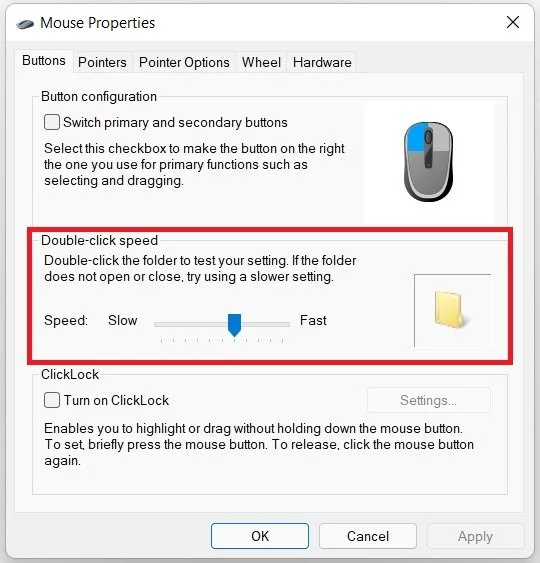
In your Mouse properties window, you can switch your primary and secondary buttons if you are left, or right-handed, for example.
Mouse Properties > Buttons > Double-Click Speed
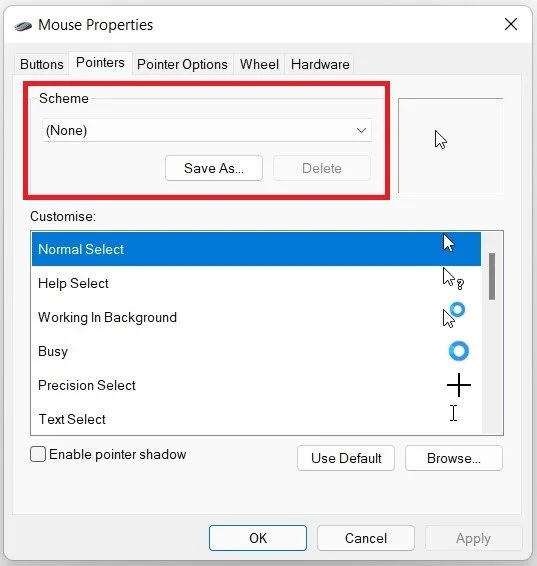
Under Pointers, you can change the style of your mouse pointer and other cursor icons for Windows 11.
Mouse Properties > Pointers > Customise
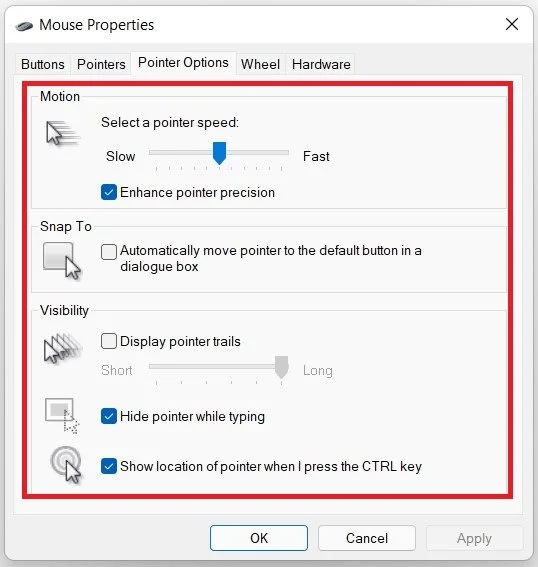
Under Pointer Options, you have the option to add pointer trails, hide the pointer while typing, and show the location of the pointer when using the CTRL key, which I often use.
Mouse Properties > Pointer Options
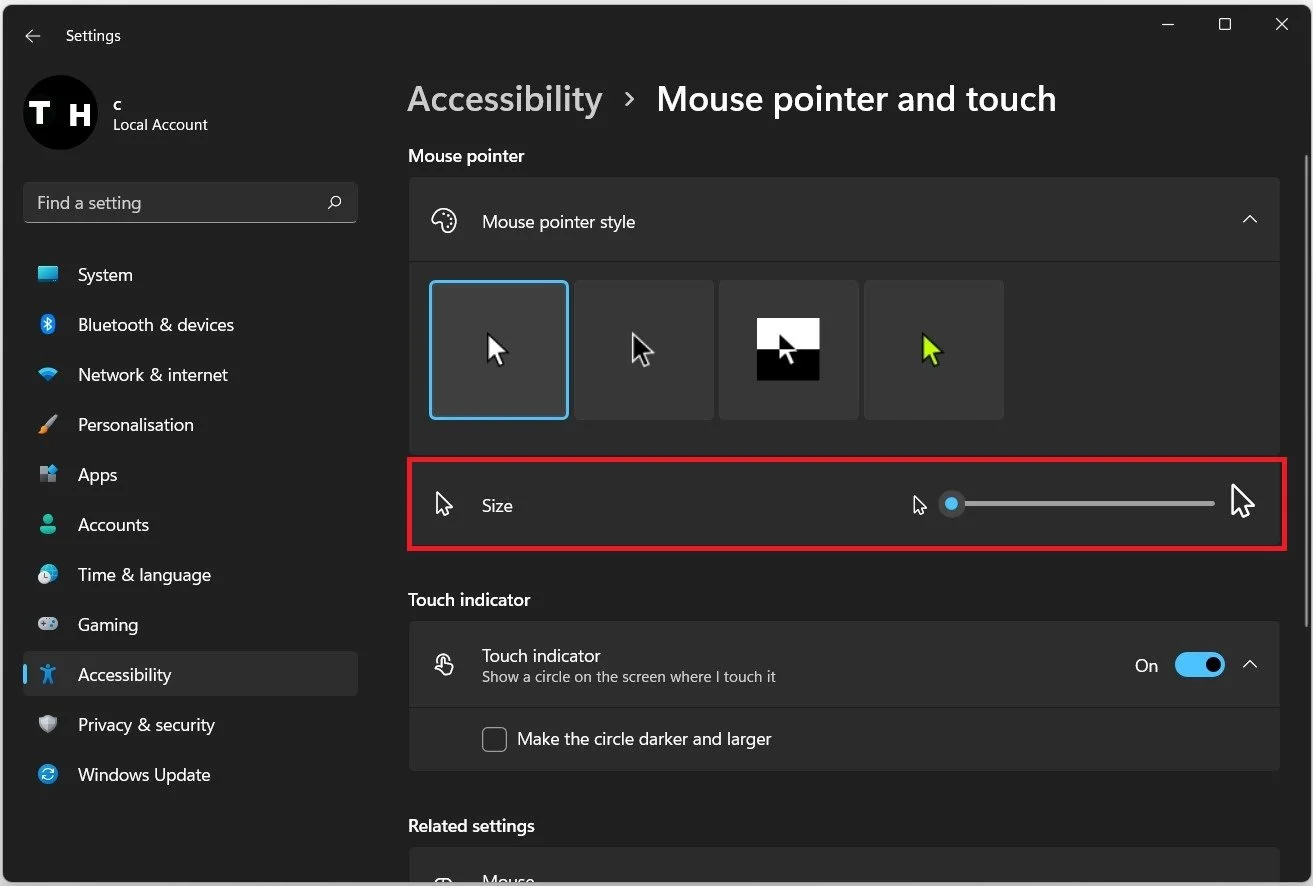
Back in your Mouse settings, click on Mouse pointer to change the Mouse pointer size to your liking.
Mouse Pointer and Touch Settings


