

Windows 11 - How To Partition Hard Drives Guide

Windows 11 is the latest operating system released by Microsoft, and it comes packed with a host of new features that can enhance your overall computing experience. One of the most essential aspects of managing your data on Windows 11 is to partition your hard drive effectively. Partitioning your hard drive can improve your system's performance, allowing you to better organize your data into separate sections.
In this guide, we will take a closer look at the process of partitioning hard drives on Windows 11. Whether you are a professional or a casual user, this guide will provide you with a comprehensive overview of the steps involved in partitioning hard drives on Windows 11.
Access your Partition Properties
Search for Computer Management in your start menu search and select Computer Management.
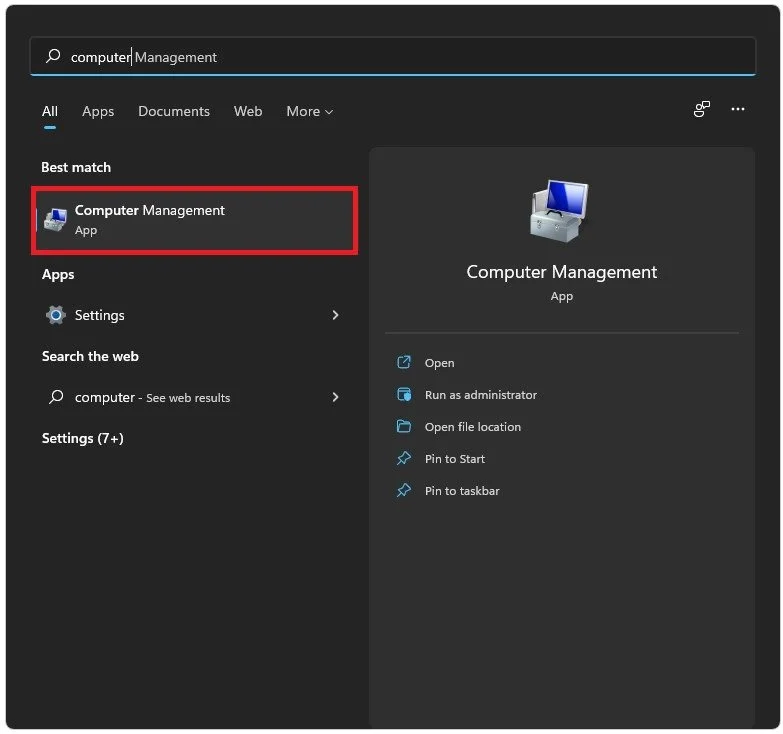
Start Menu Search > Computer Management
On this window, expand your Storage and select Disk Management. This will allow you to preview your Primary Partition where your operating system is installed. We currently only use one SSD; in most cases, you will see two or more storage listed here.
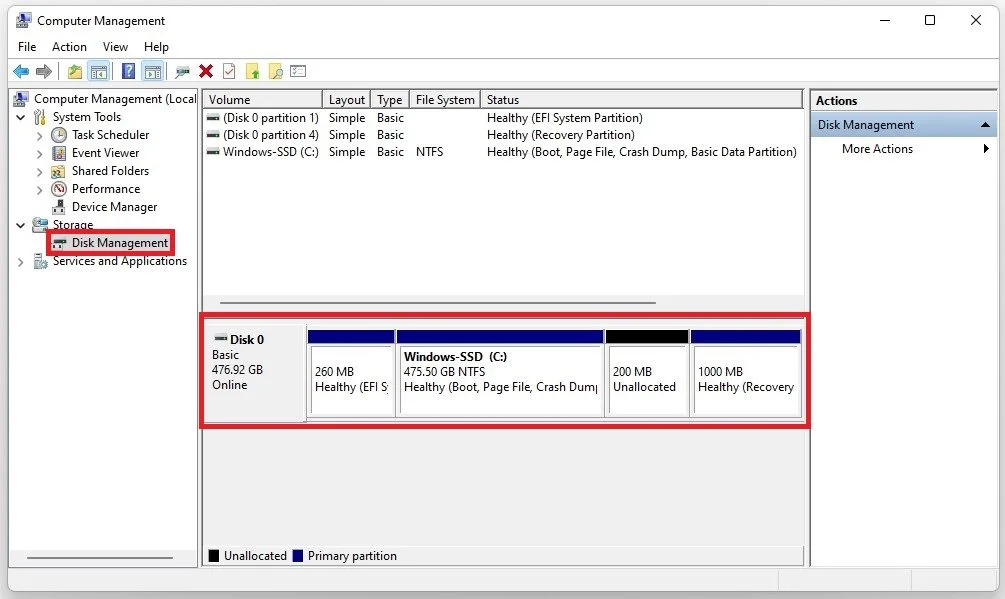
Storage > Disk Management
Right-click the hard drive where you would like to create a new partition and select Shrink Volume.

Right-click Hard-Drive > Shrink Volume
It will take a few seconds to load, and you can allocate the space to partition in MB. Let’s set this to 200MB as an example, you might want to increase the size. When clicking on Shrink, it will load for some time until you can see the unallocated disk space in your preview.

Enter the amount of space to shrink in MB
Create A New Partition
Right-click the new unallocated space and select New Simple Volume.
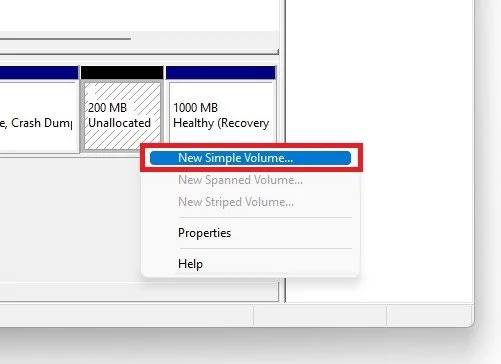
Right-click Space > New Simple Volume
Finally, follow the New Simple Volume Wizard.
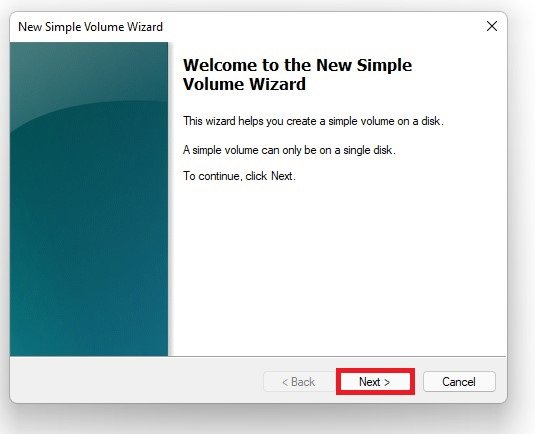
Set up the new volume
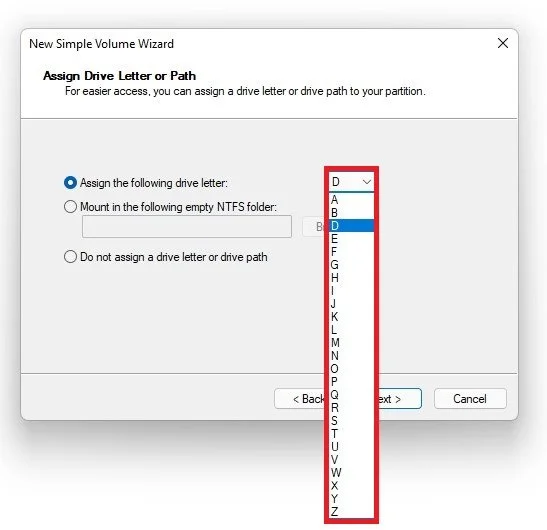
Click on Next, allocate the correct amount of space, and then you can assign a drive letter or path to your new partition.
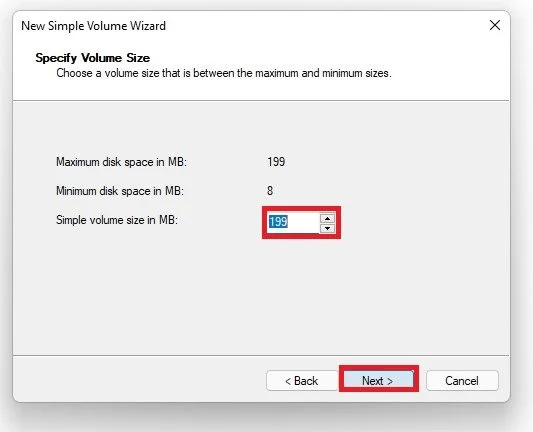
New Simple Volume Wizard > Simple Volume Size in MB
Make sure to only use a new drive letter, so C: would in most cases not work.
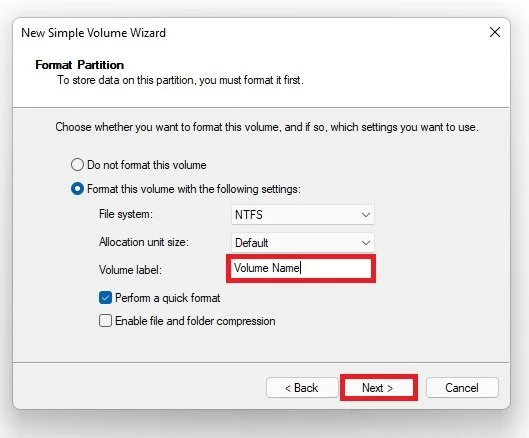
Click on Next, and then you can name the new Volume to anything you like.
Click on Next and then on Finish. Your new partition will then be created with the name, disk space and drive letter you selected before.
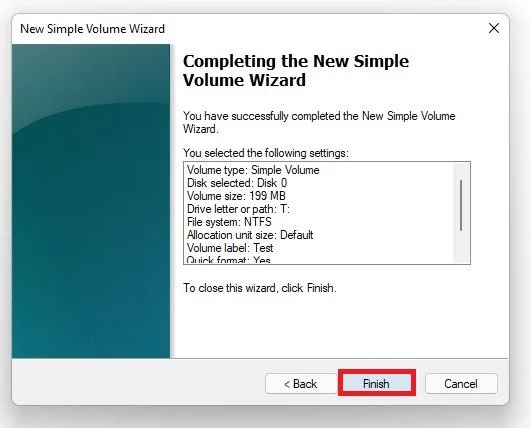
Completing the New Simple Volume Wizard


