WiFi Not Working on Windows 11 Fix - Not Showing, Not Connecting
Windows 11 is the latest operating system by Microsoft, boasting advanced features and better performance than its predecessor. One of the most crucial functions of any device in today's connected world is the ability to connect to the internet via WiFi. However, you may encounter issues with your WiFi on Windows 11, such as it not showing or not connecting. This problem can be frustrating, especially if you rely on the internet for work or entertainment. In this article, we will guide you on how to fix the WiFi not working on Windows 11 issue with simple and easy-to-follow steps.
Restart the Wi-Fi Process on your PC
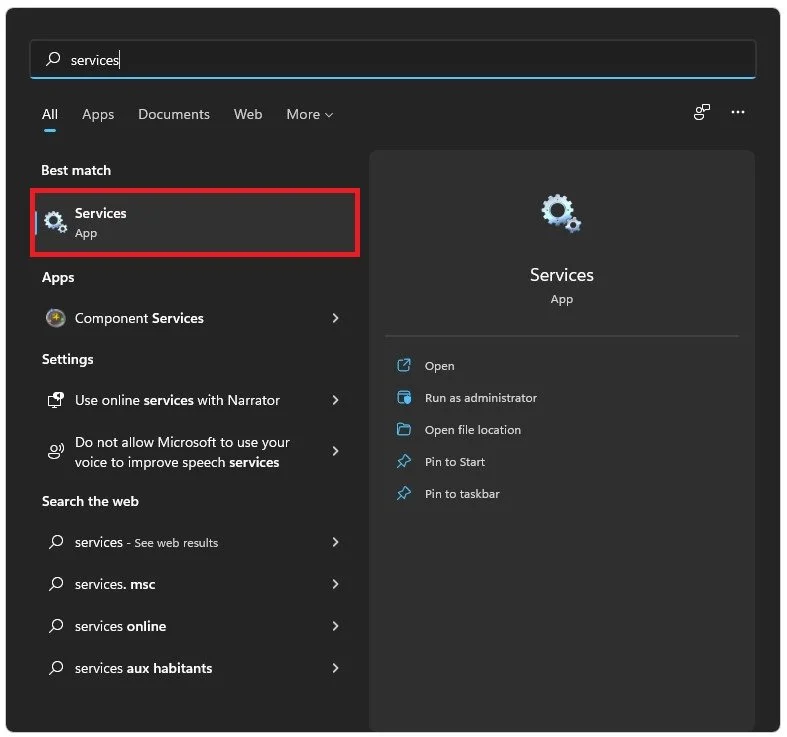
Open up your Windows Services Manager by searching for Services in your start menu search.
Services > Windows Services Manager
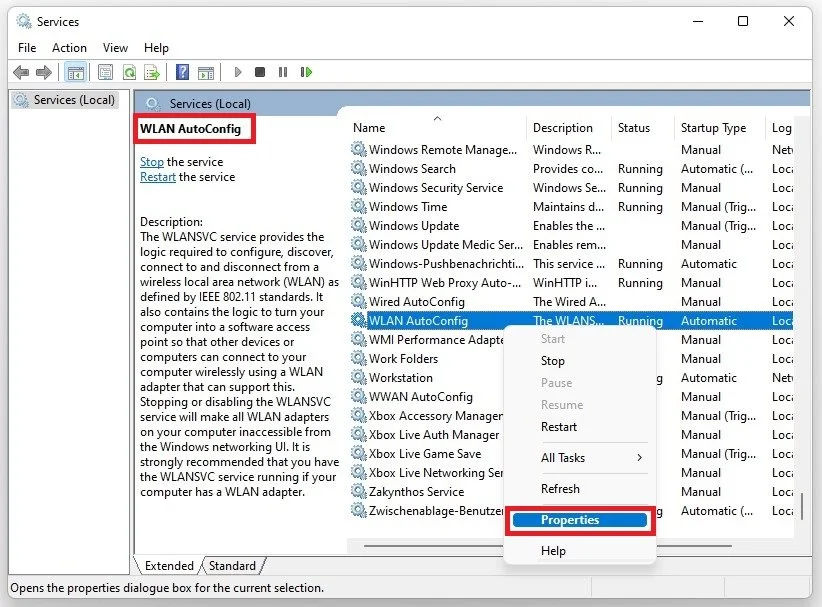
Click on any service and start typing WLAN AutoConfig. Right-click the service and navigate to its properties.
WLAN AutoConfig > Properties
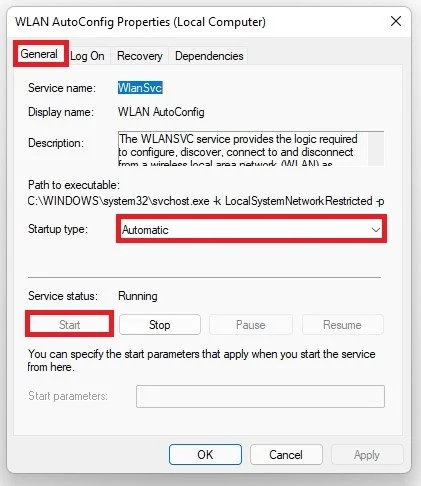
In the General tab, ensure the Startup Type is set to Automatic, and the status is running. Otherwise, click on Start to start the service.
WLAN AutoConfig Properties > General > Services Status
Update Network Adapter Driver
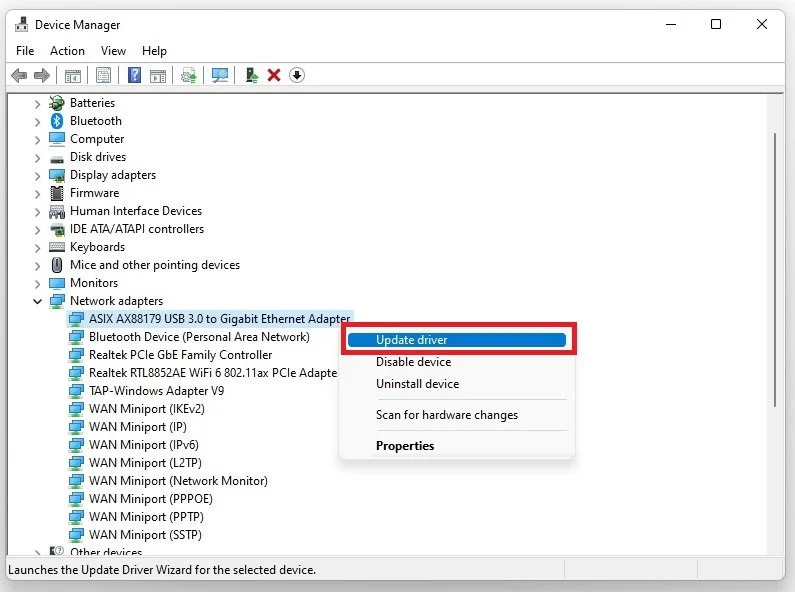
You should ensure that your network adapter’s driver is current. Search for Device Manager to open it up. Expand your Network Adapters, right-click the one you are using, and select Update Driver. Search automatically for drivers, which will take a second to ensure that your network adapter is running the latest driver.
Device Manager > Device > Update Driver
Disable Network Connection Bottleneck
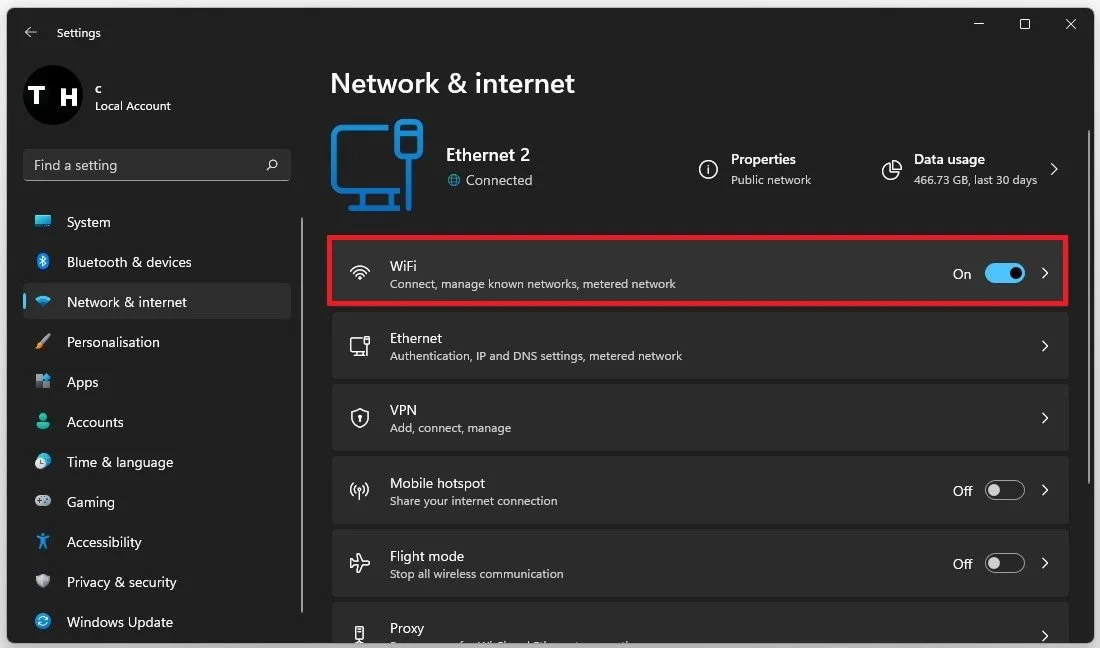
Open up your Windows settings when this is done, and you’re still experiencing WiFi-related issues. In the Network & Internet section, you can preview your current internet connection. Ensure that the WiFi option is enabled.
Windows Settings > Network & Internet > WiFi
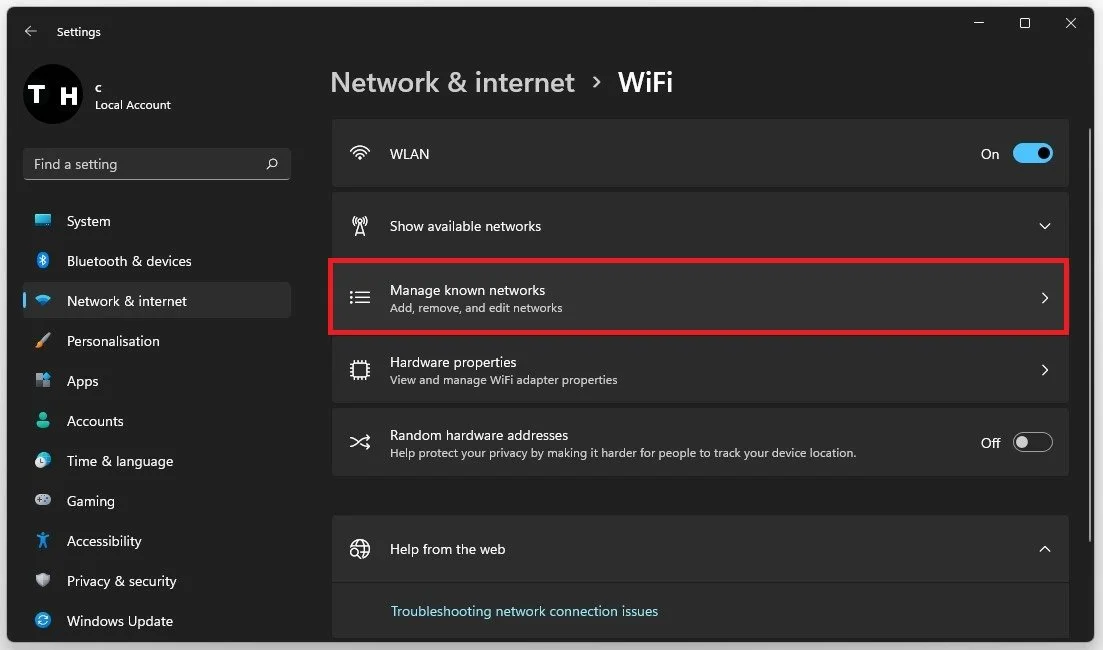
Click on WiFi and then on Manage known networks.
WiFi > Manage Known Networks
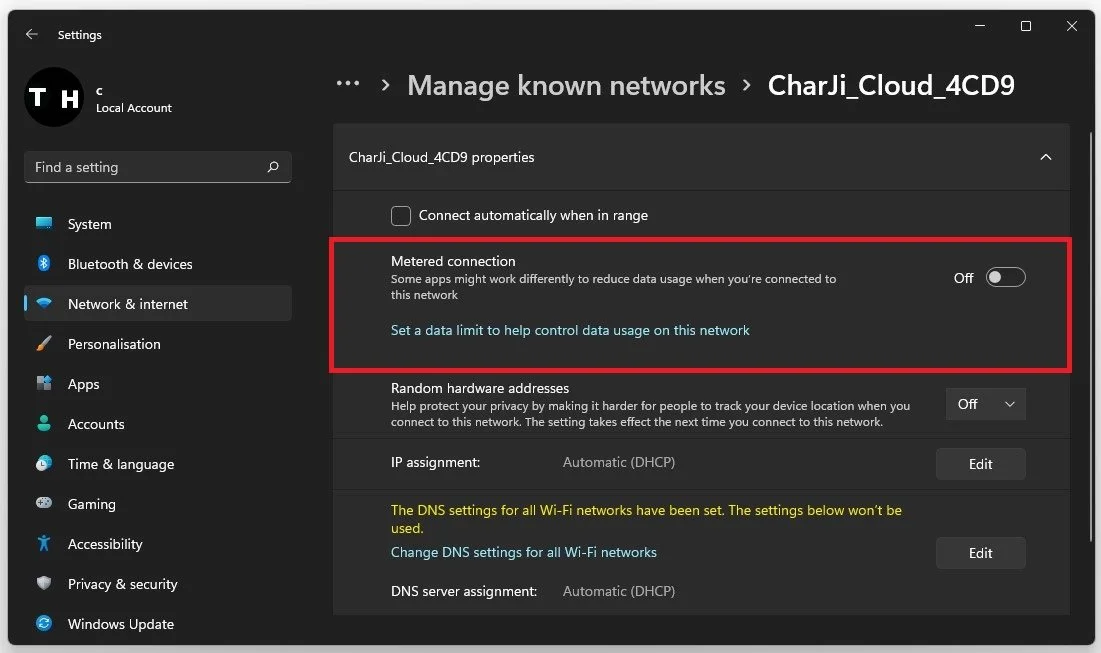
Click on the WiFi connection that is not working on your system and make sure that the Metered connection option is disabled.
Manage Known Networks > Disable Metered Connection
Reset Your Network Connection
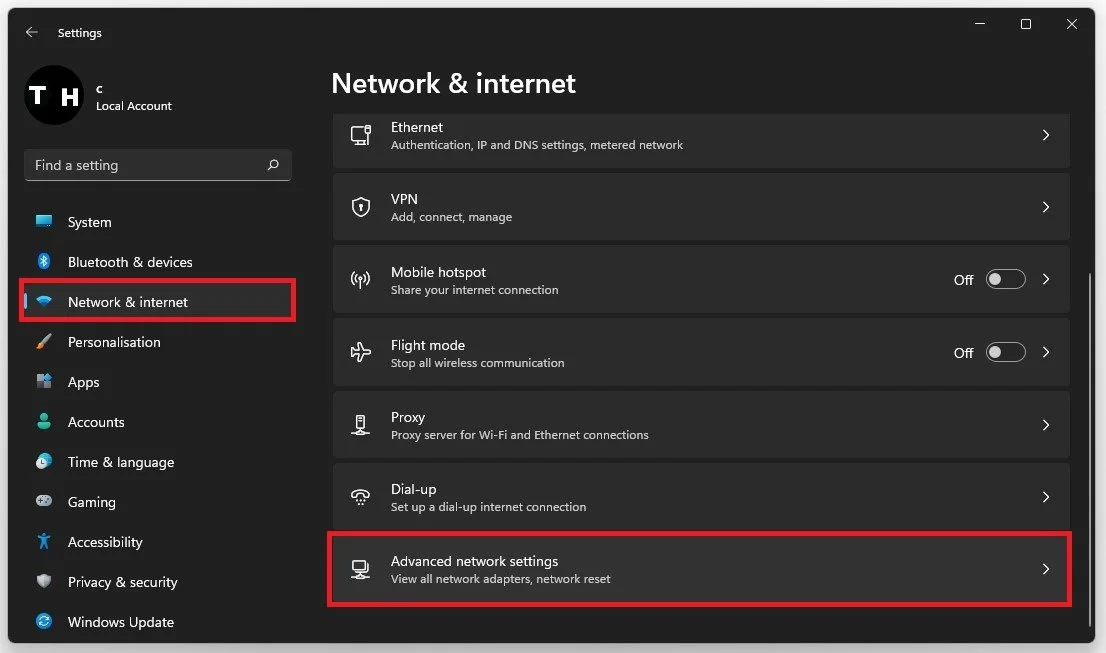
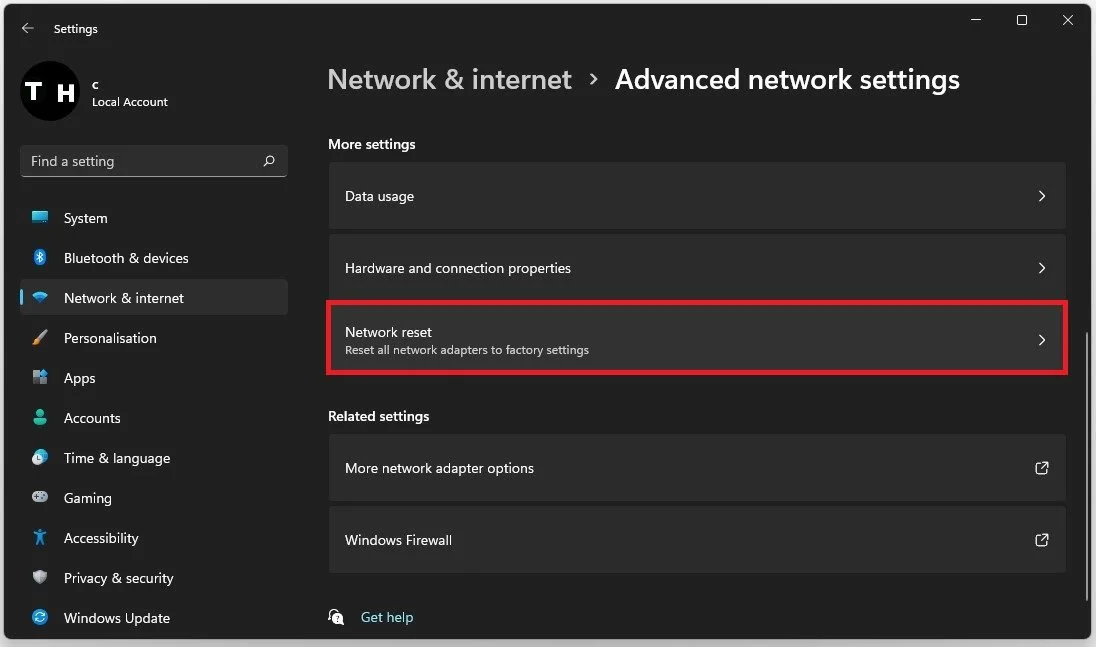
Navigate to your Advanced Network Settings in your Network & Internet settings.
Windows Settings > Network & Internet > Advanced Network Settings
Click on Network Reset. This will allow you to reset your current WiFi connection. This can help a lot when you’re unable to connect to the internet, even though you’re able to connect to your router. While resetting your connection, you should also restart your router or modem if you haven’t done this in a while.
Advanced Network Settings > Network Reset
Troubleshoot Common Internet Connection Issues
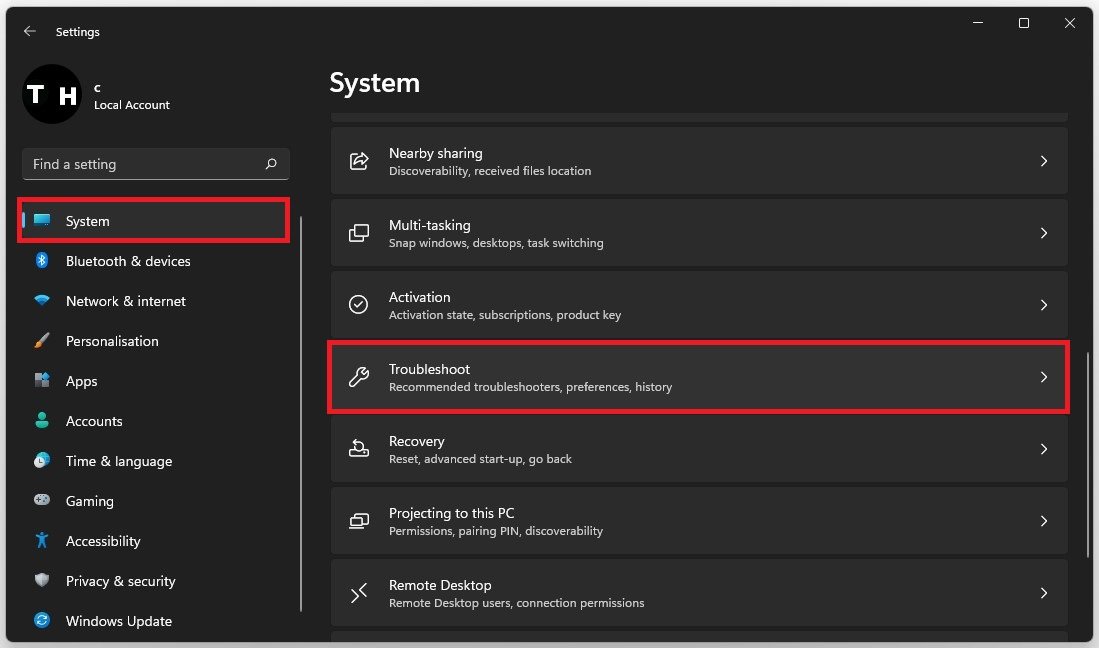
If nothing helped you, then navigate to your System settings and select Troubleshoot.
System Settings > Troubleshoot
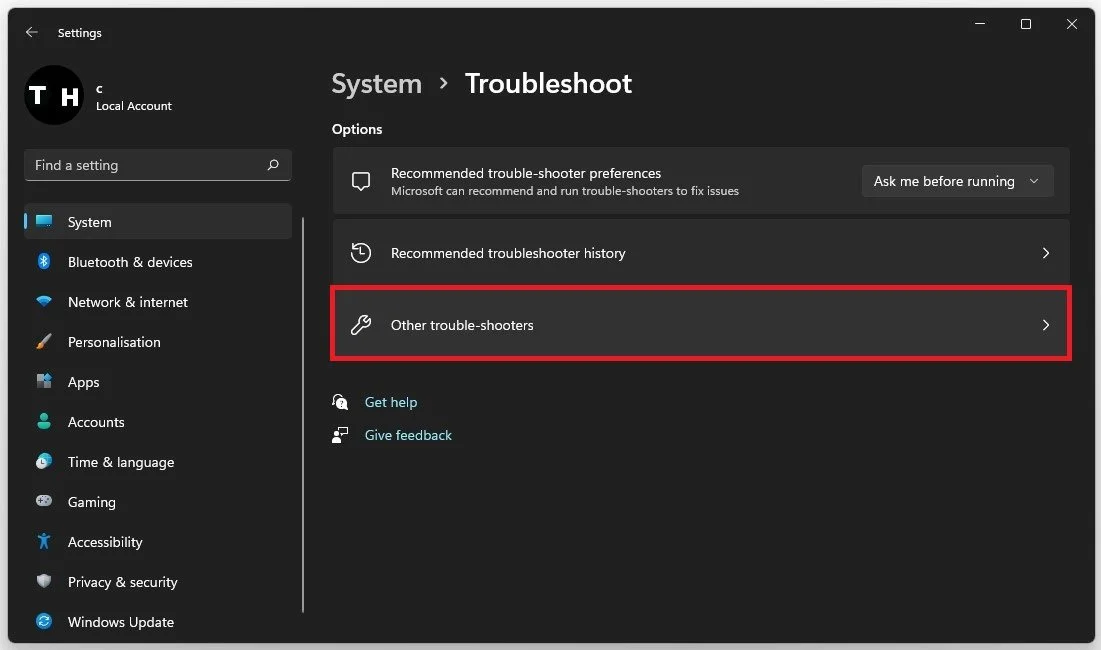
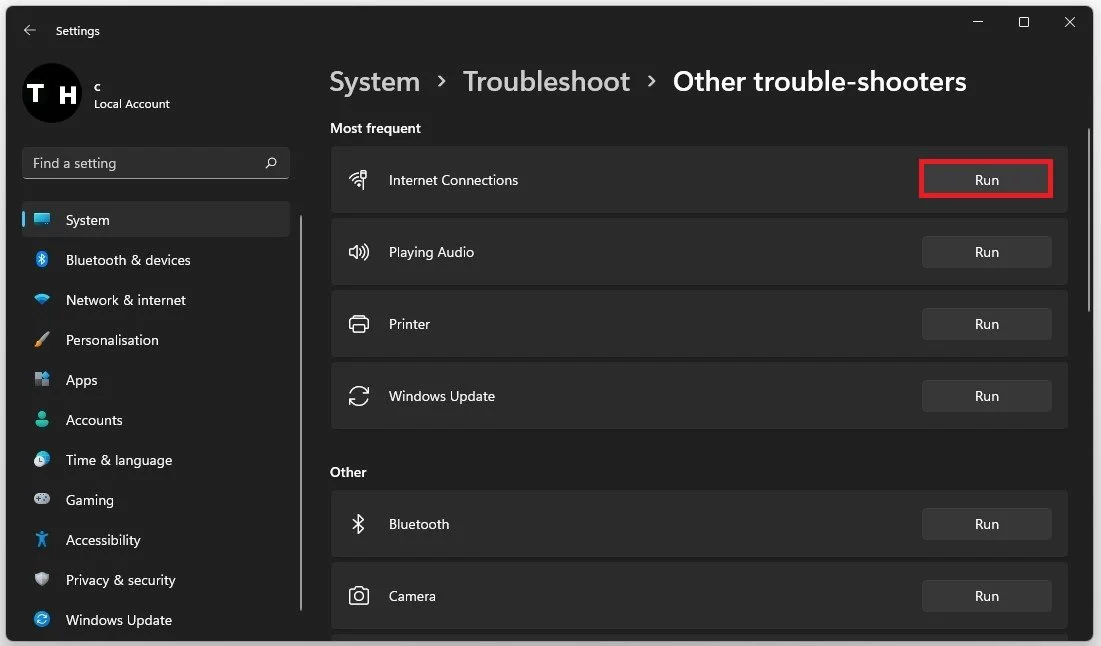
Under Other Trouble-shooters, run the Internet Connections troubleshooter.
Troubleshoot > Other Troubleshooters
This will take a moment to detect common issues with your connection.
Run the Internet Connections trouble-shooter
Restart Windows 11
Restart your PC after making all of these changes. Restarting your PC will restart some processes and services which could prevent you from connecting to the internet.
-
There are various reasons why your WiFi may not be working on Windows 11, such as outdated drivers, incorrect network settings, and hardware issues. It could also be due to a recent software update or a virus on your device.
-
To check if your WiFi is turned on, click on the network icon in the taskbar, which should be on the right-hand side of the screen. If WiFi is turned off, click on the WiFi button to turn it on.
-
If your WiFi is slow on Windows 11, you can try moving closer to your router or modem, clearing your browser cache, or resetting your network settings. You can also try disabling any unnecessary applications or programs that may be using up your network bandwidth.
-
Yes, you can troubleshoot your WiFi issues on Windows 11 by yourself, using the steps provided in this article. However, if you are still experiencing issues or are not comfortable troubleshooting on your own, it is recommended to seek professional help.


