How To Fix “You Don’t Have Permission to Access This Folder” on Windows 11
Introduction
Encountering the 'You Don't Have Permission to Access This Folder' error on Windows 11 can be frustrating. This guide provides a straightforward solution to regain access by adjusting folder properties and permissions. Follow these steps to quickly resolve the issue and access your files.
Adjusting Folder Permissions in Windows 11
Steps to Resolve Access Errors:
Locate the Problematic Folder:
Open File Explorer and find the folder causing the error.
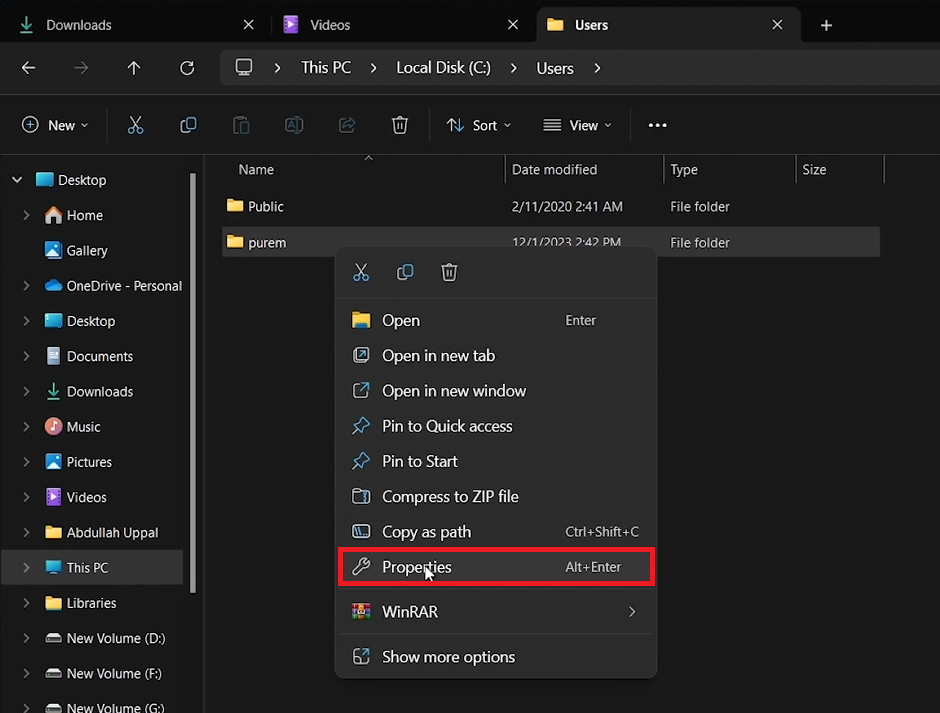
Right-click on the folder.
Access Folder Properties:
Select 'Properties'.
Go to the 'Security' tab.
Windows Folder > Properties
Edit Permissions:
Click 'Edit' to modify permissions.
Add User for Permissions:
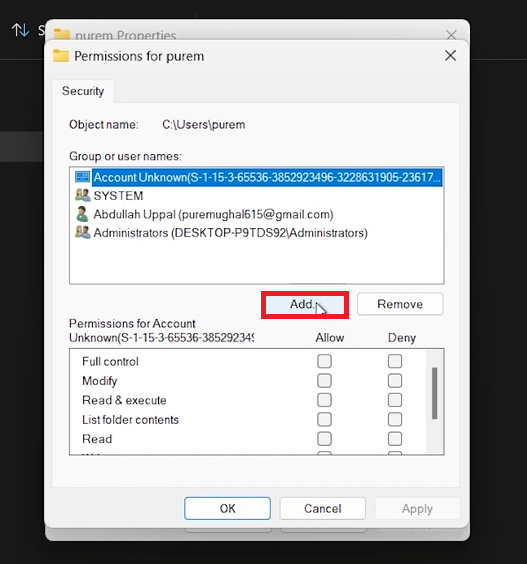
Select 'Add'.
Enter your username.
Locate your username in 'Local Disk C:' under the 'Users' folder.
Type the username in the dialog box and confirm with 'Check Names'.
Add your Windows username to “Permissions for Account”
Setting Folder Permissions for All Users
Steps to Enable Full Access:
Adjust for Current User:
In the Permissions window, allow all permissions for your username.
Include 'Everyone' Group:
If permissions are restricted, click 'Add'.
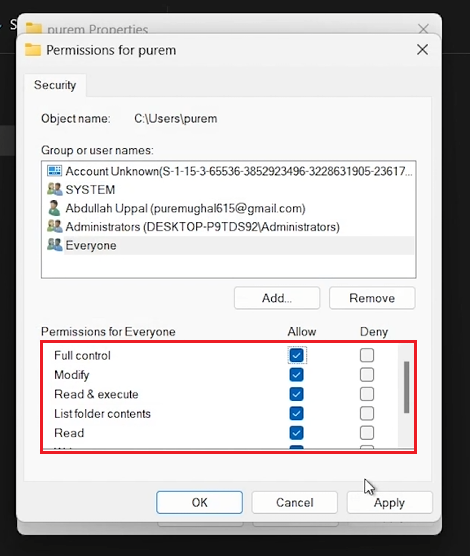
Type 'everyone' in the dialogue box and confirm with 'OK'.
Finalize Permissions:
Ensure all permissions are enabled for 'everyone'.
Click 'Apply', then 'OK' to save changes.
These adjustments should resolve the "You Don’t Have Permission to Access This Folder" error, granting access to all users on your PC.
Change folder permissions for everyone
-
This error often occurs due to restricted permissions settings on a folder or file in Windows 11.
-
Adjust the folder's permissions in the Security tab of its Properties, granting access to your username or 'everyone’.
-
It's generally safe for personal folders, but be cautious with sensitive data.
-
Changes will apply to all users, allowing everyone access to the folder.
-
Ensure you have administrative rights or contact your system administrator for assistance.


