How to Delete a Facebook Page Permanently
Introduction
Navigating the labyrinth of Facebook settings can sometimes be daunting, especially when trying to achieve something as definitive as deleting a Facebook page permanently. With changing interfaces and constant updates, this process might not always be straightforward. This guide is designed to steer you through these digital corridors, making your journey to achieve this objective as seamless as possible. Whether it's a page you've outgrown or one that no longer serves its purpose, we'll provide you a clear, easy-to-follow route to delete your Facebook page permanently.
Effortlessly Remove Your Facebook Page Using Facebook Settings
Navigating to your Facebook page for deletion involves a few simple steps. Firstly, log into Facebook making sure you've chosen the correct account associated with the page you wish to delete. From the landing page of your Facebook account, locate your profile picture at the top right corner and select it to switch over to your Facebook page.
Once you're on your Facebook page, proceed by clicking your page's profile picture located in the same top right corner. A drop-down list will appear; select "Settings and Privacy", followed by clicking on "Settings" once more. You'll be directed to a new settings page.
Facebook Settings & Privacy
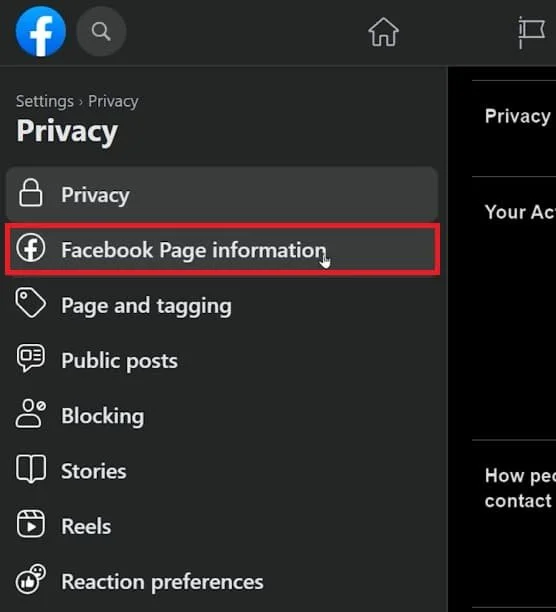
On this page, you will find a "Privacy" option in the menu on the left-hand side, which you need to click on. This will take you to the "Facebook Page Information" section, also located in the left-side menu bar. After clicking it, you will land on a page featuring a "Deactivation and Deletion" option, click on "View" adjacent to it.
Meta Accounts Center > Personal Details > Account ownership and control
Here, Facebook presents you with two choices: you can either deactivate your page or delete it permanently. If you're unsure or wish to save the page for future use, you can opt to deactivate instead. However, if you're adamant about deleting, select that option and click "Continue".
Deactivation or Deletion (Facebook Page)
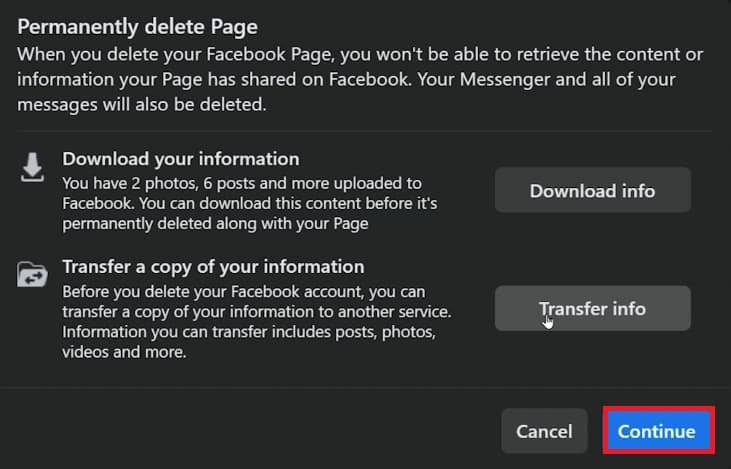
Next, Facebook will ask you to "Download Your Information" or "Transfer a Copy of Your Information". This is to ensure you don't lose any essential data from your page. Complete this step and then proceed by clicking "Continue".
Download or transfer your Facebook page information
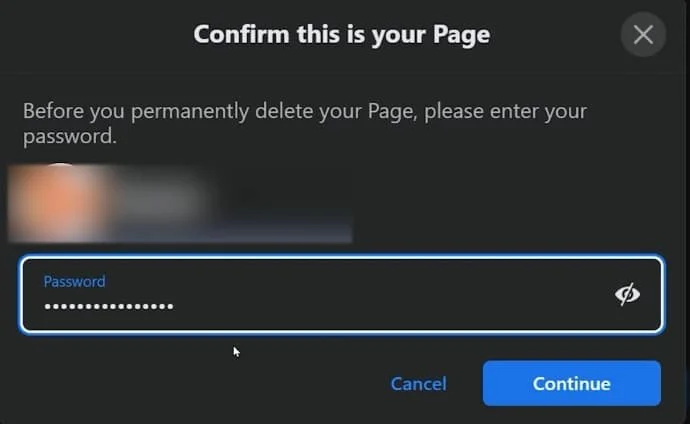
Finally, as a security measure, you'll be prompted to enter your password. After entering your password, click on "Continue" to confirm your choice. One last time, you'll need to click "Continue" to verify the permanent deletion of your page. After clicking this, your Facebook page will be removed permanently.
Enter your Facebook account password
-
You can permanently delete a Facebook page by navigating to your Facebook settings, selecting "Privacy", clicking on "Facebook Page Information", and choosing "Deactivation and Deletion". Following the prompts, select "Delete" and confirm.
-
No, once you permanently delete your Facebook page, it cannot be restored. However, you have the option to deactivate your page, which can be reactivated later.
-
Yes, Facebook offers an option to "Download Your Information" or "Transfer a Copy of Your Information" during the deletion process. You can use this feature to save your data before permanently deleting the page.
-
No, deleting your Facebook page will not affect your personal Facebook account. They are treated as separate entities within the Facebook system.
-
Always make sure you're logged into the correct account associated with the page you want to delete. Double-check the page details in the "Facebook Page Information" section before proceeding with the deletion.


