How To Rotate Video in iMovie iOS (iPhone & iPad)
If you're an iOS user looking for a simple and easy-to-use video editing app, iMovie is an excellent choice. iMovie is a user-friendly application that allows you to easily create and edit videos. One of the essential functions of video editing is rotating, which is especially useful if you capture your footage in portrait mode. In this tutorial, we'll show you how to rotate video in iMovie on your iPhone or iPad.
Import the Video to iMovie
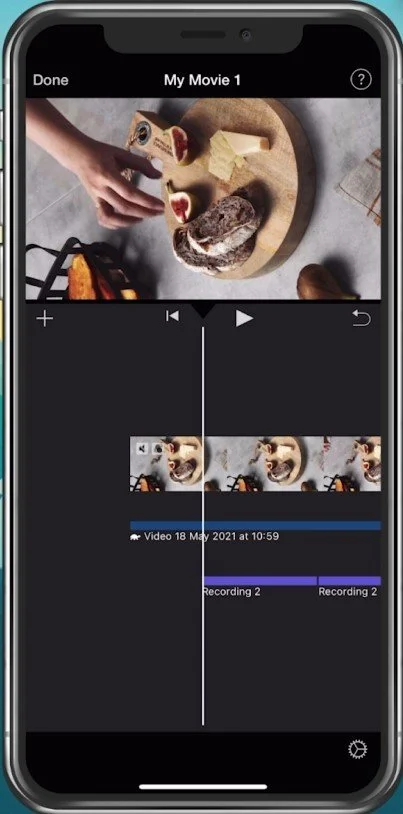
While working on a project with iMovie, select the video that should be rotated.
Select the video in your timeline
How To Rotate the Video
Use two fingers and turn the video 90 degrees to change the rotation of the video. This will, in any case, change the zoom or aspect ratio of your video footage. For example, when rotating a vertical video, your exported project will no longer be a vertical video.
Pinch the video footage with 2 fingers and start rotating it
Use the Correct Aspect Ratio
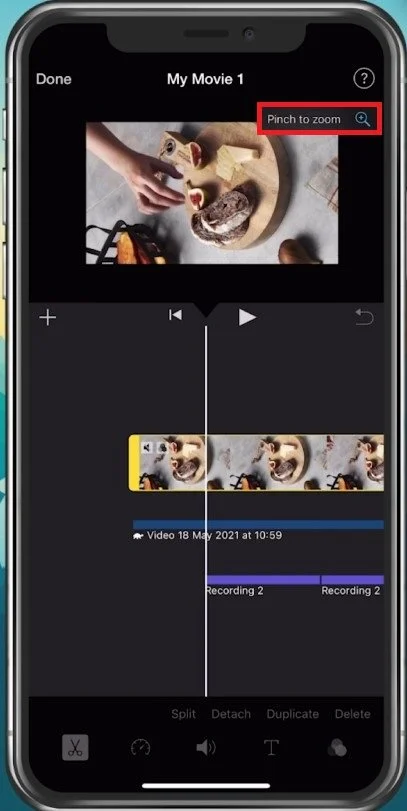
Keep the video in your selected timeline, and you can then tap on the magnifying glass icon. Pinch to zoom out and in to correct the rotation of your footage for your new video resolution.
Pich to zoom to correct the aspect ratio of your video
-
No, rotating a video in iMovie does not cause any quality loss. iMovie is designed to maintain the quality of your videos even after applying various edits, such as rotation.
-
Yes, you can rotate a video by 90 degrees in iMovie. iMovie allows you to rotate your video in 90-degree increments, making it easy to achieve your desired orientation.
-
Yes, you can rotate a portion of your video in iMovie by using the split tool. You can split your video into sections and rotate the section you want to change the orientation.
-
Once you've finished rotating your video in iMovie, tap on the "Done" button located on the top left corner of your screen. Then, tap on "Save Video" to save your rotated video to your camera roll.


